Showing posts with label poultry. Show all posts

Friday, April 27, 2012

The New Coop


So here's a project that's taken up far more of our spring time than I would have imagined.  It's our spankin' new chicken coop.  As you can see, it's an A-frame and a rather large one.  The seed ideas for the design were mostly mine, but in the course of constructing it with the help of our WWOOF volunteer, design became very much a collaborative effort.

Our previous coop-and-pen system was our first attempt at providing mobile housing for our laying hens.  It served reasonably well for four years, but we built in plenty of flaws because we didn't really know what we were doing.  We had to build chicken housing before we'd ever kept chickens.  Some of these flaws were remediable, and we fixed what we could; others not so much.  My two biggest complaints were that the coop wasn't easy to clean out and that both the coop and the pen were quite heavy, making it hard for me to move them by myself sometimes.  A lesser issue was that we had no way of providing a dust bath for our hens in a mobile system.  So they tore into our grass to cool themselves down in summer, thus leaving significant divots in the lawn.  I didn't care so much about the aesthetics, but rolling a heavy coop and pen around was hard enough to begin with.  When the wheels fell into some of these divots, it became really difficult.

So the new design had to eliminate the difficulty of cleaning, shed excessive weight, and offer dustbathing possibilities for the birds.  I also wanted easier access to the interior, and room for at least two nest boxes.  We started with one nesting box for four hens, which was reasonable, especially since the box could hold two hens at a time if need be.  But over the years the number of hens we've had at one time has varied considerably, with nine being the upper limit.  This resulted in the occasional queue for the nesting box, and the occasional egg laid outside the nest.


Here you can see the elevated dust box in the back.  Since it's raised up this way it doesn't take away any area of the lawn.  This also shows the articulated door, which folds down so I can access the feeder and waterer, or throw treats to the girls without giving them too much temptation to escape.  When I need access to the inside of the pen, I can open the entire door and get inside without much crouching or discomfort.

The nesting boxes are situated towards the peak of the new coop.  The girls don't seem to have any aversion to laying their eggs so far off the ground.  Since they have to make three jumps from the ground to the nests, their feet seem to be cleaner.  The eggs I've been getting have been mostly pristine.

Here are a couple of pictures of the wheels and the slight advantage we gained by not placing them at the very back edge of the bottom frame.  You'll notice that they're on a lever bar that can be propped into place when it's time to move the coop.  The rest of the time the frame rests almost in contact with the ground.  By moving the wheel slightly towards the front of the coop, the weight of small portion of the coop behind the wheel acts as a counter balance to the rest of the weight.  This makes it easier for me to move.  I don't quite have the technical vocabulary to describe this, but the idea was described in an excellent article about the Chinese wheelbarrow in the Energy Bulletin a short while ago.  The article will fill you in on the principle, if you're interested.


Here you can see the lever bar positioned to raise the coop off the ground to make it easier to move.  We're still tinkering with this a bit since our smallest hen scooted right under the coop while I was moving it one morning.  We have a few ideas on how we might fine tune the system.


Here's a shot taken after the main construction was done that shows most elements of the interior.  We have diagonal bracing in a few areas to strengthen the wooden framing.  After painting was finished, the whole thing was sheathed in chicken wire.  Then an old billboard was used to cover the sides/roof and most areas of the gable ends.


I've already been asked, "Why purple?"  My standard response is, "Why not?"  My tendency to splash bright colors around my garden is already on record.  It helps curb the impulse to paint something loud on the walls of our home.  Deep purple was one color not yet represented in the garden.  It all looked so pretty until it was time to put that used billboard on as roofing material.  I'm hoping that I can find an artistic soul who might paint something attractive on it.  After all, it looks like nothing so much as a blank canvas to me, just waiting to be filled up with something whimsical or chicken-related.

I will say this for the ugly billboard.  It is very sturdy stuff, designed to be out in all weathers.  The white backing of the advertisement should help keep the coop from heating up too much in full summer sun.  Oh, and it was free, by the way.  The billboard companies give them away for nothing once they're taken down.  I know a man who used this material in lieu of roof liner when he built his own home.  I expect the billboard to hold up extremely well, and thus protect this coop from the elements for several years at least.

The only thing missing from our new coop is a clever name.  My husband calls it the "land yacht."  I sometimes refer to it as the "purple menace."  Neither moniker seems to really capture the mixture of charm and clunkiness of our new coop.  So what say you, readers?  Got a clever name for this behemoth?  I have no prizes to give away and make this a contest, but I'd love a snazzy label for our newest piece of homestead infrastructure.  All suggestions will be gratefully received and considered.

Monday, April 23, 2012

Resurfacing

Apologies for the long radio silence.  And thanks to those of you who sent kind inquiries about my absence.  All is well at the homestead.  While spring is always a busy season that gets in the way of writing, that's not my excuse this time.  The difference now is that my husband is more or less retired, and thus home all the time.  This is almost entirely a good thing.  The only exception to that is my habit of writing when I have the house entirely to myself.  The writing "mood," as it were, comes to me most easily in solitude.  I find it very hard to reach that state with distractions around me.  So, if this blog is to continue, I'll need to figure out a routine or a method that will provide verisimilitude for being alone at home.  This will probably be a challenge, but I'll work at it.  If I manage to find time to write, it'll probably mean I find a way to catch up with many of your blogs as well.  I've missed keeping tabs on what many of you are up.  There's so much inspiration and so many cool ideas in the gardening/homesteading blogosphere!

In the meantime I should provide some thumbnail sketches of where we're at and what we've been doing.  First off, my husband's "retirement" is really the loss of a job.  Since we've known this was coming for quite a while, we could plan for it, which I know is an advantage many people don't get.  Forewarned is forearmed, as they say.  Our advance notice let us, just barely, pay off our mortgage entirely before his employment ended.  So we are now without an income, but also debt-free.  Mostly that's not scary at this point.  It feels pretty good, I have to tell you.  We've taken a few extra efforts here and there to shave expenses in an already pretty frugal existence. 

We've already hosted a number of WWOOF volunteers this year, and our first one brought with him an impressive amount of construction experience.  He helped us build a new mobile chicken coop to replace our clunky and deteriorating pen and coop system, which served honorably, if inelegantly, these past four years.  The new rig is an A-frame that provides a bit more area to the chickens and should require almost no cleaning, ever, since there's no floor. All the poop ends up directly on the lawn. The girls seem to have taken to it quite happily.  I think it's just about the most awesome chicken coop ever, if I say so myself.  I'll try to get a detailed post on this one up soon.  (Yes, I know my track record with "soon" is execrable.)

Other recent efforts have entailed a lot of digging and planting of rootstock.  The hedgerow project got moved way up the priority list by last year's Halloween snowstorm from hell.  The storm took out a major section of our fence in the backyard.  We're going with the strategy of leaving what remains of the old wooden fence where it is, and replacing what came down with livestock panels and the plants that will form the hedgerow.  Frankly, this looks ugly at the moment, and doesn't provide any of the privacy of the wooden fence.  But eventually, the livestock panels will be mostly hidden by the plants, which will give us privacy, and should look a lot better than the wooden fence.  Should we ever decide to use that space for dairy goats, the dual-element hedgerow will constitute a real barrier to the animals, while looking pretty and offering some browse.  So far our hedgerow plantings include rugosa roses, Siberian peashrub, cornelian cherry, a dwarf willow tree, and a golden elderberry.  It's likely that our black raspberry patch, which sort of backs into the property line, will become a hedgerow element too.  I have three tiny hazels and a ginseng plant that will be coddled for another year or two in containers before being added to the hedgerow.  We lucked out with the goat panels, finding them used for a small fraction of the price for new ones, which is considerable.  Right now a picture of the hedge project wouldn't really show much.  I'm hoping that by late summer or fall a second picture will provide an impressive contrast.  We'll see how it goes.

We also planted several new fruit trees, bushes and vines this month.  We're starting both table grapes and hardy kiwis on trellises, and experimenting with a new growing technique for several fruit trees.  The technique is called Backyard Orchard Culture.  The good folk at Root Simple blog wrote about it, and you can check out a summary at the website of the tree nursery which developed it.  Basically the idea is to cram normal fruit trees into places where they either won't have enough space to develop to their normal mature size, or where such full growth is undesirable.  Then you radically prune the tree as it grows to keep it very small.  Planting multiple fruit trees very close together is another part of BOC.  Doing so forces the trees to compete for resources, which helps keep them small.  While trees maintained in this manner will obviously never produce as much fruit as trees which realize their full growth, there are other advantages.  Having many small fruit trees means you can have a succession of harvests that are each just large enough to keep you in fresh fruit for a fortnight or so, without providing any pressure to preserve the bulk of an enormous harvest.   The six Asian pears and two extra apples we just planted in this way should (eventually) give us modest quantities of fresh fruit over a three-month span from mid-summer to early fall.  (We'd ordered two more apples which would have extended the season through mid-fall at least, but they were sold out.  We may add them next year.)  Since BOC trees are kept very small, maintenance and harvesting are very easy.  There's no need for ladders.  I expect that when I'm another twenty or thirty years older, the ability to do such work with both feet on the ground will be very appealing.

We've got a few broiler chickens going already this year.  My feeling is that last year we let our batch of six go far too long.  I wanted to use up the second bag of feed that I'd purchased for them, and that meant letting most of them live for ten weeks.  It gave us bigger birds, certainly.  But it also meant that by the end I had to move the birds three times per day just to keep them out of their own filth.  The Cornish cross breed that accounts for the vast majority of chicken meat in this country isn't genetically modified, but judging by how fast they grow, they may as well be.  At nine and ten weeks of age, even broilers that were kept on grass, not fed for 24 hours per day, and allowed plenty of space to move around, pretty much couldn't and didn't.  The speed at which these birds grow is an undeniable advantage for those who want to fly under the radar with backyard meat production.  You can finish the birds before anyone notices they're there.  But it's pretty much their only virtue.  This year I'll raise two batches of four birds each, and only until each batch finishes off an 80-pound bag of feed.  I expect that to mean slaughter at roughly seven weeks old.  Thus smaller birds, but more of them as compared with last year.

Finally, we've just started work on a tiny frog pond to be added to the center of our garden.  This is the only suitable spot we could find for it - one that's not on a footpath or directly under a large deciduous tree that will dump too many leaves into it in autumn.  Work sort of stalled with this after the hole was dug, as mild weather brought on many spring tasks very early.  But I want to get this done soonish, so that it can provide many benefits to our growing space this year.  I know for a certainty that adding a bit of water to the garden will bring a great deal of additional biodiversity, which can only be a good thing.  What I'm really hoping for though are some toads, which are supposed to be fantastic for slug control.  The lasagna mulching method I'm so fond of does tend to encourage slugs, though we've had such dry conditions the last couple years that it's sort of been a wash.  The plan is to stock the pond with duckweed for multiple uses, and probably a few goldfish for algae management.  If frogs or toads don't show up on their own, I may go looking for some tadpoles.  I know where to find some of these locally in the correct season, but I'm pretty sure that window has closed for the year. 

Hope spring is treating you all well.  Drop me a line and let me know what's new with you and your garden.

Saturday, December 10, 2011

More Hoop House Details


I promised another post on the features of our hoop house.  Despite the fact that it's still not quite complete, the hoop house is doing well and demonstrating its productivity.  Typically, protected growing space is some of the most expensive in any garden or on the farm.  Our hoop house was definitely no exception.  I don't have a figure for what we've spent on this project, but I'm guessing it's close to $1000 all together.  That makes it about $10 per square foot of growing space.  And given that our laying hens are occupying one-third of that, the productivity of the remaining two beds is under a lot of scrutiny.  I know we'll get many years of use out of the hoop house, and thus the cost can be amortized.  But I'm still very conscious of needing to maximize the value of that space.

The seeding of the hoop house, like everything else associated with this project, was a day late and a dollar short this year.  Mostly it got planted at the end of September and very early October.  Nonetheless, most of what I planted seems to be doing at least tolerable well.  I experimented with turnips (planted a little too early, if anything), cylindra beets and some piracicaba broccoli (probably a tad late), catalogna dandelion (doing very well, wish I'd planted more), many transplanted volunteer lettuces and cilantro from the main garden (all looking happy and gorgeous), tatsoi (happy, but seems to be beloved of whichever pest found its way into the sheltered space before winter arrived), carrots and scallions (very happy and well timed) a few snow peas (rather small, but seem to be hanging in there), some sort of Asian brassica that I got on sale from Johnny's (nice cooking green, another one I wish I'd planted more of), as well as a few perennial herbs which seem to be biding their time.  So I'm well rewarded by the sight of happy plants each time I go out to the hoop house.  That said, I mostly want to show off a bit of the infrastructure today.


The hens are once again overwintering on deep bedding.  As usual the bedding is primarily free wood mulch from the yard waste facility in our township.  This year I also put some fallen leaves in there.  These high-carbon materials will absorb and balance all the manure (high in nitrogen) laid down by the chickens during the four months or so of their winter confinement.  In my experience during the last two years, the litter never smells bad and the girls constantly scratch through and mix their wastes into it.  In the spring what is left is a rich, inoffensive, bioactive, nutrient-packed fertility mulch for my fruit trees.  I was asked whether this didn't pose a risk to these trees, since excessive nitrogen can lead to fire blight on growing trees. I haven't seen that on the pear and apple trees that have benefited from previous years' litter treatment.  My feeling is that because there is so much microbial life in the litter, most of the nitrogen and other nutrients are bound up in the bodies of living things, and thus only become available to other organisms where the litter is laid down very gradually.  This is a far cry from what happens when sterile chemical fertilizers are dumped into the ecosystem of the topsoil.  I will be watching the bedding closely however.  We've got more hens this year, and less square footage per bird.  The rule of thumb that Joel Salatin proposes is a minimum of four cubic feet of deep litter per bird.  Supposedly at that stocking density the litter will never turn nasty.  We're right up against that number, so we'll see what happens.

There are a few major benefits of the hoop house over the shed, as far as winter housing for the hens goes.  The first is that we didn't have to sacrifice one third of the space in the shed to them this year, and won't ever have to again.  The second is that the deep litter bedding in the shed, being raised up off the soil, sometimes froze solid, despite the carbon-nitrogen balance that should have provided for enough microbial activity to keep the pile generating its own heat.  This required me to get into the bedding and turn it over with a pitchfork from time to time, otherwise the manure built up on the frozen surface.  It's certainly true that we haven't seen the worst of the winter weather to come.  But given that the lack of air space under the bedding, I very much doubt the bedding will freeze inside the hoop house.  The other main benefit is the added light and warmth of the hoop house compared to the shed.  The doors of the shed face north, so the hens got no direct sunlight at all in previous years.  I did open the doors all day in all but the worst weather though, so the temperature was always cold in the shed.  The hoop house gets cozy warm inside on sunny days, even when the temperature is well below freezing.  This saves on feed costs for me, since the girls don't need so many calories to keep themselves warm.  Whether the deep litter is actually generating heat as well, I couldn't say.  I don't have a compost thermometer, so I have no way of distinguishing the sources of the heat in the hoop house.

Given the overall cost of the hoop house project, it was important to me to pimp out the hoop house for as little money as possible.   Most of the following tricks and accessories cost very little money.  While some of these were doable largely by making use of fortuitous chance, I hope some of them at least will be useful to others who have or are considering a hoop house.


In the center of the hoop house I've place a truck bed storage box - one of those things that sit across the bed of a pickup truck and provide a lockable compartment akin to the trunk of a car.  (The garbage can sitting on top of it holds the chicken feed safe from dripping condensation and rodents.)  This one came with our beater pickup truck, but we didn't need it.  I thought it would make a pretty good seat between beds.  More importantly though I noticed that it was black and that it could hold water.  Black things absorb solar warmth, and water has a high thermal mass.  So I filled the bed box with as much water as it will hold (with some soap and salt added to make sure it doesn't become a breeding ground for mosquitoes).  Now it's doing double duty as a bench and a heat sink.  The other use I might want to turn it to one day is as a large vermicompost bin.  I suspect it wouldn't be great for worms in the summer time, but I'm mulling it as a possibility for next fall and winter.  That could provide a nice homegrown source of protein for the chickens next year.


My next trick is one I've used before in the garden - reflective material along the north side of the hoop house that maximizes the natural light the plants receive.  This time I've added a cheap space blanket that I found at a 99-cents sale.  I got one for each car and our emergency kit at home, plus one for the hoop house.  Now I wish I'd gotten two for this project.  It's highly reflective and it probably also acts as thermal insulation.

Then there are the low hoops over each growing bed.  These were invaluable while the hoop project was still under way.  They were the only protection the plants had from frost for a while there, before the sheeting went on the big hoops.  Now the low hoops give a second layer of protection, keeping the temperature in the beds even warmer overnight.  In fact, on sunny days I need to get out there and raise the plastic off the low hoops lest the plants get cooked.  Fortunately, with the hens in the hoop house, daily maintenance is built into the schedule.

Predictably, before the house was completed and before the winter weather even got too severe, some rodents took up residence on the margins of the hoop house.  There were plans to place 1/4-inch hardware cloth around the perimeter of the house at ground level.  Our delay on that part of the construction allowed the mice, or voles, or whatever they are, to move in.  It's still the plan to install the hardware cloth.  In the meantime, I knocked together a trap box based on Rob's vole motel, but so far I haven't figured out what bait will snare them.  Either that or the neophobia (fear of new things) common to many rodents has kept them safe.  I know they've been through my box; the dirt tracked into either side confirms this.  If the peanut butter bait still hasn't worked in another week, I'll try something else.  So far my carrots don't seem to have taken any damage, at least not at the surface where I could spot it before harvest.  Who knows what's going on underneath though.


Here's one I'm rather pleased with.  I built myself a weeding/harvesting board with an extra cross piece that extends my reach across the beds quite effectively.  This was a scrap piece of the 2x6 cedar wood that we used to construct the raised beds.  I tricked it out with some risers and braces underneath so that it is stable on the edges of the beds and doesn't completely flatten the growing plants.  The sitting board allows me to easily reach the far side of the beds.  When I rest the cross piece on the sitting board and far edge of the bed, I can lean way out for wider access across the beds.  I put some wood sealer on the boards, a useful measure given how humid the hoop house is.


Okay, more tricks.  To use every bit of space that possibly can be used, and to eke out as much productivity as possible, I scrounged through the pile of stuff we've pulled out of construction site dumpsters and came up with a simple shelf.  I hung it from the purlin on the north side of the hoop house.  With the sun low in the sky from fall through early spring, the shelf doesn't cast a shadow on the raised bed below it, so no light lost to the growing space.  Right now I'm only using the shelf to store oyster shell for the hens and a few other items.  Come springtime, this shelf and others like it will increase my growing space.  They will be ideal spots for vulnerable seedlings in trays, keeping them well out of reach of our unwelcome rodent guests.


Our hoop house has lighting too, which is for the benefit of the hens rather than the plants.  We happened to have an extra fluorescent hanging lamp lying around in the basement, and it just so happens that the previous owner of our home ran electricity out to the shed.  So rigging the lamp from the ridge pole of the hoop house and running an extension cord to the shed was no big deal.  As I have done the previous two winters, I am lighting the hens with the help of a timer to keep them productive over the winter months.  It took quite a few hours of lighting them at first to bring them back into laying.  Right now we have mostly heritage breed hens, and they had all stopped laying for the winter season.  Now that we're getting a decent number of eggs each day, I may try slowly cutting back the hours and/or removing one of the two bulbs to save on the electricity bill.  My understanding is that it would require an enormous amount of lighting to make any difference to the growth of the plants.  That's not something I'm interested in paying for.  As far as I can see, the fact that the plants are practically in stasis is one of the main benefits of winter hoop house growing.


An indispensable accessory for the hoop house is the common broom.  A pair of brooms helped us coax the plastic sheeting over the large hoops.  It also allows me to gently push up the sheeting from the inside to coax  accumulating rain and snow off the sheeting.  I keep one in the hoop house at all times.


A not so cheap aspect of the hoop house are the multiple self-ventilating windows.  I had intended to content myself with just one of the expensive piston openers when I spotted them on sale at Johnny's.  Unfortunately, I didn't communicate this to my husband, who spotted the same sale and purchase two for me as an anniversary present.  We decided to indulge ourselves and not return any of them for a refund.  So our hoop house is going to be very well ventilated when my husband finishes installing them.  The way these work is that the piston contains a temperature-sensitive fluid that expands as it warms and condenses as it cools.  So as the temperature increases, the piston opens the window automatically, then closes automatically when the temperature drops.  It sure is a nifty trick and I admit that it saves me the need to pay a lot of attention to what's going on in the hoop house.  Still, even on sale, these things weren't cheap, and I would have contented myself with fewer of them under different circumstances.

The final feature I want to mention is one that I can't take a picture of.  We built this hoop house and arranged the beds directly over the surplus heat dumping coils for our solar thermal array.  We actually requested the placement and configuration of those coils with the hoop house project in mind.  Right now we're not shunting any heat whatsoever to the coils, because it's wintertime, and we need every bit of heat we can collect from the solar array.  So presently we have an unheated hoop house.  But come the shoulder season in spring, when our heating demands go down in the house, we will be able to divert some of the heat from the array into the ground underneath the hoop house.  The same could be true in the fall shoulder season as well. It remains to be seen whether or not this will provide any advantage.  It may be that by the time we have excess heat to vent from the array, the hoop house will already be quite warm enough.  There is an alternate heat venting system that we would use in that case.

I expect having the hoop house will change the growing routine around here quite a bit.  I'll be able to start plants earlier in the year, and keep a small number of them carefully manicured in there year-round.  I'm thinking about implementing some proper square-foot gardening in there to really max out the potential of covered beds.  I'll need to learn how best to use the extra heating that should be available in spring and fall; an unusual set-up in hoop houses that have heating available.

Monday, October 17, 2011

Hoop House is Coming Together


We've been struggling to get our tiny hoop house project done, racing the first frost of the season, which has been remarkably dilatory in arriving.  Not that I'm complaining, believe me. This project was slated to begin in June, and technically, it did.  It's simply been a series of one delay after another.  Unreasonably hot summer weather accounted for some of the delay, a general gardening funk on my part contributed its own special languor, needing to stay out of the way of a contractor helped us delay some more, and then my husband's broken thumb came along, right when we really needed to get down to business.

But we're finally getting somewhere.  The bones of our 12'x15' hoop house are up.  The raised beds are in, and even planted.  All the stuff we needed to attach to the frame before the sheeting went on is done.  We used up almost an entire roll of duct tape covering up anything that might possibly wear or tear the plastic sheeting.  And the sheeting is on, though not shown in the picture above.  Now we just need to get the ends framed in before it's too cold to work outside.  This will be a big job, and probably as jury-rigged as the rest of the structure.

I went ahead and planted two of the beds when I just couldn't stand it any longer.  I was worried about missing the window of opportunity with the seeding dates.  It was a rather haphazard seeding job, and a groundhog helped itself to some of my lovely seedlings, but at least there's some greenery in there for the inaugural winter.  Two of the beds measure about 3.7'x9.5',  and the third 3.7'x11', giving us a bit more than 110 square feet (10.3 square meters) of bed space.  We'll only be growing food in two of these over the winter however.


The third bed is going to house our chickens over the winter on deep litter bedding.  This saves us the hassle of rebuilding the winter quarters we've provided for them in the shed the past two years.  We've built a containment system out of green garden netting in that bed,the farthest one in the picture above.  This space is just a bit larger than the 30 square feet (2.8 square meters) the hens get each day in the mobile coop and pen system they're in most of the year.  It includes feeder, waterer, a "bleacher" double roosting bar and a nesting bucket for them.  Right now they're just testing out the new digs.  They'll soon be putting in more light tilling and weeding service elsewhere until winter is well under way.  In theory the chickens' body heat will nudge up the temperature in the hoop house a little bit, thus helping the plants.  I say in theory because even in so small a hoop house as this one, four chickens can't possibly make much difference.  But we shall see.

I've got a few more tricks up my sleeve to try out and write about in the mini-hoop house.  So there will be more posts on the hoop house as we put the finishing touches on it, move through the seasons, and learn to make the best use of it.  Stay tuned.

Wednesday, October 12, 2011

Tiller Hens and a Reconsidered Routine

Our hens moulted about five or six weeks ago, and are slowly regrowing their feathers.  This is a calorically intensive process, and so our egg supply has fallen off a cliff.  On a good day we get two eggs from four hens; on the not so good days, one or none.  It doesn't help that we slaughtered the two Cuckoo Marans hens that were the more consistent egg producers with the last of our broilers at the end of September.  The Cuckoos were younger birds, but my experience suggests that their egg laying becomes pretty sporadic after the first year of laying.  Aside from that, the Cuckoos were much flightier than our Red Stars, who I'd made a point to handle regularly during their winter sojourn on deep litter bedding in our shed.  While the Red Stars aren't exactly thrilled about me picking them up, they tolerate it pretty well instead of panicking as the Cuckoos did.  I suspect it's all down to conditioning and handling rather than reflective of innate disposition of two different breeds.  The breeder we got the Cuckoos from didn't habituate them to being handled.

The reason this is all relevant is that I needed the hens to do some weeding and tilling for me this fall.  I knew the Cuckoo Marans would never be easily moved from one spot to another.  Getting the hens in and out of the poultry schooner requires twice daily handling, since the schooner must be positioned over each garden bed and maneuvered carefully around beds that still have plants on them.  The hens go back into their mobile coop each night, leaving me free to reposition the empty schooner.  Dealing with hens that were terrified of me wasn't on the agenda.  So the Cuckoos met their end with the last of our broilers, and went on to a useful afterlife of chicken stock, schmaltz, and a hearty dish of chicken and knefles, which I may tell you about sometime if I find the time.

The remaining hens, our Red Stars, are now earning their keep by clearing a large weed infested area for me.  This is the bed we referred to as the three sisters, where we meant to grow the three sisters crops this year: winter squash, beans, and corn (maize).  That came to nothing when labor was spread too thin and the bed never made it close enough to the top of the list to get weeded.  What the squash vine borers didn't kill, or the birds pluck out of the ground, or the long summer dry spell didn't kill outright, was overwhelmed by weeds of every stripe.  It was a jungle in there.  With the help of some garden caging that is easy to move around every day or so, the hens have weeded and lightly tilled this area into submission, while adding their own manure and mixing it into the soil.  Which is great; saves me a lot of time and prepares the area for some heavy-duty, remedial lasagna mulching.  It also gives me a chance to see the fanciful nesting box in action.  I banged this thing together this spring in anticipation of hosting a broody hen with some eggs.  The hen never materialized, but the nesting box was ready to go when I needed it for this project.  If they aren't earning their keep by giving us eggs, at least the hens are contributing labor and fertility in the form of their manure.

Weeded and yet-to-be-weeded areas are clearly distinguishable
 The hens eagerly hone in on each new slice of territory when I move the caging every other day or so.  That must mean that they've picked over the ground they've had access to pretty well.  In order to encourage them to scratch and till the ground I've adopted a feeding strategy gleaned from Carol Deppe's The Resilient Gardener, which I reviewed a while back.  Namely, I don't feed the hens in the morning while they're on tilling duty.  Their hunger early in the day motivates them to scratch down the weeds to look for grubs, worms, and other choice bits in the three sisters area.  I add plenty of garden cullings and whatever kitchen scraps we have.  Then late in the afternoon I provide them with some of their purchased grain feed.  That way they don't go to bed hungry and they have something to look forward to most of the day.

The afternoon feeding doesn't work with the mobile coop and pen we've been using most of the time since we got chickens four years ago.  In that system, the hens go into the coop in the evening and are locked in until I let them out the next morning.  I always try to let them out close to sunrise so that they're not literally cooped up and unhappy.  The time before I release them each morning is the only time during the day that I have access to the pen without them in it.  So I always provided their food and water first thing in the morning.  I like the late afternoon feeding not only because it gives me a more leisurely cup of tea in the morning, (though it's grand, let me tell you) but also because I think it saves money on feed.  The hens eat less when they've scrounged for themselves most of the day, even though they're currently regrowing their feathers.  This was precisely Deppe's reasoning for the afternoon feeding time - to conserve money when times are tough.  Seeing how well this works is encouraging me to consider ways of making this standard operating procedure for the hens next year.  I have to think on it some more over the winter, but we'll likely need to build new housing for them next spring anyway.  So it'll be a good opportunity to change things up.

Thursday, October 6, 2011

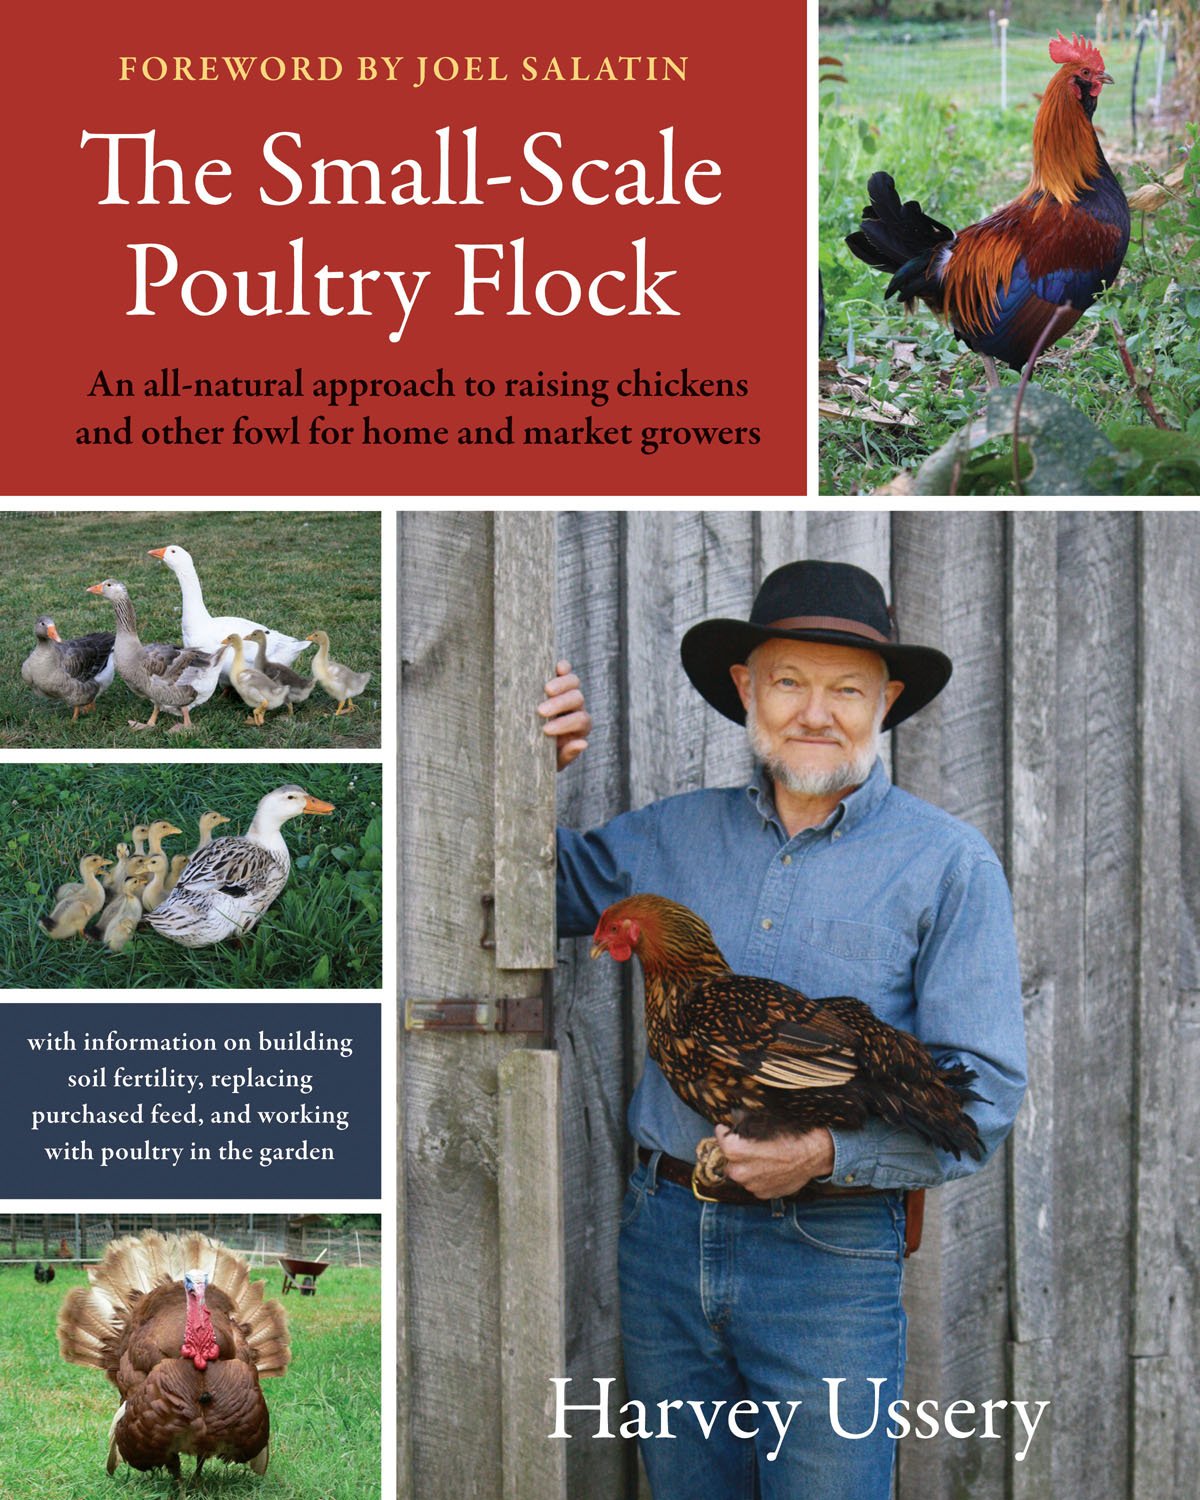
Book Review: The Small-Scale Poultry Flock


I've got a bit of a problem today.  This is a review of a book that's worthy of all the gushing I can muster up.  But there's also a credibility issue.  I want my readers to trust that my opinion can't be bought, and that what you read here is my unbiased viewpoint.  To that end I don't respond to offers of products in exchange for reviews. (The implicit expectation of course being, that the reviews would be positive.)  While I have Amazon links to books and a few other products, these are for things I have paid for and been very pleased with, and am thus happy to recommend to others.  I also link a couple of books at a time in the sidebar without endorsement, simply as books I'm reading. Few of those ever end up on my Bookshelf list, which I'm pretty choosy about.

So with that out of the way I have to disclose that I'm not wholly disinterested in the book I'm recommending today, The Small-Scale Poultry Flock.  The author, Harvey Ussery, is the person I consider my chicken guru.  Hearing his presentation at the PASA conference four and a half years ago is what convinced me to get started with a backyard flock.  His enthusiasm for not only keeping chickens for meat or eggs, but using them in an integrated way around the homestead spoke deeply to me.  A link to his non-blog website has been on my sidebar since Living The Frugal Life got started.  I had the chance to see him at another small conference early last year.  Speaking with me after his presentation, he mentioned that he had just secured a book contract for a title on small-scale poultry.  I offered to review his book when it came out, fairly confident that I would be able to give it a glowing recommendation, which I can.  He gave me his card and after that I began an intermittent email correspondence with him on poultry topics.  What I didn't expect was for him to invite me to give feedback on the manuscript before it was even submitted to his editor.  I was more than flattered to be asked and I happily devoured his first draft, offering what few comments and suggestions occurred to me.

Well, I had to wait for the finished copy to come out to see the pictures.  The end result is fabulous; well worth the wait.  Blows every other title I've seen on backyard chickens right out of the water.  Harvey's view is both broader and deeper than the typical small-scale poultry guide.  He considers the behaviors of various poultry species and how those behaviors are best incorporated to the benefit of the homestead and the homesteader.  Harvey's approach to poultry husbandry is to build health into the flock from the ground up.  Or rather, from below the surface of the soil on up.  He believes, as I do, that healthy soils are the basis for all sustaining and sustainable food production.  To that end, he manages his flocks so that they are able to express their full range of natural behaviors, and so they are always benefiting, rather than damaging, the soils they are on from day to day and month to month.  He also has a discernible frugal streak, which obviously appeals to me.  Both his frugality and his desire to provide healthy natural feeds to his livestock have led him to look for ways to feed poultry from the homestead's own resources.  This is right up my alley, and a topic rarely addressed by other writers.

The Small-Scale Poultry Flock will certainly help those who are poultry beginners. Though all aspects of keeping poultry are covered comprehensively in this book, it's not the equivalent of trying to drink from a firehose for anyone who has yet to start their first flock.  If you are an aspiring backyard chicken keeper, this book contains everything you need to get started, plus a great deal more.  This is really a book pitched to those who already have some experience with one or two poultry species, who want to take things to the next level or beyond.  I'm not speaking here in terms of flock size, but of integration - specifically, fully utilizing the labor potential of poultry, reducing the need for purchased feeds, recognizing and using the fertilizing value of manure, and choosing species, breeds and management practices to best suit a particular bit of earth.  Harvey is a tireless observer of the natural world, as well as a keen experimenter.  What he has to share has been learned through decades of trial and error and empirical observation of his livestock.

I can wholeheartedly recommend this title to anyone who wants to keep chickens, turkeys, ducks, geese, or guinea hens on a small scale.  Whether you want birds for meat or eggs, whether you want to start with pullets or hatch out your own chicks, whether you are on a small suburban lot or have a few acres in the country, whether you want to slaughter your own birds or are comfortable with running an old age home for hens past their productive years, this book should be on your bookshelf.  The Small-Scale Poultry Flock makes the other two backyard poultry books I own look rather limited and simplistic.

As it happens, when Harvey's book was printed and bound I received one complimentary copy from him, and another from his publisher, Chelsea Green.  Much as I love the book, I don't require two copies.  So I'll be hosting a giveaway of my extra copy next week sometime.  Stay tuned for the giveaway, plus some other news on this topic.

Wednesday, October 5, 2011

Further Thoughts on Lasagna Mulching


It's fall and my thoughts turn to lasagna mulching the garden beds to retire them for the year.  I've had the chance to observe the effects that a few years of lasagna mulching have had on our garden, and wanted to share those observations with you.

First off, let's review what lasagna mulching, also known as sheet mulching, consists of.  The basic practice is to cut down any vegetation to the soil line, but leave all plant material lying in place.  You might not want to do this if there are lots of obvious seed heads on weeds.  While lasagna mulching certainly curtails weeds, I don't like to incorporate weed seeds, which can lie dormant for ten years or more, into the soil any more than is unavoidable.  Any vegetation other than seed heads is great - just extra organic matter. The next step is to add soil amendments.  These should be tailored to what your soil needs.  I use finished compost obtained from our township, wilted leaves of comfrey grown on site, our half-finished compost, a bit of greensand to help loosen our clay soil, and sometimes fresh manure laid down in situ by our laying hens.  Next comes a covering of paper, newspaper, or cardboard. If using any kind of paper, it should be thoroughly soaked before or after being laid down, to help it conform to the contours of the soil.  The heavier and thicker this layer, the longer the weed suppression will last, and the less frequently you will need to repeat the entire process.  Finally, a good layer of wood chip mulch covers the paper.  Again, the more of this you can pile on, the longer it will last and the better the weed control.

Some gardeners will actually repeat these layers in one go - thus, multiple layers of compost, paper and mulch laid down on the same day.  I have never had the luxury of having so much material to work with.  But if you have a small area and sufficient materials to do so, why not?  On the other hand, I omit the soil amendments when working on areas that I never intend to plant in, such as walkways in the garden and border areas where I only want to suppress weeds.

My first motivation for lasagna mulching was exactly that - weed control.  This is something that the technique accomplishes with great success.  There are a few weeds that can make their way up through even a freshly laid section of lasagna mulch, and some airborne seeds that will land on and germinate in the wood chip layer, but those few are generally easy to remove by hand.  What I wanted to discuss today though are the additional benefits of lasagna mulching.  There are several of them that I've observed so far.

Significant soil improvement is one of them.  This isn't exactly surprising; it's routinely mentioned as the "other" benefit of the technique besides weed control.  But knowing intellectually that it would help the soil didn't quite prepare me for the fat earthworms I've been coming across.  They're not inordinately long as worms go, but they are rotund.  Wider than a pencil by a long shot; embonpoint, even.  I hope it's not the case that the obesity epidemic has now spread as far as earthworms.  But clearly these worms aren't going hungry.  Their presence is both an indicator of healthy soil as well as a guarantee that the soil will be even better over time.  Every earthworm is a mobile factory of soil fertility, and I count each sighting as a blessing.  I also see, year by year, healthier plants that are better able to withstand the vagaries of stressful growing seasons.

The other benefits of lasagna mulching all have to do with what I believe are leading indications of the changes that global climate weirding are going to bring to my region.  More than one model of climate change that I've seen predicts routine summertime drought across much of the US.  My immediate region is forecast to escape the worst of this trend, but still the summers could still be drier than they historically have been.  The last two summers here certainly have been that way, whether or not they were part of an emerging new pattern.  Mulching and good organic content in the topsoil are critically important for plants dealing with water stress.  Mulching because it curbs evaporative loss of moisture.  And high organic content because organic matter acts like a sponge, soaking up water and releasing it slowly as plants need it.  Lasagna mulching provides for both of these.

The flip side of the dry spells predicted under the climate change models is a pattern of more violent storms.  This may seem contradictory, but it really isn't when you look at the meteorological explanations.  Namely, a more energetic (warmer) atmosphere that is able to carry and move more water vapor.  And in any case, whether it makes intuitive sense or not, this is exactly what we saw this year: About ten weeks of rain too insignificant to help the garden crops followed by a hurricane and a tropical storm that washed out roads, flooded farmlands, wiped out crops, and carried topsoil straight into the waterways, not to mention killing a few people and destroying a few homes.  Our garden certainly took damage from these storms, and we had standing water in the portion of our backyard that is just barely lower than our garden.  But careful inspection of the garden itself proved that we lost no topsoil at all to the heavy rains.  Again, I believe credit goes to the lasagna mulching.

Phallus rubicundus (yes, really), red stinkhorn mushroom

It wasn't just that the paper and wood chip mulch protected the soil beneath them.  Within a few short weeks of laying down these materials I can find evidence mycorrhizal mycelium colonizing the entire area.  These are networks of fine hair-like structures, the fungal equivalent of roots.  The white threads are easily seen near the surface, knitting the soil together in an enormous net.  I know by the wide variety of mushrooms that fruit out of those networks that we have at least a dozen different species of mycelium at work in the top layers of our garden soil.  I take this as a spectacular indicator of biodiversity and the increasing health of our soil.  Although I started lasagna mulching for weed control, the practice would be worthwhile even if the mycelium were the only benefit.  If you wonder why I think so highly of mycelium, I refer you to Paul Stamets'  eye-opening, jaw-dropping book, Mycelium Running.  Fungi of all types provide invaluable services to other life forms in the topsoil.  They mitigate stresses on plants, break down tough organic matter into materials accessible to other organisms, move critical soil nutrients from areas of excess to where they are deficient, and can even bind up harmful substances (such as salts) in a waxy coating so that they become inert in the soil.  Truly, mycelium is a blessing in the garden, and observation has convinced me that lasagna mulching equates to laying out the welcome mat for the fungal kingdom.

Unknown mushroom.  Enlighten me?

Finally, there's the fact that lasagna mulching entails a bit of carbon sequestration.  That means, on balance, that we're taking carbon that could otherwise end up in the atmosphere (where it could do us further harm), and locking it into organic material in our soil (where it can do us some good).  The amount of carbon that I manage to store away on our property may seem trivial.  And in fact, it is.  But the truth is that an acre of topsoil is capable of holding more carbon than all the air directly above it, all the way to the outermost edges of our atmosphere.  But that carbon has to be stored up by and in living things working with plenty of resources in healthy soil.  If the project were undertaken on a wide scale, boosting the organic matter stored in our topsoil and the living woody plants above it could go a long way to ameliorate the carbon emissions wreaking havoc with the climate; earth is populated, after all, by carbon-based lifeforms, and that's what organic matter is.  My infinitesimal contribution is to do what I can with the soil I have some control over.  You could do the same.  I believe we will never solve the many problems stemming from industrial society's waste streams (and there are obviously many) until we look at the "wastes" we generate as resources so valuable that people compete for access to them.  It's a challenge for me to lay my hands on enough cardboard, newspaper and wood chip mulch to cover all the areas I would like to, and this despite the fact that several people save their newspapers for me, and I know where to get cardboard and mulch for free.

Having outlined the benefits as I see them, I'll share a few tweaks I'm making to the way I use lasagna mulching.  I've tried planting seedlings into a freshly lasagna mulched bed in the spring and found it problematic.  While the plants survive, they don't grow particularly well without a great deal of hand-watering.  The layers of paper soak up so much water that relatively little of it reaches the roots of the plants.  The dry summers the last two years haven't helped.  I have to water directly into the hole I punched through the paper layer to plant the seedling.  This entails far more work than I would like.  Fortunately I find no such difficulties in beds that I lasagna mulch in the autumn.  By spring the paper layers have broken down enough to let water pass more easily through them, although they still provide something of a barrier to weeds. So I'm going to do my best in future to lasagna mulch my garden beds in fall, and the borders and pathways in spring or summer.  I'm also sold on letting the chickens participate in the lasagna mulching process as often as possible.  They enjoy their carefully orchestrated visits to individual garden beds that I'm done with for the year, it saves me that first step of having to clear the weeds, and they boost soil fertility by lightly tilling in their own manure.

One possible drawback to lasagna mulching is that the moist conditions it fosters just under the surface can be a boon to slugs and snails.  This was apparent in 2009, the last wet year we had.  The past two summers have been quite dry for us and I saw very few slugs anywhere in the garden.  If I lived in a wetter climate I might look for some other technique to build our soil.  Here in Pennsylvania I'm comfortable using diatomaceous earth to control what slugs and snails we have in wet years.  And if the climate change models are correct, we're not going to be contending with wet summers very often.

Well, there are my reflections on lasagna mulching, after using this technique in my gardens for about three years.  I think it's making enormous contributions to the health of my garden soil while saving me a lot of effort in weeding.  I'll do my best to keep that in mind as I try to get all the mulching done this month.

Cyathus striatus, fluted bird's nest mushroom

Monday, September 19, 2011

Slaughter Day

We sent our two largest broilers to ice camp on Sunday.  We didn't have any spare clean hands to hold a camera once we got started.  So I don't have any footage or even still pictures of the slaughtering process itself.  We're still in the market for someone to hold a camera while our hands are occupied.  But I did take some pictures just before we got under way.  I thought I'd share these and also some of the videos I've turned to for help figuring it out on my own.

Obviously, if this subject is going to upset you, stop reading now.  I think most readers here will be comfortable with this topic, and I think the methods we use are pretty humane.  But this is a post about killing animals for food.  If you're categorically opposed to such things, here's your notice.  

Our setup


A place to work - This is our solar cooking station equipped with a cutting board, knives, latex gloves, and containers to receive various parts of the chickens.  We save or use just about every part of the chicken except the intestines, gall bladder, oil gland and the head.  What doesn't come into the kitchen gets used or buried somewhere in the garden.


Slip knotted cords - these will hold each bird by the feet.  We have sometimes used a killing cone in the past, which takes care of the movement problem.  With the birds hanging freely like this you need two people to stabilize the chicken; one to hold the wings against the body, and another to hold the head as they bleed out.  The wings should be held closed because otherwise the bird can flap so hard that it bruises its own wings.  In a commercial operation the resulting discoloration would make the bird unsalable.  Stabilizing the head ensures that the movements of the bird (either voluntary or involuntary) don't send blood flying everywhere.  Holding the head at an angle away from the cut also speeds the bleeding out, thus hastening death and limiting the suffering of the animal.

Wheelbarrow with mulch - We situate this directly under the cords or the killing cone that holds the bird.  It will collect the blood from the chickens and be used around our fruit trees.  This saves on cleanup and preserves the value of the blood as a fertilizer.  For the number of birds we slaughter at any one time, even a small amount of mulch will suffice to soak up the blood; there just isn't that much of it.

Knives - A well-sharpened boning knife, paring knife and a cleaver.  The boning knife is used both for cutting the chicken's jugular and for the small amount of cutting needed during evisceration.  The paring knife is sometimes not used at all; it's there as a just in case alternative to the boning knife.  The cleaver is useful for decapitation and for cutting through the neck, which I've always had trouble doing with a boning knife.  If you don't have a cleaver, a good strong pair of kitchen shears might work for the neck.  Whichever knife is used for the killing cut needs to be very sharp in order to spare the bird as much suffering as possible, and working with a sharp knife during evisceration always makes things much easier.  We devote time to getting the knives ready the day before slaughter.  But as you'll see in the Joel Salatin video below, there's really very little cutting necessary in the whole process.


Scalding water - A large pot is required.  I use a water bath canning pot.  The water should be roughly 145-150F/63-66C.  I  heat the water above that temperature before hauling it outside, so that it's just right when we've gotten through the first few steps in the slaughtering process.  When slaughtering more than a couple of birds, I leave a kettle simmering inside so that we can top off the pot with hot water, keeping the water at the right temperature for all the birds.  The birds displace a lot of water, so the pot should not be completely full.  When it's chilly outside I set the pot on cardboard so that heat is conducted away a little more slowly.


DIY Chicken plucker - This works well for the very small number of birds we process at any one time.  It probably wouldn't be workable for anyone slaughtering more than a dozen birds at once.  A day ahead of time we make sure to have the batteries for the drill charged up.  When we're processing only one or two birds at a time, we sometimes don't even bother with the plucker as it's quick and easy enough to pluck a bird by hand if you get the scalding right.  We try to pluck the feathers into a garden bed that is ready for lasagna mulching.  Feathers are high in nitrogen and break down quite slowly.  So they'll feed the soil very gradually while adding a bit of structure for soil microorganisms.  Strangely enough, yellow jackets will steal the small feathers, for the protein content I suppose, if you don't cover them with mulch right away.  An older post of mine details the DIY plucker.

By the way, if you like your chicken skinless, you can skip the plucking entirely and just peel the skin off the entire bird.  This isn't a great idea if you plan to roast the bird whole, since the skin keeps the bird from drying out.  But if your birds are destined for other preparation methods, and you don't want the fat from the skin, you can save some time and effort.


Chilling bath - We use a cooler, filled with all the ice we have on hand and water from the garden hose.  This brings the temperature of the eviscerated bird down very quickly, and can hold 4-5 broilers, but really only one turkey at a time.  It's wiped down with a bleach solution before and after use.

Bags, scale, permanent marker, freezer - Once the birds are nicely chilled, I drain them as well as possible, weigh them, bag them up, and write the weight of the bird on the bag.  We let our broilers live a little longer and get a little bigger than many farmers so I use 2-gallon freezer bags, which I'll sanitize and re-use just for our own chickens.  I wouldn't like to count on our larger birds fitting into the 1-gallon bags.  The two birds we slaughtered on Sunday averaged just over 6 pounds (2.7 kg).  I put the giblets from all birds into one container, to be used when it's time to make gravy for the Thanksgiving turkey.  (We grill our turkey so we don't get pan drippings to work with.)  Then the birds and giblets all go off to ice camp. 


Instruction

I've learned all I know about slaughtering and eviscerating chickens by watching videos and doing it myself.  I've never come across a text description or even still photos that have helped me as much as video has.  Here's a sampling of videos that show the process in detail.  These first two videos don't show the exact method I use, and there's a lot of extra material covered, but they're definitely useful for amateurs and novices who don't have expert help on hand.


Respectful chicken slaughter - Part 1


I think it's an especially good tip to locate the chicken's jugular by feeling for the jaw.  I've never been able to precisely identify where a chicken's ears are, so that point of reference hasn't been useful to me.  The jaw can be easily felt.  You may not make a perfect cut the first time you do it.  When you get it right, you'll know by the steady stream of blood that the cut produces.  Practice makes perfect, though the obvious difficulty is that homesteaders work at such a small scale that getting enough practice on a regular basis isn't easy.  That's why I watch critical parts of these videos a few times over the day before slaughter.  


Respectful chicken slaughter - Part 2


Good tips in this video on how to use legs and other parts of the chicken.

Joel Salatin - chicken evisceration


If you're contemplating your first poultry slaughter yourself, you might want to study other homesteaders' take on the process.  Paula recently posted about her own chicken slaughter.  And Kristeva had a post quite a while back with good pictures.  If these videos and posts don't answer your chicken slaughtering and processing questions, I'd be happy to try despite my meagre experience.  On the other hand, if you have any tips that you'd like to share, please sound off in the comments.

Wednesday, August 24, 2011

Harvest Meal: Chicken in a Pot


I never posted about the source of the main course of this harvest meal.  It was a runty broiler that my farming friend gave me when it was half-size to the rest of her broilers, which were ready for slaughter.  Something was definitely off about this Cornish Cross bird, because it took me more than two additional months to raise it to a size that looked sort of ready to harvest.  I finally decided on the slaughter date (Sunday) only because our own broiler chicks really needed the extra room provided in the poultry schooner, which is still in service.

Monday night's method of preparation...well, that was an experiment for which I had to work up my nerve.  "Experiment" only in the sense of trying something entirely new with a precious bit of homegrown meat.  I'm usually loathe to branch out too far with high value ingredients, and no food is so scarce as meat raised on less than an acre.  But this Chicken in a Pot came from Dorie Greenspan's Around My French Table cookbook which I found on the new arrivals shelf at the library.  Greenspan is no slouch in the kitchen.  The rustic appearance of this mundanely name dish appealed to my peasant cooking propensities.  (But trust me when I say the cover photo of this dish is far more beautiful than the one above.)  So I took a risk, and I'm glad I did.  Basically, the chicken steams itself inside a cast iron dutch oven sealed air-tight with a ring of simple dough.  The bird and the accompanying vegetables are pre-browned to ensure some color, but every drop of juicy goodness collects in the dutch oven.  Everything turned out super moist, super tender.  For copyright reasons, I'm not going to reproduce her recipe verbatim.  But I will tell you what I put in the pot.

Our broiler chicken weighed just under 5 and a half pounds.  Had it been any larger I don't think it would have fit into our standard size dutch oven.  Aside from the bird, I put in homegrown purple potatoes, garlic, shallots, rosemary, thyme and a few boughten carrots.  I browned the bird and all the vegetables except the potatoes in a mixture of bacon fat and olive oil.  The dough was just water and flour, though I did add some of the leftover fat from browning the ingredients.  The rest of the fat went into the dutch oven.  I enjoyed the challenge of tucking as many potatoes as I could around the chicken, without stuffing it so full that it wouldn't cook through.  Greenspan called for adding both white wine and chicken broth to the pot, but I omitted these, largely because I was moving 100 miles an hour on Monday and only scanned the recipe well enough to get a general sense of it.  At serving time there were plenty of juices in the dutch oven; I think it would have been a swimming pool of liquid had I been more faithful to the author's intention.

The only tiny disappointment of the meal was the crust that sealed the chicken and vegetables into the dutch oven during cooking.  I was surprised to find that Greenspan's recipe made no reference to it after the chicken was cooked.  I wondered whether it would be worth breaking up and soaking in the abundant juices in the bottom of the dutch oven.  I can't abide the thought of wasting the flour, you see.  Not only did my crust end up just this side of well charred, but it also had little flavor or texture.  We tried the juice soaking technique and found it really only made the crust marginally edible. If I were to repeat this dish in the future, I might try sealing the dutch oven with a loop of good yeasted bread dough.  If the dough started out well chilled I can imagine it forming a beautifully browned and scrumptious ring, the perfect vehicle for dunking in roast chicken juices.

It was incredibly satisfying to tuck into a meal that was almost entirely homegrown.  The carrots might have come from the garden if it hadn't been for the few that I had hanging around in the fridge, the leftovers from a spate of morning glory muffin baking.  Other than that, the only ingredients that weren't produced right here were the fats, salt and pepper.  This bodes very well for our six broilers, which are coming along nicely and are now out on the "pasture" full time, in the poultry schooner.


By the way, if any of you are raising birds for the table, or mulling it, and are planning to do your own slaughtering and processing, you may have pondered the same questions I did.  How soon does rigor mortis set in?  How long does it last?  Does it adversely affect the dish to cook a bird in rigor mortis?  And if so, what are the windows of opportunity for cooking the bird?  The basic answers to these questions are that rigor mortis sets in very quickly with poultry, and yes, it's best to avoid cooking a bird in rigor mortis.  Fortunately, it doesn't last too long.  Either cook a bird immediately upon slaughtering and processing, or refrigerate the bird and wait about 24 hours for the rigor mortis to dissipate.

Some of you have asked for a pictorial guide or even video on my slaughtering process.  So far we haven't had any clean hands available to hold a camera on slaughter day, but I'm keeping it in mind for the broilers we are raising at the moment.  If I can corral an innocent bystander with enough intestinal fortitude into taking some pictures or video, I will certainly post them later on.

Wednesday, August 3, 2011

Chicks

Back in early spring there was an offer of a broody hen from a local farmer I know.  I got all excited and built a nesting box for the broody girl and her eggs.  When late spring rolled around and we weren't hosting a hen, I put the chances of that project playing out at slim to nil.  Farmers get real busy once winter is over, and with that in mind I wasn't willing to nag him about anything.  Besides, if he didn't have a broody hen at the moment, he couldn't exactly produce one.  In any case, I've got the nesting box all ready to go, so if and when he has a broody hen in a non-frantic part of the year, I'm ready to accept her on a moment's notice.

But having psyched myself up to host some little chicks, I reconsidered my lack of interest in getting chicks from a hatchery.  In the end I asked my farming friend if I could buy a few chicks from her the next time she started another batch of broilers.  She gets Cornish Cross chicks from a nursery that is fairly local to us, though they're still delivered by mail.  So just over two weeks ago when her order of chicks came in, I went to her farm with the WWOOF volunteers we were hosting  and picked up six day-old chicks.  Our volunteers at the time were vegetarians, but surprisingly accepting of my plan to raise these birds for our table.  I encouraged them to handle the chicks as much as possible, wanting the birds to become accustomed to being picked up by humans.


My setup for the brooder was pretty simple.  I just covered a large storage plastic bin with garden caging and filled it with a few inches of wood shavings.  Our volunteer constructed a little wooden frame with fine mesh across the top to hold the waterer.  This serves to catch any spilled water in a limited part of the wood shavings, and to keep the chicks away from the wet bedding.  When the chicks are very tiny, they don't tolerate getting even slightly wet as they must stay very warm indeed.  I had set up the brooder with an incandescent bulb hanging from the caging, since my chick-rearing guide warned me that they need 95F (35C) temperatures in their brooder the first week.  But these chicks arrived in the midst of a summer heat wave, when indoor temperatures were 80+F (27C) during the day.  I turned on the bulb for the first few days and left it on overnight.  From observing the chicks it was obvious they didn't need the extra heat.  The bulb was positioned in the middle of the brooder, and they scattered to the four corners to sleep.  So I happily turned the light off and let them bunch up for warmth if they felt the need.  The crazy heat has passed, for the moment, but the chicks still don't seem to need any extra warmth.

You may notice in the picture above that I've been providing weeds to the chicks from day one.  Every day I hang some purslane (which is rampant in the garden right now) from the caging, and dandelion or other weeds when they come easily to hand.  The chicks seem to like the dangling plants.  They jump for individual leaves and tear off what they can with their beaks.  Anything that encourages exercise in these chicks is a good thing.  Cornish Crosses are, in my opinion, overbred.  They are noted for a growth rate so rapid that it causes leg problems because they cannot support their own weight.  It's also not uncommon for their bodies to outgrow their organs.  Heart failure is a feature in this breed which is typically slaughtered at six weeks when raised industrially.  Because we're not lighting them at night, our broilers won't eat 24 hours a day.  So they'll grow a bit more slowly and have a few more weeks of life.  It should also help prevent organ failure and leg problems. 


Last week, when the chicks were less than two weeks old, I started moving them for part of each day to "daycamp."  This is just a wire mesh enclosure with their food and water.  I place it on a fresh, shady patch of grass and let them hang out there whenever the weather is fair and I'm at home.  This wouldn't be feasible for two-week old chicks in spring or fall, but it works in the summer. Fortunately our cat shows absolutely zero interest in the chicks.  I'm not complaining about this or anything, but it is odd since he's such an accomplished hunter of chipmunks, baby rabbits and smaller rodents of all kinds.  Perhaps the chicks smell to him like our hens, and the hens being clearly out of his range so far as hunting goes, the chicks get sorted into a non-prey category in his little feline mind.  The broilers grow very fast indeed and this simple pen is going to be a bit crowded for all of them in a very short time.

I'm guessing it'll be slaughter time in another six to seven weeks.  So far the broiler chicks have been very little bother at all.  If the rest of the process is this easy I may plan to raise two batches of six birds each next year.  That would represent a very significant portion of all the meat we eat in a year - probably something like a third to half of our total meat consumption.  Knowing that we can do that much for ourselves on less than an acre would be huge.