Friday, April 27, 2012

The New Coop


So here's a project that's taken up far more of our spring time than I would have imagined.  It's our spankin' new chicken coop.  As you can see, it's an A-frame and a rather large one.  The seed ideas for the design were mostly mine, but in the course of constructing it with the help of our WWOOF volunteer, design became very much a collaborative effort.

Our previous coop-and-pen system was our first attempt at providing mobile housing for our laying hens.  It served reasonably well for four years, but we built in plenty of flaws because we didn't really know what we were doing.  We had to build chicken housing before we'd ever kept chickens.  Some of these flaws were remediable, and we fixed what we could; others not so much.  My two biggest complaints were that the coop wasn't easy to clean out and that both the coop and the pen were quite heavy, making it hard for me to move them by myself sometimes.  A lesser issue was that we had no way of providing a dust bath for our hens in a mobile system.  So they tore into our grass to cool themselves down in summer, thus leaving significant divots in the lawn.  I didn't care so much about the aesthetics, but rolling a heavy coop and pen around was hard enough to begin with.  When the wheels fell into some of these divots, it became really difficult.

So the new design had to eliminate the difficulty of cleaning, shed excessive weight, and offer dustbathing possibilities for the birds.  I also wanted easier access to the interior, and room for at least two nest boxes.  We started with one nesting box for four hens, which was reasonable, especially since the box could hold two hens at a time if need be.  But over the years the number of hens we've had at one time has varied considerably, with nine being the upper limit.  This resulted in the occasional queue for the nesting box, and the occasional egg laid outside the nest.


Here you can see the elevated dust box in the back.  Since it's raised up this way it doesn't take away any area of the lawn.  This also shows the articulated door, which folds down so I can access the feeder and waterer, or throw treats to the girls without giving them too much temptation to escape.  When I need access to the inside of the pen, I can open the entire door and get inside without much crouching or discomfort.

The nesting boxes are situated towards the peak of the new coop.  The girls don't seem to have any aversion to laying their eggs so far off the ground.  Since they have to make three jumps from the ground to the nests, their feet seem to be cleaner.  The eggs I've been getting have been mostly pristine.

Here are a couple of pictures of the wheels and the slight advantage we gained by not placing them at the very back edge of the bottom frame.  You'll notice that they're on a lever bar that can be propped into place when it's time to move the coop.  The rest of the time the frame rests almost in contact with the ground.  By moving the wheel slightly towards the front of the coop, the weight of small portion of the coop behind the wheel acts as a counter balance to the rest of the weight.  This makes it easier for me to move.  I don't quite have the technical vocabulary to describe this, but the idea was described in an excellent article about the Chinese wheelbarrow in the Energy Bulletin a short while ago.  The article will fill you in on the principle, if you're interested.


Here you can see the lever bar positioned to raise the coop off the ground to make it easier to move.  We're still tinkering with this a bit since our smallest hen scooted right under the coop while I was moving it one morning.  We have a few ideas on how we might fine tune the system.


Here's a shot taken after the main construction was done that shows most elements of the interior.  We have diagonal bracing in a few areas to strengthen the wooden framing.  After painting was finished, the whole thing was sheathed in chicken wire.  Then an old billboard was used to cover the sides/roof and most areas of the gable ends.


I've already been asked, "Why purple?"  My standard response is, "Why not?"  My tendency to splash bright colors around my garden is already on record.  It helps curb the impulse to paint something loud on the walls of our home.  Deep purple was one color not yet represented in the garden.  It all looked so pretty until it was time to put that used billboard on as roofing material.  I'm hoping that I can find an artistic soul who might paint something attractive on it.  After all, it looks like nothing so much as a blank canvas to me, just waiting to be filled up with something whimsical or chicken-related.

I will say this for the ugly billboard.  It is very sturdy stuff, designed to be out in all weathers.  The white backing of the advertisement should help keep the coop from heating up too much in full summer sun.  Oh, and it was free, by the way.  The billboard companies give them away for nothing once they're taken down.  I know a man who used this material in lieu of roof liner when he built his own home.  I expect the billboard to hold up extremely well, and thus protect this coop from the elements for several years at least.

The only thing missing from our new coop is a clever name.  My husband calls it the "land yacht."  I sometimes refer to it as the "purple menace."  Neither moniker seems to really capture the mixture of charm and clunkiness of our new coop.  So what say you, readers?  Got a clever name for this behemoth?  I have no prizes to give away and make this a contest, but I'd love a snazzy label for our newest piece of homestead infrastructure.  All suggestions will be gratefully received and considered.

Monday, April 23, 2012

Resurfacing

Apologies for the long radio silence.  And thanks to those of you who sent kind inquiries about my absence.  All is well at the homestead.  While spring is always a busy season that gets in the way of writing, that's not my excuse this time.  The difference now is that my husband is more or less retired, and thus home all the time.  This is almost entirely a good thing.  The only exception to that is my habit of writing when I have the house entirely to myself.  The writing "mood," as it were, comes to me most easily in solitude.  I find it very hard to reach that state with distractions around me.  So, if this blog is to continue, I'll need to figure out a routine or a method that will provide verisimilitude for being alone at home.  This will probably be a challenge, but I'll work at it.  If I manage to find time to write, it'll probably mean I find a way to catch up with many of your blogs as well.  I've missed keeping tabs on what many of you are up.  There's so much inspiration and so many cool ideas in the gardening/homesteading blogosphere!

In the meantime I should provide some thumbnail sketches of where we're at and what we've been doing.  First off, my husband's "retirement" is really the loss of a job.  Since we've known this was coming for quite a while, we could plan for it, which I know is an advantage many people don't get.  Forewarned is forearmed, as they say.  Our advance notice let us, just barely, pay off our mortgage entirely before his employment ended.  So we are now without an income, but also debt-free.  Mostly that's not scary at this point.  It feels pretty good, I have to tell you.  We've taken a few extra efforts here and there to shave expenses in an already pretty frugal existence. 

We've already hosted a number of WWOOF volunteers this year, and our first one brought with him an impressive amount of construction experience.  He helped us build a new mobile chicken coop to replace our clunky and deteriorating pen and coop system, which served honorably, if inelegantly, these past four years.  The new rig is an A-frame that provides a bit more area to the chickens and should require almost no cleaning, ever, since there's no floor. All the poop ends up directly on the lawn. The girls seem to have taken to it quite happily.  I think it's just about the most awesome chicken coop ever, if I say so myself.  I'll try to get a detailed post on this one up soon.  (Yes, I know my track record with "soon" is execrable.)

Other recent efforts have entailed a lot of digging and planting of rootstock.  The hedgerow project got moved way up the priority list by last year's Halloween snowstorm from hell.  The storm took out a major section of our fence in the backyard.  We're going with the strategy of leaving what remains of the old wooden fence where it is, and replacing what came down with livestock panels and the plants that will form the hedgerow.  Frankly, this looks ugly at the moment, and doesn't provide any of the privacy of the wooden fence.  But eventually, the livestock panels will be mostly hidden by the plants, which will give us privacy, and should look a lot better than the wooden fence.  Should we ever decide to use that space for dairy goats, the dual-element hedgerow will constitute a real barrier to the animals, while looking pretty and offering some browse.  So far our hedgerow plantings include rugosa roses, Siberian peashrub, cornelian cherry, a dwarf willow tree, and a golden elderberry.  It's likely that our black raspberry patch, which sort of backs into the property line, will become a hedgerow element too.  I have three tiny hazels and a ginseng plant that will be coddled for another year or two in containers before being added to the hedgerow.  We lucked out with the goat panels, finding them used for a small fraction of the price for new ones, which is considerable.  Right now a picture of the hedge project wouldn't really show much.  I'm hoping that by late summer or fall a second picture will provide an impressive contrast.  We'll see how it goes.

We also planted several new fruit trees, bushes and vines this month.  We're starting both table grapes and hardy kiwis on trellises, and experimenting with a new growing technique for several fruit trees.  The technique is called Backyard Orchard Culture.  The good folk at Root Simple blog wrote about it, and you can check out a summary at the website of the tree nursery which developed it.  Basically the idea is to cram normal fruit trees into places where they either won't have enough space to develop to their normal mature size, or where such full growth is undesirable.  Then you radically prune the tree as it grows to keep it very small.  Planting multiple fruit trees very close together is another part of BOC.  Doing so forces the trees to compete for resources, which helps keep them small.  While trees maintained in this manner will obviously never produce as much fruit as trees which realize their full growth, there are other advantages.  Having many small fruit trees means you can have a succession of harvests that are each just large enough to keep you in fresh fruit for a fortnight or so, without providing any pressure to preserve the bulk of an enormous harvest.   The six Asian pears and two extra apples we just planted in this way should (eventually) give us modest quantities of fresh fruit over a three-month span from mid-summer to early fall.  (We'd ordered two more apples which would have extended the season through mid-fall at least, but they were sold out.  We may add them next year.)  Since BOC trees are kept very small, maintenance and harvesting are very easy.  There's no need for ladders.  I expect that when I'm another twenty or thirty years older, the ability to do such work with both feet on the ground will be very appealing.

We've got a few broiler chickens going already this year.  My feeling is that last year we let our batch of six go far too long.  I wanted to use up the second bag of feed that I'd purchased for them, and that meant letting most of them live for ten weeks.  It gave us bigger birds, certainly.  But it also meant that by the end I had to move the birds three times per day just to keep them out of their own filth.  The Cornish cross breed that accounts for the vast majority of chicken meat in this country isn't genetically modified, but judging by how fast they grow, they may as well be.  At nine and ten weeks of age, even broilers that were kept on grass, not fed for 24 hours per day, and allowed plenty of space to move around, pretty much couldn't and didn't.  The speed at which these birds grow is an undeniable advantage for those who want to fly under the radar with backyard meat production.  You can finish the birds before anyone notices they're there.  But it's pretty much their only virtue.  This year I'll raise two batches of four birds each, and only until each batch finishes off an 80-pound bag of feed.  I expect that to mean slaughter at roughly seven weeks old.  Thus smaller birds, but more of them as compared with last year.

Finally, we've just started work on a tiny frog pond to be added to the center of our garden.  This is the only suitable spot we could find for it - one that's not on a footpath or directly under a large deciduous tree that will dump too many leaves into it in autumn.  Work sort of stalled with this after the hole was dug, as mild weather brought on many spring tasks very early.  But I want to get this done soonish, so that it can provide many benefits to our growing space this year.  I know for a certainty that adding a bit of water to the garden will bring a great deal of additional biodiversity, which can only be a good thing.  What I'm really hoping for though are some toads, which are supposed to be fantastic for slug control.  The lasagna mulching method I'm so fond of does tend to encourage slugs, though we've had such dry conditions the last couple years that it's sort of been a wash.  The plan is to stock the pond with duckweed for multiple uses, and probably a few goldfish for algae management.  If frogs or toads don't show up on their own, I may go looking for some tadpoles.  I know where to find some of these locally in the correct season, but I'm pretty sure that window has closed for the year. 

Hope spring is treating you all well.  Drop me a line and let me know what's new with you and your garden.

Monday, January 30, 2012

Repurposing Wool Fibers


Despite my interest in frugality, I'm relatively new to thrift stores.  Generally I don't enjoy shopping, but there are a couple of Goodwill stores on routes I travel regularly, so I've been stopping in there and browsing lately.  Naturally, there are some amazing deals to be had.  Probably one of the most surprising to me have been the 100% wool sweaters that sell for as little as $2, when they're on markdown.  It simply defies logic that these pure woolen items, some of them brought all the way from Scotland or Australia, end up being given away for a song. Of course, the vast majority of sweaters at the Goodwill are made from synthetic yarns.  But that only makes it a little more of a treasure hunt to seek out the wool.

I'm an occasional, largely seasonal, and not very gifted knitter.  One reason I haven't done more knitting is the incredible expense of the yarn.  It's always much, much cheaper to buy a sweater than to buy the yarn to make one yourself, even if you're paying the full retail price for the sweater.  But those occasional thrift store finds change that equation.   When woolen sweaters sell for so much less than the cost of the constituent materials, I've met my price point.  Mind you, it's not every sweater that can be taken apart by hand, so it pays to know what I'm looking for.  I learned what I needed to from this link

Taking apart a knitted item to recycle the yarn is a somewhat tedious task, well suited to wintertime, endless cups of tea, a BBC radio stream, and the company of a playful cat, brisking about the life.  It's amazing how much yarn comes out of a small sweater.  I cut a few cardboard pieces to wind the yarn around as I unravel the sweater.  Binding it in this way helps to stretch out some of the bends the yarn assumed when it was first knitted.  There are steps you can take to further relax the kinks in previously used yarn.  But they take time and effort, and my creations aren't so magnificent that I worry about minor issues such as slightly pre-kinked yarn.

In principle, you could take apart a knitted item made from any sort of fiber.  For my time and money, only wool or other animal fibers would make it worth my while.  I did scoop up an alpaca sweater from the thrift store, and it's waiting to be taken apart.  It's white but slightly stained.  I may decide to dye the yarn if I can't get the stain out. The beauty of acquiring these materials so cheaply is that it gives me free rein to experiment with them and learn from mistakes if I must.

I've knitted one pair of my chunky fingerless gloves, and am currently working on a second pair, both to be donated to the fundraising auction at the PASA conference, which is only days away.  These gloves are knitted with double strands of yarn, which makes them extra warm.  For both pairs of gloves I'm using the repurposed yarn as one strand.  It's satisfying to salvage and re-use this material.  The color of the sweater is such that I wouldn't choose to wear it myself, but in a double stranded item, I think it turns out quite pretty.

I'm off to the conference on Wednesday, presenting on Thursday, and enjoying myself thoroughly on Friday and Saturday.  After I'm home, I'll give my usual summary of the conference highlights, and with a little luck, relocate my writing mojo, which has been scarce of late.  Hope winter is treating you all well.

Friday, January 13, 2012

Harvest Meal: Roasted Parsnips


This winter we have a surfeit of parsnips to harvest, which is wonderful because they are one of my favorite vegetables.  But parsnips can be tricky to cook well, because they aren't very dense.  So when you roast them (one of the very best cooking methods for this vegetable) with other root crops, they tend to cook through much faster than carrots, potatoes, or turnips.  Add to this the abundant sugars in a winter-harvested parsnip, and you have a recipe for burned, or mushy parsnips, or worst of all, both conditions at once.

So I like to roast parsnips on their own, and I recently hit on a fabulous way of doing that.  It's a bit more fussy than other methods, but it produces such deliciousness that I'm willing to go to the extra effort.  The nicest thing about this dish is that all the major ingredients are either homegrown, or homemade.

I start by cutting up several slices of my home cured guanciale.  I'm sure bacon or pancetta would work fine as well, but the extra seasonings that I add to my guanciale give the dish a little something special.  If you use bacon or pancetta, one or two slices should do it.  My guanciale is small, and my slices short; I used about seven slices for two full pans of roasted parsnips.  A little bit of fatty cured pork goes a long way in the flavor department.  So the slices are cut into bite-sized pieces and gently heated in a skillet just enough for some of the fat to render out into a liquid state.  Some of the guanciale pieces begin to brown a little, but I'm not aiming to crisp them up at this point.

While the fat renders I go to the trouble of peeling several parsnips and cutting them also into bite sized pieces.  I check my quantities by spreading out the chopped parsnips on a sheet pan.  I don't want it overcrowded, but neither do I want too much open space on the pan.  The vegetables should all fit in a single layer with a bit of space around the pieces.  To each sheet pan of parsnips I add several peeled cloves of garlic, left whole, a good amount of finely chopped rosemary, and freshly ground white pepper.  I gather up the ingredients to the center of the pan, pour over the rendered guanciale fat and the guanciale pieces, and add just a bit of olive oil to the pile.  Then I mix everything by hand so that the vegetables are well coated with oil and fat.  These get spread back out to an even layer, and sprinkled with kosher salt just before going into a 375 F oven.

A single pan of these parsnips will take about 25-30 minutes to roast.  If you make two or more pans of these goodies at once, it'll take longer.  It's a good idea to rotate pans between shelves, as well as turning them 180 degrees if you're making a lot.  I didn't need to stir the parsnips around from time to time as they cooked.  With larger pieces of root vegetables I've noticed that doing so encourages more even cooking.  The smaller pieces don't seem to need it.  When the parsnips and guanciale develop a lovely browned appearance, you'll know they're done.

It may seem strange that I'm elevating what most people would consider a side dish to the status of a proper meal.  All I can say is that I tried using these roasted parsnips as a topping for pasta, and while it worked just fine, I noticed that the pasta seemed more of a distraction from the vegetables than a help.  So I gave up and next time just ate a large bowlful of the roasted parsnips.  Not the most nutritionally balanced meal in the world, but I can't stop eating them.  I'm thrilled to have stumbled on a great recipe for parsnips that uses homegrown garlic and rosemary, which is doing well by the way under protection.  We've hardly needed much in the way of season extension infrastructure with the mild winter we're having, but that's another post.

I got the basic idea for this dish from Molly Stevens' All About Roasting cookbook.  She takes her dish in a sweeter direction than mine with the addition of brown sugar.  To my mind, a parsnip that is allowed to stay in the ground through a few frosts so that it sweetens up on its own is plenty sweet enough, so I leave the sugar out.  But I appreciate the attention to detail in Stevens' book.  Hitting on the best temperatures and cooking pans for roasting all sorts of different foods is not an intuitively obvious thing, but one arrived at through much trial and error.  So I'm grateful for the sheet pan and temperature recommendation on this recipe, and the topic of the book is well suited to the season.

Anyway, I hope some of you will try this parsnip recipe, especially if you've never been impressed with this humble treasure before.  It was once the main winter staple crop of Europe, before the potato was brought from the new world.  I do wish that I could retrieve some of the ways our ancestors prepared this vegetable.  I'm sure they had some very good ways with the parsnip.  If you have a favored recipe for parsnips or other root crops, please do share them in the comments!

Thursday, January 5, 2012

A Few Loose Ends

Happy New Year, everyone!  My conscience has been nagging at me to follow up with results from several things I've written about over the last year or so.  I'm not good about getting around to posting about things I say that I will.  So I figure I'll clear my backlog with the first post of the year and then I can get back to semi-regular posting.

Leek seedlings
Last spring I tried a somewhat fiddly method of starting leek seedlings, with the aim of encouraging them to grow long and tall before they were transplanted out.  The idea was that a long seedling, transplanted deeply, wouldn't need hilling to make the plant develop a nice long white section, which is the best part of the leek.  Well, it worked and it didn't.  The seedlings indeed grew long and tall.  I duly transplanted them with just a couple inches of their full length showing above the ground, and then ignored them for the whole growing season.  Disappointingly, when I dug up a few this fall, they had very minimal white parts.  It seemed to me as though the plant turned anything planted below the soil line into root.  So this was a bust.  Hilling seems to be required to grow beautifully long white leeks.  I'm still looking for the best way to do this in my long narrow garden rows. 

Tomato trellising
Remember my enthusiasm to try a new tomato growing technique that I learned about at last year's PASA conference?  I've got results.  The trellising system worked fairly well as the plants grew tall.  It took some diligence to keep up with pruning extra branches and clipping the remaining ones to the wires.  The problem came when the plants started setting fruit and bulking them up.  I had all my trellises in short rows, which meant that only two 7' stakes were holding up three tomato plants each.   Gradually the weight of the plants pulled the stakes in towards each other, making all the wires sag.  This could be only minimally remedied by adjusting the wires at the stakes.  Next year I plan to grow my tomatoes in longer rows, with stakes every ten feet or so.  Since all but the end stakes will be supporting plants to either side, the growing weight of the plants should exert equal pulling in both directions, so that the stakes remain upright.  I may try angling the stakes outward at either end of the rows to give them more resistance.  The sagging wasn't a disaster, but it looked kinda shabby and cut down on airflow around the plants, which might have been a very bad thing in a blight year.

Burdock
I've become a fan of burdock, aka gobo, for its delicious flavor and its soil amending properties.  When I wrote about them more than a year ago, there was some question in the comment section as to whether or not the parts of the taproot left in the ground would regrow in the spring and form a new plant.  The results this spring were negative - in the sense that I saw no plants emerge above ground where we'd dug out the roots.  This is a positive as far as I'm concerned though, because it means we can have our soil amendment and eat it too.  Those portions of root that are too deep to dig out rot in place, adding organic content to the subsoil and greatly improving our clay soil in the process. So burdock is not forever once you plant it, provided you harvest the root.  Those roots we didn't harvest definitely came roaring back this spring, ready to set seed.  And this is not a plant whose seed I want to save for myself, thank you very much.  It took more than one severe cutting down to the ground to encourage the plants to call it quits.  Burdock produces a fair bit of biomass in the second year, and the greens are marginally of interest to the chickens.

Acorns sprouting and different oak species
This one is owing for quite a while.  In fall of 2010, I aggressively gleaned acorns from oaks in parks and off my own property to use as feed supplement for my laying hens.  I went for a certain oak species that produced beautiful, large, meaty acorns, and I managed to gather some 60 pounds of them.  Unfortunately, it was mostly wasted effort.  The acorns that looked so big and worthy to me did not pass muster with the hens. They pecked rather half-heartedly at them after I crushed them by hand.  It was my mistake.  Since they obviously enjoyed the taste of the small, poorly looking acorns produced by the oak tree at our property line, I assumed that the acorns that look so much better to my eye would please them just the same.  Not so.  There are more than five hundred species of oak in the world.  And there's enormous variation in the tannin content of the seed of different sorts of oak tree, and even between individual trees of the same species.   Tannins give a bitter flavor to foods.  These compounds can be leached out of acorns well enough to make them palatable to humans, but that's not a process I'm willing to go through for the chickens' sake.  Some acorns are naturally "sweeter" than others, and obviously the oak on the edge of our property produces tasty ones.  So I've gone back to only collecting these rather sad looking acorns, which the hens do appreciate.  My advice is to definitely run a test on any acorn available to you before you go to the trouble of collecting more than a handful.  See if your livestock will eat the acorns from any given tree, and don't rely on appearance as an indicator of feed quality.

A note too about storing the acorns you do collect.  Do not keep them in plastic bags or buckets, even if left open and uncovered.  The acorns give off enough moisture so that the ones on the bottom will start to sprout in just a week or two.  A canvas or burlap bag will breathe enough to prevent this, as will baskets made of wire or natural fibers.


If there's something else I promised to report back on and have forgotten about, please remind me.  I'll do my best to follow up!

Tuesday, December 13, 2011

PASA Conference Coming Up

Here's my annual publicity for PASA's Farming for the Future Conference.  I've been attending this conference for the last four years, and have always come away excited, energized, and having learned many useful things applicable to my homesteading endeavor.  The conference is held at the beginning of February each year in State College, Pennsylvania.  If you're interested in the sorts of topics I cover here on the blog and reasonably local to PA, I suggest you consider attending.

In the coming year I'll have the honor to be presenting with the man who first inspired me to start keeping a tiny flock of backyard chickens at the PASA conference four years ago.  Harvey Ussery will be leading an all-day pre-conference track on Integrated Homesteading.  I'll be playing backup.  Harvey is more than capable of presenting a knock-out presentation all by himself, as I have seen more than once.  He's concise, well-spoken, and his talks are carefully honed.  He does not waste the audience's time.  My hope as a novice speaker is to not look incompetent by comparison.  Frankly, I'd rather be learning than teaching, but it's hard to say no to an invitation from someone I admire so much.

From now until December 31st, you can receive an early bird registration discount, and additional family members receive discounted registration as well.  There are many ways to reduce the cost of conference registration if you want to attend but need to watch your pennies; everything from scholarships, to facilitated carpooling, to a WorkShare program.  So check it out even if you think it's not in the budget.  The next conference is going to be an even better deal than in previous years, because PASA has decided to pack an extra workshop slot into the two-day conference.  So I'll be able to attend six 80-minute talks instead of five.  I look forward to all the other wonderful extras of the conference as well: picking up free shipping coupons from Johnny's, checking out the free seed-swap table, the local cheese tasting, free live music in the evenings, a free seed packet or two from various seed vendors, the great quotation posters, a wonderful fund-raising auction with so many lovely and useful items, and all the unpredictable things I'll learn from formal presentations and conversations with other attendees.

I'd love to see some of you there, whether at the Integrated Homesteading track or the main conference.  If you plan to attend, please drop me a note.  If you can't attend, I'll most likely to a summary post after the conference, detailing some of the highlights and things I learned.

Saturday, December 10, 2011

More Hoop House Details


I promised another post on the features of our hoop house.  Despite the fact that it's still not quite complete, the hoop house is doing well and demonstrating its productivity.  Typically, protected growing space is some of the most expensive in any garden or on the farm.  Our hoop house was definitely no exception.  I don't have a figure for what we've spent on this project, but I'm guessing it's close to $1000 all together.  That makes it about $10 per square foot of growing space.  And given that our laying hens are occupying one-third of that, the productivity of the remaining two beds is under a lot of scrutiny.  I know we'll get many years of use out of the hoop house, and thus the cost can be amortized.  But I'm still very conscious of needing to maximize the value of that space.

The seeding of the hoop house, like everything else associated with this project, was a day late and a dollar short this year.  Mostly it got planted at the end of September and very early October.  Nonetheless, most of what I planted seems to be doing at least tolerable well.  I experimented with turnips (planted a little too early, if anything), cylindra beets and some piracicaba broccoli (probably a tad late), catalogna dandelion (doing very well, wish I'd planted more), many transplanted volunteer lettuces and cilantro from the main garden (all looking happy and gorgeous), tatsoi (happy, but seems to be beloved of whichever pest found its way into the sheltered space before winter arrived), carrots and scallions (very happy and well timed) a few snow peas (rather small, but seem to be hanging in there), some sort of Asian brassica that I got on sale from Johnny's (nice cooking green, another one I wish I'd planted more of), as well as a few perennial herbs which seem to be biding their time.  So I'm well rewarded by the sight of happy plants each time I go out to the hoop house.  That said, I mostly want to show off a bit of the infrastructure today.


The hens are once again overwintering on deep bedding.  As usual the bedding is primarily free wood mulch from the yard waste facility in our township.  This year I also put some fallen leaves in there.  These high-carbon materials will absorb and balance all the manure (high in nitrogen) laid down by the chickens during the four months or so of their winter confinement.  In my experience during the last two years, the litter never smells bad and the girls constantly scratch through and mix their wastes into it.  In the spring what is left is a rich, inoffensive, bioactive, nutrient-packed fertility mulch for my fruit trees.  I was asked whether this didn't pose a risk to these trees, since excessive nitrogen can lead to fire blight on growing trees. I haven't seen that on the pear and apple trees that have benefited from previous years' litter treatment.  My feeling is that because there is so much microbial life in the litter, most of the nitrogen and other nutrients are bound up in the bodies of living things, and thus only become available to other organisms where the litter is laid down very gradually.  This is a far cry from what happens when sterile chemical fertilizers are dumped into the ecosystem of the topsoil.  I will be watching the bedding closely however.  We've got more hens this year, and less square footage per bird.  The rule of thumb that Joel Salatin proposes is a minimum of four cubic feet of deep litter per bird.  Supposedly at that stocking density the litter will never turn nasty.  We're right up against that number, so we'll see what happens.

There are a few major benefits of the hoop house over the shed, as far as winter housing for the hens goes.  The first is that we didn't have to sacrifice one third of the space in the shed to them this year, and won't ever have to again.  The second is that the deep litter bedding in the shed, being raised up off the soil, sometimes froze solid, despite the carbon-nitrogen balance that should have provided for enough microbial activity to keep the pile generating its own heat.  This required me to get into the bedding and turn it over with a pitchfork from time to time, otherwise the manure built up on the frozen surface.  It's certainly true that we haven't seen the worst of the winter weather to come.  But given that the lack of air space under the bedding, I very much doubt the bedding will freeze inside the hoop house.  The other main benefit is the added light and warmth of the hoop house compared to the shed.  The doors of the shed face north, so the hens got no direct sunlight at all in previous years.  I did open the doors all day in all but the worst weather though, so the temperature was always cold in the shed.  The hoop house gets cozy warm inside on sunny days, even when the temperature is well below freezing.  This saves on feed costs for me, since the girls don't need so many calories to keep themselves warm.  Whether the deep litter is actually generating heat as well, I couldn't say.  I don't have a compost thermometer, so I have no way of distinguishing the sources of the heat in the hoop house.

Given the overall cost of the hoop house project, it was important to me to pimp out the hoop house for as little money as possible.   Most of the following tricks and accessories cost very little money.  While some of these were doable largely by making use of fortuitous chance, I hope some of them at least will be useful to others who have or are considering a hoop house.


In the center of the hoop house I've place a truck bed storage box - one of those things that sit across the bed of a pickup truck and provide a lockable compartment akin to the trunk of a car.  (The garbage can sitting on top of it holds the chicken feed safe from dripping condensation and rodents.)  This one came with our beater pickup truck, but we didn't need it.  I thought it would make a pretty good seat between beds.  More importantly though I noticed that it was black and that it could hold water.  Black things absorb solar warmth, and water has a high thermal mass.  So I filled the bed box with as much water as it will hold (with some soap and salt added to make sure it doesn't become a breeding ground for mosquitoes).  Now it's doing double duty as a bench and a heat sink.  The other use I might want to turn it to one day is as a large vermicompost bin.  I suspect it wouldn't be great for worms in the summer time, but I'm mulling it as a possibility for next fall and winter.  That could provide a nice homegrown source of protein for the chickens next year.


My next trick is one I've used before in the garden - reflective material along the north side of the hoop house that maximizes the natural light the plants receive.  This time I've added a cheap space blanket that I found at a 99-cents sale.  I got one for each car and our emergency kit at home, plus one for the hoop house.  Now I wish I'd gotten two for this project.  It's highly reflective and it probably also acts as thermal insulation.

Then there are the low hoops over each growing bed.  These were invaluable while the hoop project was still under way.  They were the only protection the plants had from frost for a while there, before the sheeting went on the big hoops.  Now the low hoops give a second layer of protection, keeping the temperature in the beds even warmer overnight.  In fact, on sunny days I need to get out there and raise the plastic off the low hoops lest the plants get cooked.  Fortunately, with the hens in the hoop house, daily maintenance is built into the schedule.

Predictably, before the house was completed and before the winter weather even got too severe, some rodents took up residence on the margins of the hoop house.  There were plans to place 1/4-inch hardware cloth around the perimeter of the house at ground level.  Our delay on that part of the construction allowed the mice, or voles, or whatever they are, to move in.  It's still the plan to install the hardware cloth.  In the meantime, I knocked together a trap box based on Rob's vole motel, but so far I haven't figured out what bait will snare them.  Either that or the neophobia (fear of new things) common to many rodents has kept them safe.  I know they've been through my box; the dirt tracked into either side confirms this.  If the peanut butter bait still hasn't worked in another week, I'll try something else.  So far my carrots don't seem to have taken any damage, at least not at the surface where I could spot it before harvest.  Who knows what's going on underneath though.


Here's one I'm rather pleased with.  I built myself a weeding/harvesting board with an extra cross piece that extends my reach across the beds quite effectively.  This was a scrap piece of the 2x6 cedar wood that we used to construct the raised beds.  I tricked it out with some risers and braces underneath so that it is stable on the edges of the beds and doesn't completely flatten the growing plants.  The sitting board allows me to easily reach the far side of the beds.  When I rest the cross piece on the sitting board and far edge of the bed, I can lean way out for wider access across the beds.  I put some wood sealer on the boards, a useful measure given how humid the hoop house is.


Okay, more tricks.  To use every bit of space that possibly can be used, and to eke out as much productivity as possible, I scrounged through the pile of stuff we've pulled out of construction site dumpsters and came up with a simple shelf.  I hung it from the purlin on the north side of the hoop house.  With the sun low in the sky from fall through early spring, the shelf doesn't cast a shadow on the raised bed below it, so no light lost to the growing space.  Right now I'm only using the shelf to store oyster shell for the hens and a few other items.  Come springtime, this shelf and others like it will increase my growing space.  They will be ideal spots for vulnerable seedlings in trays, keeping them well out of reach of our unwelcome rodent guests.


Our hoop house has lighting too, which is for the benefit of the hens rather than the plants.  We happened to have an extra fluorescent hanging lamp lying around in the basement, and it just so happens that the previous owner of our home ran electricity out to the shed.  So rigging the lamp from the ridge pole of the hoop house and running an extension cord to the shed was no big deal.  As I have done the previous two winters, I am lighting the hens with the help of a timer to keep them productive over the winter months.  It took quite a few hours of lighting them at first to bring them back into laying.  Right now we have mostly heritage breed hens, and they had all stopped laying for the winter season.  Now that we're getting a decent number of eggs each day, I may try slowly cutting back the hours and/or removing one of the two bulbs to save on the electricity bill.  My understanding is that it would require an enormous amount of lighting to make any difference to the growth of the plants.  That's not something I'm interested in paying for.  As far as I can see, the fact that the plants are practically in stasis is one of the main benefits of winter hoop house growing.


An indispensable accessory for the hoop house is the common broom.  A pair of brooms helped us coax the plastic sheeting over the large hoops.  It also allows me to gently push up the sheeting from the inside to coax  accumulating rain and snow off the sheeting.  I keep one in the hoop house at all times.


A not so cheap aspect of the hoop house are the multiple self-ventilating windows.  I had intended to content myself with just one of the expensive piston openers when I spotted them on sale at Johnny's.  Unfortunately, I didn't communicate this to my husband, who spotted the same sale and purchase two for me as an anniversary present.  We decided to indulge ourselves and not return any of them for a refund.  So our hoop house is going to be very well ventilated when my husband finishes installing them.  The way these work is that the piston contains a temperature-sensitive fluid that expands as it warms and condenses as it cools.  So as the temperature increases, the piston opens the window automatically, then closes automatically when the temperature drops.  It sure is a nifty trick and I admit that it saves me the need to pay a lot of attention to what's going on in the hoop house.  Still, even on sale, these things weren't cheap, and I would have contented myself with fewer of them under different circumstances.

The final feature I want to mention is one that I can't take a picture of.  We built this hoop house and arranged the beds directly over the surplus heat dumping coils for our solar thermal array.  We actually requested the placement and configuration of those coils with the hoop house project in mind.  Right now we're not shunting any heat whatsoever to the coils, because it's wintertime, and we need every bit of heat we can collect from the solar array.  So presently we have an unheated hoop house.  But come the shoulder season in spring, when our heating demands go down in the house, we will be able to divert some of the heat from the array into the ground underneath the hoop house.  The same could be true in the fall shoulder season as well. It remains to be seen whether or not this will provide any advantage.  It may be that by the time we have excess heat to vent from the array, the hoop house will already be quite warm enough.  There is an alternate heat venting system that we would use in that case.

I expect having the hoop house will change the growing routine around here quite a bit.  I'll be able to start plants earlier in the year, and keep a small number of them carefully manicured in there year-round.  I'm thinking about implementing some proper square-foot gardening in there to really max out the potential of covered beds.  I'll need to learn how best to use the extra heating that should be available in spring and fall; an unusual set-up in hoop houses that have heating available.

Monday, November 14, 2011

A Nice Barter Arrangement

With the beginning of cold weather, I've been reaching for canning jars of homemade chicken stock a lot lately.  So much so that I'm completely out, not only of chicken stock, but of any stock whatsoever.  I don't like being without this building block of good soup, which is so fortifying at this time of year.  I have a few carcasses from roasted chickens saved in our freezer, but I know they're not going to make as much stock as I'd like to be putting up right now.  Buying commercial stock, even the organic brand that I used to buy, just isn't on my radar these days.  As anyone who's made their own knows, store-bought stock just doesn't hold a candle to homemade.

So I started looking through the market lists of the grass-based farms in my area.  Even though I'm fully aware of how much work goes into raising healthy, ethical food, I'm still often initially surprised by the prices of animal products from these businesses.  My next thoughts are always the same: the prices are fair, given what I know about labor and materials costs for this type of production, and given the methods they employ which show a proper respect for the environment; and to boot, none of these farmers are getting rich on the prices they're charging for the foods they offer.  Still, when I saw the price of the chicken backs and bones from other animals that I would need for making stock, I decided to try a different tack.

I asked my Farming Friend whether she might be interested in bartering finished stock for the bones to make it, a 50-50 split.  I know she likes to cook with stock, but she's a very busy woman, and I figured she wouldn't mind having someone else do the work.  As it turned out, the offer was especially attractive to her, because she doesn't have time to do the canning.  She has typically frozen her stock, but that ends up using too much of her freezer space, which is at a premium for the meats that she sells.  So I told her I'd be happy to make and can as much stock as she has bones for over the winter months.  It's a win for me because I get free bones and I can do this work when the demands of the garden and livestock are minimal.  As a bonus, the heat generated by the roasting, simmering, and canning processes will be most welcome in the house at this time of year.  She has agreed to return the canning jars and the re-usable lids and rings that I use.  And she'll send lamb and goat bones my way any time she has them on the same barter basis.

I'm always so tickled when things like this work out - a benefit for both parties.  I trust her to produce good, clean food.  She trusts me produce tasty and safely canned stock.  I call that win-win any day, and I'd like there to be more bartering in my life.  It's something I sometimes feel shy about proposing to people, even though no one has ever seemed offended by the idea of barter. 

I'd be curious to hear about any barter arrangements you have.  If you barter, were you the one to propose the exchange?  Have you ever been turned down on an offer to barter?  Any tips on how to successfully arrange bartering agreements?

Tuesday, November 1, 2011

Back in the Loving Arms of the Grid


The freak Halloween storm that visited the northeastern US left us without power for most of the weekend and Monday.  On Saturday we watched as heavy flakes of snow fell, and kept falling all day.  This came just two days after the first light frost of the year, which came more than three weeks later than the historical average first frost date.  We hadn't even had a hard frost yet in this incredibly mild autumn season.  That meant that most of the trees were still fully garbed in their own leaves.  And that meant a large snowfall was a big problem.

On Saturday afternoon we went around outside trying to keep the worst of the snow off our fruit trees, young and old, and also off the plastic sheeting of the still unfinished hoop house.  This was accomplished with brooms and poles.  That went well; we had no damage to those trees or the little hoop house.  But the taller trees were much harder to protect, especially the very large shade trees close to the house.  All through the afternoon we could hear trees and tree limbs all around the neighborhood snapping and cracking; it was like a pan of popcorn popping, so frequent and regular were the sounds.  By noon we had lost power, and the phone went dead a couple hours later.  Outside we watched the occasional flash of electrical transformers exploding, waiting just a moment for the sound to reach us.  The audio-visual show continued well into the evening as the snow continued to fall.  After each nearby crack! I checked in anxiously with my husband to make sure he hadn't been hurt by a limb coming down.


I have to admit that even though we had advanced warning of this storm and its likely consequences, I prepared less well than I did for the hurricanes of August and September.  We skated through those storms with barely a blip.  Not so much this time.  I did make sure the dishes were done and that we had water on hand to flush toilets and for drinking.  I showered on Friday night and even filled our large thermos with hot water so we could wash our faces.  But I didn't gather our oil lamps, matches, and flashlights, and didn't fill the empty space in the chest freezer with bottles of water to move to our refrigerator.  Now we keep plenty of stored water on hand all the time anyway, and we did have everything we needed to weather such a storm and power loss.  The large chest cooler got cleaned on Sunday, loaded up with plenty of snow, and placed on the porch to accept the contents of our fridge and house freezer.  We had heat from the gas fireplace insert that I had carefully laid away batteries for in case of power loss; we had our gas stovetop range to cook on; and we were well supplied with tanks of propane to keep those going for quite a while.  All in all we were fine.  But I still felt as though I'd been caught flat-footed.

The funny thing is that just Saturday, after listening to Nicole Foss's description of how she prepared her family for life after peak oil, I had talked with my husband about getting some deep cycle marine batteries to carry us through a few days of power outage.  Or rather to support the truly essential functions of the house through a power outage.  We had talked about installing some PV panels a while back, and part of that project was to include a battery backup so that we would have power in the event the grid went down.  Given our budgetary constraints we decided that solar thermal was a higher priority, so the PV system could wait.  And when the grid went down this weekend, so did all the benefits of our solar thermal system.  It made sense to me on Saturday morning that we should ensure at least a few days' supply of electricity to at least keep our chest freezer working, to keep water moving through our radiant heat floors, out through the sump pumps in the basement, and also out of our taps.  Everything else we could do without, I thought.  And after 48 hours or so without electricity, I still think so.  Flashlights and oil lamps were no big deal.  It was an inconvenience not to have a working oven, because we were out of bread and couldn't make any more.  But everything else in the kitchen was manageable with no electricity and a limited supply of water and light.  Even if we never scrape up the money for a PV installation, the batteries themselves would provide a large benefit in the case of future power outages.


Although the fallen limbs caused no damage to the house, the garden or the hoop house, that's not to say we came through completely unscathed.  Far from it.  The entrance to our house was a scene of devastation.  The driveway was blocked by two large limbs, with another heavy limb resting too much weight on our split rail fence.  The fence in the backyard fared even worse.  One half of a large split mulberry came down across the corner of the fence, taking out four panels.  At least it spared our newly planted Ashmead's Kernel apple tree.  The trellising for all our black raspberries took the brunt of the fall and is almost certainly toast, but the canes themselves probably don't care about any damage suffered during this time of the year.  We needed to revamp those trellises anyway.  On the other hand, the poultry schooner caved in completely from the weight of the snow.  It was waiting in the garden for the tilling power of the chickens.  Somehow as we were knocking snow off other structures we just didn't pay attention to it sitting out in the open there.  Still, we think it's mostly salvageable, and should be good as new with a few new pieces of lumber.

The thing that struck real fear into my heart during this storm was the massive tulip poplar tree that stands where our driveway meets the road.  This tree towers over our house.  If it had lost even one major limb, chances were good that either the road would be blocked, or our house would be very seriously damaged.  Fortunately I recognized that there was really nothing I could do about it and managed mostly not to worry about it.  We've had the tree checked by an arborist who pronounced it in excellent condition, so we'd done due diligence.  More fortunately still, it took almost no damage at all.  It's rather stunning to compare the damage the magnolia, which stands right next to it, took.  We'll be cleaning up the debris from the storm for the next few weeks at least.

Since I'm currently in a glass-half-full state of mind, I see all the fallen trees as material for a hugelkultur mound or two (something I've mulled before, but we didn't have enough wood until now), and as more sunlight next year in our front yard and the garden too.  We have a WWOOF volunteer arriving this evening who will be able to help us deal with the additional work load.   And we had already planned to replace a good portion of the fence anyway, in pursuit of a slow-moving hedgerow project.  It may be that due to the storm damage, we get a little bit of money towards that effort from our homeowner's insurance.  And of course, the storm gave me a valuable lesson in living in this home without electricity.  No thought experiment or advance preparations were quite the same as actually dealing with no power. 

I hope all my readers in the path of this storm came through without any harm.  If you were affected by it, please let me know how it went for you in the comments.

Friday, October 21, 2011

Giveaway Winner

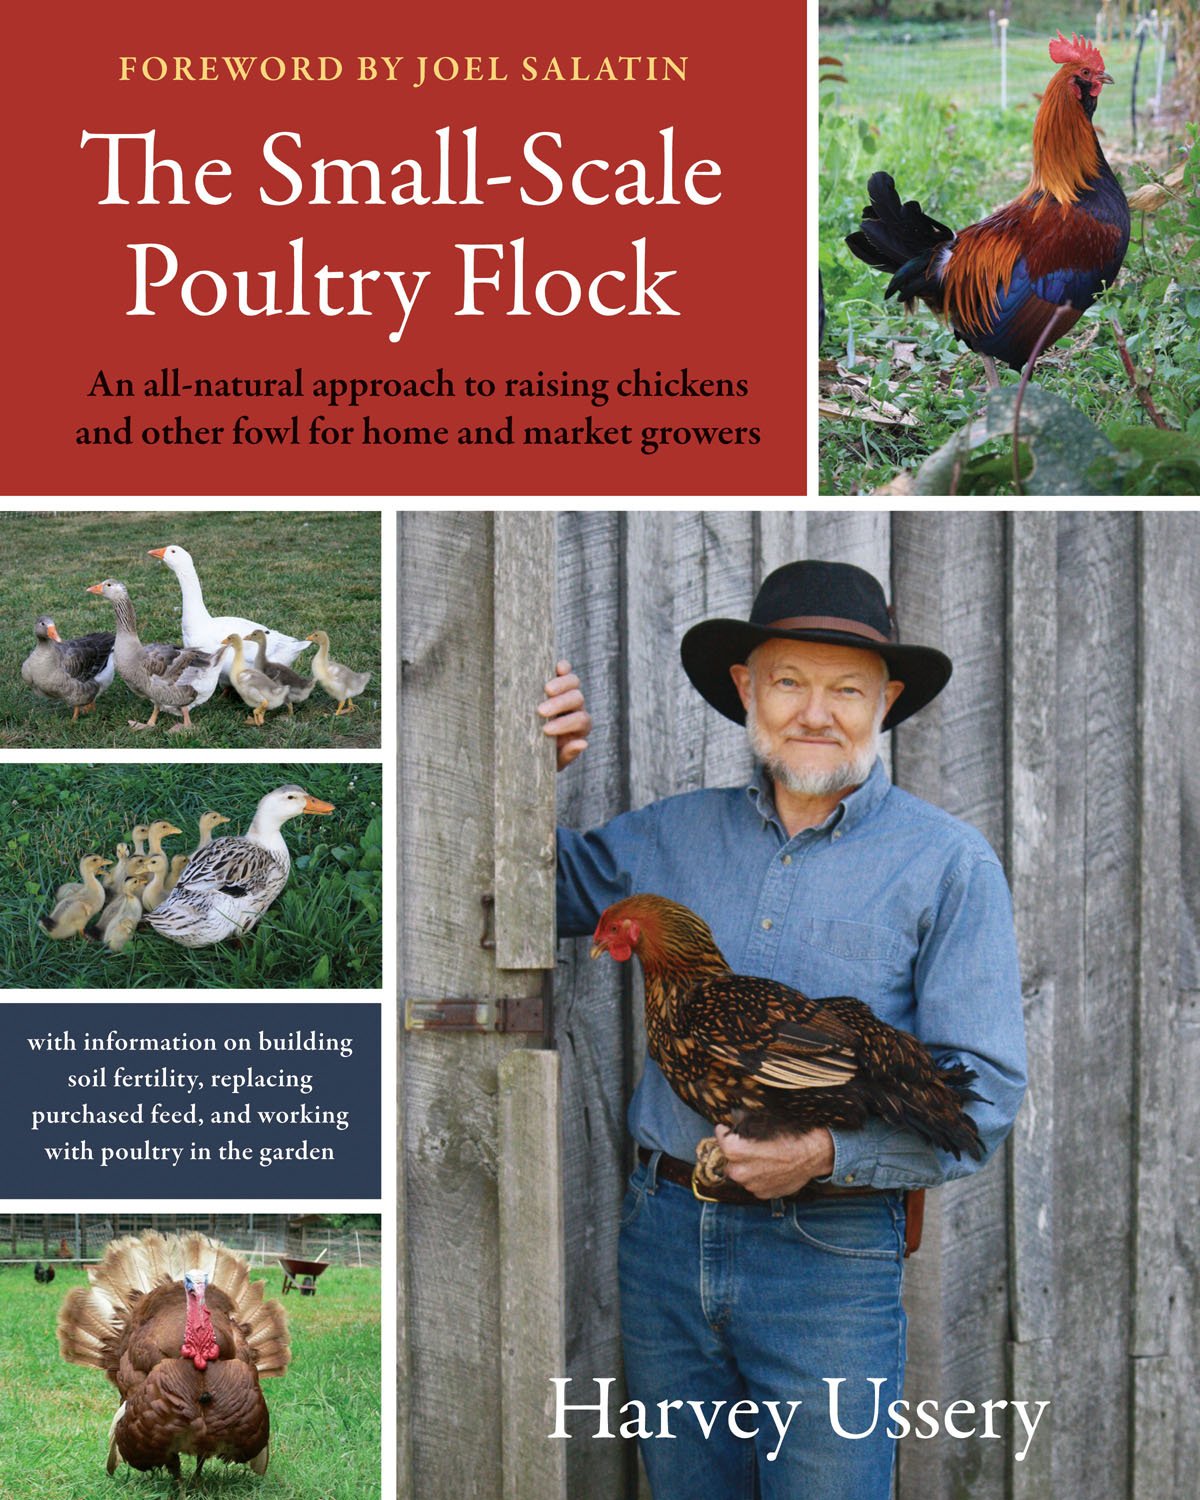
The randomly chosen winner of the giveaway for The Small-Scale Poultry Flock is Alexis, Baron von Harlot - an Aussie reader who blogs at Lexicon Harlot.  Congratulations, Alexis!  Please leave your contact information in the comment section, and I'll get the book out to you just as soon as ever I can.  Your comment will not be published.

Thanks so much to those of you who entered the giveaway and shared your fantastic frugality and homesteading tips.  I really enjoyed reading them and hearing what all of you are up to.  It's encouraging to hear about so much ingenuity and general thriftiness out there in the big world.  I hope you all have checked out the tips and tricks in that comment section.

Those of you who didn't win, I recommend you find some way to check the book out nonetheless, whether by buying it or asking your local library to acquire a copy for you to peruse.  In the event I don't hear from Alexis by Tuesday next week, I'll generate another number and try with another winner.

Wednesday, October 19, 2011

Cooking an Old Hen, with Knefles


When we slaughtered the last of our broiler chickens towards the end of September, we also dispatched our two Cuckoo Marans hens at the same time. The Cuckoo Maran is a dual-purpose chicken, which means it divides its energies between laying eggs and putting meat on its bones. We found the legs on the Cuckoos quite sizable, though the breasts weren't all that much to write home about.  After butchering the birds into cuts, I put the carcasses into the freezer to save for making stock and rendered all the fat into schmaltz to use for sumptuous roasted potatoes and other vegetables. Given my penchant for frugality and the amount of meat the two Cuckoos yielded, I decided to try again to make old hen meat palatable.

I had tried the time-honored coq au vin recipe with a previous batch of hens to no avail.  Still, to buy myself some time, I let the cut up legs, wings, and breasts marinate in some cheap white wine in the fridge for three days.  Maybe this was excessively long for marinating, but I was hedging my bets as well as simply being too busy to get to it sooner.

I had ambitions for experimenting with several different methods for cooking the meat, but as it happened the one that I managed to execute worked out pretty well.  So I'll outline what did work.  I started with a few diced onions cooked in olive oil just until they were softened and then lightly seared the chicken parts in the same pan.  The onions and chicken went into a bowl with some of the white wine marinade (enough to come about halfway up the meat in the bowl) and then were cooked in my pressure cooker for 45 minutes, at about 10 pounds of pressure.  When that was done, the meat was reasonably tender, so I gave some thought to how I might use it.  And here we come knefles and to what I can only hope is a worthy divagation.

Chicken and dumplings is a time-honored American dish for good reason, and I felt like going in that direction.  But it was cold outside, and I wanted something a little denser than the light biscuits that feature in the classic southern supper.  So I thought of knefles, a culinary guilty pleasure of mine.  I found the recipe in a fortuitous reprint of a delightful old cookbook, Cooking With Pomiane.  The book is genteelly dated and well worth the read, more of a tour through a charming bit of culinary history than a cookbook for our times.  But the recipe for knefles has proved an exception and earned a place in my kitchen repertoire.  They're a sort of Gallo-Germanic pasta that would be considered an abomination by the Italians, which, I grant you, isn't saying much.  The Italians think that any deviation from the particular pasta of their own particular region results in something fit only for barbarians.  Knefles, which hail from the Alsace region, would be distinguished then by the unanimity with which Italians of every region would heap scorn upon them.

So what are knefles?  Just a rough dough made with flour, milk, and egg, then scooped up by the teaspoonful.  You knock the scoops of dough into boiling salted water as you make them one by one and cook for ten minutes.  That's it.  Sort of like gnocchi, or schupfnudeln, or spaetzle, but not really any of those things.  Knefles are easier to make and less refined.  You can sauce them when they're cooked, or add a little butter and cheese and bake them, or you can play around with them like I do.  I like to add lots of finely minced fresh herbs from the garden to the dough.  I'm fairly certain that it's incorrect, but I pronounce the K in knefles.  It reminds me of Roald Dahl's vermicious knids.  And how likely am I to run across anyone who could authoritatively correct my pronunciation?

To get back to my harvest meal, in this case I used knefles as replacements for the dumplings in chicken'n dumplings.  So I put some chicken stock on to boil with the remaining white wine from the marinade, threw in the onions that had pressure-cooked with the chicken cuts, added some thyme and made a batch of knefles with chives and garlic chives in them.  Here's the recipe, which can easily be doubled:


Knefles

1/2 pound (~230 g) flour (1 1/2 generous cups)
finely minced fresh herbs to taste (optional)
1 egg
about 1/2 cup (~24 cl) of milk

Combine the flour with the herbs if you are using them.  Mix in the egg and then enough of the milk to make a thick, shaggy dough that is just a shade too sticky to knead by hand.  Work the dough with a sturdy spoon for a few minutes in the bowl to develop texture.  Bring salted water or another cooking liquid to a brisk simmer just shy of full boiling and begin to shape the knefles.  Using the tip of a teaspoon scoop up a small hunk of the dough, only enough to cover about half the spoon.  Dip the spoon into the boiling water and knock it firmly against the rim of your pot.  The dough will fall into the water.  (Avoid the urge to scoop more dough and make bigger knefles.  The dough will expand anyway when cooked, and bite-sized knefles cook through better than large ones.)  Repeat until all the dough has been shaped and put into the water.  Stir the contents of the pot once very gently to detach the knefles from the bottom of the pan.  Cover the pan and adjust the heat so that the knefles cook at a steady simmer for ten minutes.  The knefles should have doubled in size and all be floating. Test for doneness the first time you make them, just in case you made them too big.  Then drain and sauce to your liking. Serve hot.

I cooked the chivey knefles in the chicken stock and wine, adding chopped garden carrots when they were halfway done.  While that cooked I took the chicken meat off the bones and tore it all into bite-sized pieces.  When the knefles were finished cooking I added the shredded chicken meat, some frozen peas and chopped parsley to the pot and let those ingredients just heat through.  This was all served up in a thoroughly non-photogenic mess.  What can I say?  The light in my kitchen sucks.  But the mess went down very nicely, very tastily indeed.  Since my childhood didn't equip me with nostalgia for chicken'n dumplings, I have to say that old hen'n knefles is a superior dish in my book.  This definitely counts as a harvest meal for us.  On our sub-acre lot we produced the hen, chicken stock, eggs, carrots, and all the herbs that went into the dish.  I happened to use purchased onions for the dish, but it could just as easily have been made with homegrown leeks.

An illicit glee invariably accompanies the preparation and consumption of a dish so comfortingly barbaric.  At least for me.  We always have the ingredients on hand, so it's sort of surprising that we don't indulge in them more often.  Knefles are about as cheap as anything you could possibly prepare at home.  Even a single batch makes more than two adults will eat as a side dish.  I sometimes save half the dough in the refrigerator and make the rest the next day.  The dough won't keep much longer than that, though surplus cooked knefles can be held in the fridge for a few days.  Put a little oil or melted butter on extras while they're still hot if you want to hold them; it will prevent them sticking to each other.  Cooked knefles can be pan-fried, but if you've refrigerated them try to bring them to room temperature first and cook them slowly and gently so they heat through without burning.  If you want to pan-fry freshly cooked knefles, spread them out to air dry for a few minutes so they'll brown a bit better.

If you make any similar sort of dumpling-y, comforting dish from flour, potatoes, or other starchy ingredients, I'd love to hear about it.  In detail, of course.

Monday, October 17, 2011

Hoop House is Coming Together


We've been struggling to get our tiny hoop house project done, racing the first frost of the season, which has been remarkably dilatory in arriving.  Not that I'm complaining, believe me. This project was slated to begin in June, and technically, it did.  It's simply been a series of one delay after another.  Unreasonably hot summer weather accounted for some of the delay, a general gardening funk on my part contributed its own special languor, needing to stay out of the way of a contractor helped us delay some more, and then my husband's broken thumb came along, right when we really needed to get down to business.

But we're finally getting somewhere.  The bones of our 12'x15' hoop house are up.  The raised beds are in, and even planted.  All the stuff we needed to attach to the frame before the sheeting went on is done.  We used up almost an entire roll of duct tape covering up anything that might possibly wear or tear the plastic sheeting.  And the sheeting is on, though not shown in the picture above.  Now we just need to get the ends framed in before it's too cold to work outside.  This will be a big job, and probably as jury-rigged as the rest of the structure.

I went ahead and planted two of the beds when I just couldn't stand it any longer.  I was worried about missing the window of opportunity with the seeding dates.  It was a rather haphazard seeding job, and a groundhog helped itself to some of my lovely seedlings, but at least there's some greenery in there for the inaugural winter.  Two of the beds measure about 3.7'x9.5',  and the third 3.7'x11', giving us a bit more than 110 square feet (10.3 square meters) of bed space.  We'll only be growing food in two of these over the winter however.


The third bed is going to house our chickens over the winter on deep litter bedding.  This saves us the hassle of rebuilding the winter quarters we've provided for them in the shed the past two years.  We've built a containment system out of green garden netting in that bed,the farthest one in the picture above.  This space is just a bit larger than the 30 square feet (2.8 square meters) the hens get each day in the mobile coop and pen system they're in most of the year.  It includes feeder, waterer, a "bleacher" double roosting bar and a nesting bucket for them.  Right now they're just testing out the new digs.  They'll soon be putting in more light tilling and weeding service elsewhere until winter is well under way.  In theory the chickens' body heat will nudge up the temperature in the hoop house a little bit, thus helping the plants.  I say in theory because even in so small a hoop house as this one, four chickens can't possibly make much difference.  But we shall see.

I've got a few more tricks up my sleeve to try out and write about in the mini-hoop house.  So there will be more posts on the hoop house as we put the finishing touches on it, move through the seasons, and learn to make the best use of it.  Stay tuned.

Thursday, October 13, 2011

Giveaway: The Small-Scale Poultry Flock


As I mentioned in my book review of The Small-Scale Poultry Flock, I received two complimentary copies of this book.  So I'm hosting a giveaway to share the bounty with my readers.  This is a fantastic book for all homesteaders, urban chicken-keepers, and those who have yet to acquire their first small flocks.  If you haven't seen my review of it from last week, you may want to check that out.  By all means, do visit the author's website, The Modern Homestead.  It's full of thoughtful insights and useful information for anyone interested in moving towards self-sufficiency on a small acreage.

I mentioned that there was other news to do with Harvey Ussery.  I was thrilled to hear that he would once again be speaking at PASA's Farming for the Future Conference, which I attend each year in early February.  Hearing Harvey's presentation at this conference  four and a half years ago was what inspired me to start my own backyard flock.  But then, to my utter amazement I got an email from him a few weeks ago asking if I would like to co-present with him during his all day pre-conference homesteading track.  I went through a rapid series of thoughts and reactions, all centering on my paltry amount of experience as a homesteader compared to his two and a half decades in this vocation.  I was floored, honored, uncertain, hesitant, and thrilled.  In the end, I provided plenty of caveats, but ultimately said yes.  So!  I'm going to be presenting at next year's conference if only as a junior member to a seasoned and top-notch speaker.

I've encouraged my local-ish readers to attend this conference before, and I've written up summaries of things I've learned from this event in past years.  Now I can say, come introduce yourself to me at the conference.  Even if you've already read (right here on the blog) much of what I'll be talking about, you will learn a lot from Harvey Ussery, and I guarantee you'll come away loaded with enthusiasm and motivation.

Onwards to the giveaway.   Up for grabs is one copy of The Small-Scale Poultry Flock.  This is not exactly a freebie giveaway; I want something in exchange for your chance to win.  I'm asking for a comment with your best frugality, homemaking or small-scale homesteading tip.  I want to see some creative ideas here, people, not the obvious beginners-level ideas you find in the most simplistic magazine articles.  Tell me your secrets for saving energy, making a delicious meal on a dime, a great gardening trick, a labor-saving tip for any part of the homestead, a special recipe you use for canning, lacto-fermenting, or curing the foods you put up,  or anything else clever you've come up with that fits in a homemaking or homesteading category. 

Tedious stuff you should read anyway:  One entry per person.  Entries for this giveaway will be accepted until Wednesday, October 19th at 6pm, Eastern time.  You must either be signed in to some account that will easily and obviously lead me to a way to contact you, or else leave a means of contact in your entry comment.  Anonymous comments that do not include an email address will not be considered as entries for the giveaway. Winner will be chosen randomly from all valid entries, which must contain the aforementioned tip.  The winner will need to disclose (privately, to me only) full name and mailing address.  I'm opening the giveaway this time to readers from overseas, so get your comment-entries in.  I'll announce the winner by Friday, October 21st.  If I can't reach the winner in a couple of days, I'll select another and try again until it all works out.

Good luck!

Edit 10/19/2011: Comments are now closed.

Wednesday, October 12, 2011

Tiller Hens and a Reconsidered Routine

Our hens moulted about five or six weeks ago, and are slowly regrowing their feathers.  This is a calorically intensive process, and so our egg supply has fallen off a cliff.  On a good day we get two eggs from four hens; on the not so good days, one or none.  It doesn't help that we slaughtered the two Cuckoo Marans hens that were the more consistent egg producers with the last of our broilers at the end of September.  The Cuckoos were younger birds, but my experience suggests that their egg laying becomes pretty sporadic after the first year of laying.  Aside from that, the Cuckoos were much flightier than our Red Stars, who I'd made a point to handle regularly during their winter sojourn on deep litter bedding in our shed.  While the Red Stars aren't exactly thrilled about me picking them up, they tolerate it pretty well instead of panicking as the Cuckoos did.  I suspect it's all down to conditioning and handling rather than reflective of innate disposition of two different breeds.  The breeder we got the Cuckoos from didn't habituate them to being handled.

The reason this is all relevant is that I needed the hens to do some weeding and tilling for me this fall.  I knew the Cuckoo Marans would never be easily moved from one spot to another.  Getting the hens in and out of the poultry schooner requires twice daily handling, since the schooner must be positioned over each garden bed and maneuvered carefully around beds that still have plants on them.  The hens go back into their mobile coop each night, leaving me free to reposition the empty schooner.  Dealing with hens that were terrified of me wasn't on the agenda.  So the Cuckoos met their end with the last of our broilers, and went on to a useful afterlife of chicken stock, schmaltz, and a hearty dish of chicken and knefles, which I may tell you about sometime if I find the time.

The remaining hens, our Red Stars, are now earning their keep by clearing a large weed infested area for me.  This is the bed we referred to as the three sisters, where we meant to grow the three sisters crops this year: winter squash, beans, and corn (maize).  That came to nothing when labor was spread too thin and the bed never made it close enough to the top of the list to get weeded.  What the squash vine borers didn't kill, or the birds pluck out of the ground, or the long summer dry spell didn't kill outright, was overwhelmed by weeds of every stripe.  It was a jungle in there.  With the help of some garden caging that is easy to move around every day or so, the hens have weeded and lightly tilled this area into submission, while adding their own manure and mixing it into the soil.  Which is great; saves me a lot of time and prepares the area for some heavy-duty, remedial lasagna mulching.  It also gives me a chance to see the fanciful nesting box in action.  I banged this thing together this spring in anticipation of hosting a broody hen with some eggs.  The hen never materialized, but the nesting box was ready to go when I needed it for this project.  If they aren't earning their keep by giving us eggs, at least the hens are contributing labor and fertility in the form of their manure.

Weeded and yet-to-be-weeded areas are clearly distinguishable
 The hens eagerly hone in on each new slice of territory when I move the caging every other day or so.  That must mean that they've picked over the ground they've had access to pretty well.  In order to encourage them to scratch and till the ground I've adopted a feeding strategy gleaned from Carol Deppe's The Resilient Gardener, which I reviewed a while back.  Namely, I don't feed the hens in the morning while they're on tilling duty.  Their hunger early in the day motivates them to scratch down the weeds to look for grubs, worms, and other choice bits in the three sisters area.  I add plenty of garden cullings and whatever kitchen scraps we have.  Then late in the afternoon I provide them with some of their purchased grain feed.  That way they don't go to bed hungry and they have something to look forward to most of the day.

The afternoon feeding doesn't work with the mobile coop and pen we've been using most of the time since we got chickens four years ago.  In that system, the hens go into the coop in the evening and are locked in until I let them out the next morning.  I always try to let them out close to sunrise so that they're not literally cooped up and unhappy.  The time before I release them each morning is the only time during the day that I have access to the pen without them in it.  So I always provided their food and water first thing in the morning.  I like the late afternoon feeding not only because it gives me a more leisurely cup of tea in the morning, (though it's grand, let me tell you) but also because I think it saves money on feed.  The hens eat less when they've scrounged for themselves most of the day, even though they're currently regrowing their feathers.  This was precisely Deppe's reasoning for the afternoon feeding time - to conserve money when times are tough.  Seeing how well this works is encouraging me to consider ways of making this standard operating procedure for the hens next year.  I have to think on it some more over the winter, but we'll likely need to build new housing for them next spring anyway.  So it'll be a good opportunity to change things up.