Showing posts with label self-sufficiency. Show all posts

Monday, September 19, 2011

Slaughter Day

We sent our two largest broilers to ice camp on Sunday.  We didn't have any spare clean hands to hold a camera once we got started.  So I don't have any footage or even still pictures of the slaughtering process itself.  We're still in the market for someone to hold a camera while our hands are occupied.  But I did take some pictures just before we got under way.  I thought I'd share these and also some of the videos I've turned to for help figuring it out on my own.

Obviously, if this subject is going to upset you, stop reading now.  I think most readers here will be comfortable with this topic, and I think the methods we use are pretty humane.  But this is a post about killing animals for food.  If you're categorically opposed to such things, here's your notice.  

Our setup


A place to work - This is our solar cooking station equipped with a cutting board, knives, latex gloves, and containers to receive various parts of the chickens.  We save or use just about every part of the chicken except the intestines, gall bladder, oil gland and the head.  What doesn't come into the kitchen gets used or buried somewhere in the garden.


Slip knotted cords - these will hold each bird by the feet.  We have sometimes used a killing cone in the past, which takes care of the movement problem.  With the birds hanging freely like this you need two people to stabilize the chicken; one to hold the wings against the body, and another to hold the head as they bleed out.  The wings should be held closed because otherwise the bird can flap so hard that it bruises its own wings.  In a commercial operation the resulting discoloration would make the bird unsalable.  Stabilizing the head ensures that the movements of the bird (either voluntary or involuntary) don't send blood flying everywhere.  Holding the head at an angle away from the cut also speeds the bleeding out, thus hastening death and limiting the suffering of the animal.

Wheelbarrow with mulch - We situate this directly under the cords or the killing cone that holds the bird.  It will collect the blood from the chickens and be used around our fruit trees.  This saves on cleanup and preserves the value of the blood as a fertilizer.  For the number of birds we slaughter at any one time, even a small amount of mulch will suffice to soak up the blood; there just isn't that much of it.

Knives - A well-sharpened boning knife, paring knife and a cleaver.  The boning knife is used both for cutting the chicken's jugular and for the small amount of cutting needed during evisceration.  The paring knife is sometimes not used at all; it's there as a just in case alternative to the boning knife.  The cleaver is useful for decapitation and for cutting through the neck, which I've always had trouble doing with a boning knife.  If you don't have a cleaver, a good strong pair of kitchen shears might work for the neck.  Whichever knife is used for the killing cut needs to be very sharp in order to spare the bird as much suffering as possible, and working with a sharp knife during evisceration always makes things much easier.  We devote time to getting the knives ready the day before slaughter.  But as you'll see in the Joel Salatin video below, there's really very little cutting necessary in the whole process.


Scalding water - A large pot is required.  I use a water bath canning pot.  The water should be roughly 145-150F/63-66C.  I  heat the water above that temperature before hauling it outside, so that it's just right when we've gotten through the first few steps in the slaughtering process.  When slaughtering more than a couple of birds, I leave a kettle simmering inside so that we can top off the pot with hot water, keeping the water at the right temperature for all the birds.  The birds displace a lot of water, so the pot should not be completely full.  When it's chilly outside I set the pot on cardboard so that heat is conducted away a little more slowly.


DIY Chicken plucker - This works well for the very small number of birds we process at any one time.  It probably wouldn't be workable for anyone slaughtering more than a dozen birds at once.  A day ahead of time we make sure to have the batteries for the drill charged up.  When we're processing only one or two birds at a time, we sometimes don't even bother with the plucker as it's quick and easy enough to pluck a bird by hand if you get the scalding right.  We try to pluck the feathers into a garden bed that is ready for lasagna mulching.  Feathers are high in nitrogen and break down quite slowly.  So they'll feed the soil very gradually while adding a bit of structure for soil microorganisms.  Strangely enough, yellow jackets will steal the small feathers, for the protein content I suppose, if you don't cover them with mulch right away.  An older post of mine details the DIY plucker.

By the way, if you like your chicken skinless, you can skip the plucking entirely and just peel the skin off the entire bird.  This isn't a great idea if you plan to roast the bird whole, since the skin keeps the bird from drying out.  But if your birds are destined for other preparation methods, and you don't want the fat from the skin, you can save some time and effort.


Chilling bath - We use a cooler, filled with all the ice we have on hand and water from the garden hose.  This brings the temperature of the eviscerated bird down very quickly, and can hold 4-5 broilers, but really only one turkey at a time.  It's wiped down with a bleach solution before and after use.

Bags, scale, permanent marker, freezer - Once the birds are nicely chilled, I drain them as well as possible, weigh them, bag them up, and write the weight of the bird on the bag.  We let our broilers live a little longer and get a little bigger than many farmers so I use 2-gallon freezer bags, which I'll sanitize and re-use just for our own chickens.  I wouldn't like to count on our larger birds fitting into the 1-gallon bags.  The two birds we slaughtered on Sunday averaged just over 6 pounds (2.7 kg).  I put the giblets from all birds into one container, to be used when it's time to make gravy for the Thanksgiving turkey.  (We grill our turkey so we don't get pan drippings to work with.)  Then the birds and giblets all go off to ice camp. 


Instruction

I've learned all I know about slaughtering and eviscerating chickens by watching videos and doing it myself.  I've never come across a text description or even still photos that have helped me as much as video has.  Here's a sampling of videos that show the process in detail.  These first two videos don't show the exact method I use, and there's a lot of extra material covered, but they're definitely useful for amateurs and novices who don't have expert help on hand.


Respectful chicken slaughter - Part 1


I think it's an especially good tip to locate the chicken's jugular by feeling for the jaw.  I've never been able to precisely identify where a chicken's ears are, so that point of reference hasn't been useful to me.  The jaw can be easily felt.  You may not make a perfect cut the first time you do it.  When you get it right, you'll know by the steady stream of blood that the cut produces.  Practice makes perfect, though the obvious difficulty is that homesteaders work at such a small scale that getting enough practice on a regular basis isn't easy.  That's why I watch critical parts of these videos a few times over the day before slaughter.  


Respectful chicken slaughter - Part 2


Good tips in this video on how to use legs and other parts of the chicken.

Joel Salatin - chicken evisceration


If you're contemplating your first poultry slaughter yourself, you might want to study other homesteaders' take on the process.  Paula recently posted about her own chicken slaughter.  And Kristeva had a post quite a while back with good pictures.  If these videos and posts don't answer your chicken slaughtering and processing questions, I'd be happy to try despite my meagre experience.  On the other hand, if you have any tips that you'd like to share, please sound off in the comments.

Wednesday, August 17, 2011

Reducing the Canning Footprint

I had a minor freak out yesterday when, for a lark, I did a rough estimate of the energy costs of pressure canning.  On a recheck of my calculations I found a major error that put me off by a factor of 1000.  Oops!  After the error was caught I was relieved to find that - provided I started with water brought up to room temperature, and used a bare minimum of water, and ran a full batch through my pressure canner - I could can salsa for about one-sixth of a fossil fuel calorie for every calorie of preserved food.  If you want details about these calculations, find them in the comments.

The larger point is that this got me thinking about the carbon footprint of the food that I preserve.  Obviously, it's more energy intensive than the stuff we eat fresh out of the garden.  Going into freak out mode over what I erroneously believed was an absolute travesty of fossil fuel consumption made me scrutinize the food preservation process as a whole.  How could I whittle down the energy inputs to the food we preserve?  Here's what I came up with:

1. Can local products and minimize use of ingredients shipped from afar.  It makes sense to start with foods that don't have inherently high carbon footprints before they arrive in our kitchens.  Home canned food can only be as energy efficient as the ingredients that go into it.  Obviously, finding a substitute for sugar grown a long way off won't be easy for most people.  But we can opt to make lower-sugar jellies and jams.  It'll be healthier for all of us while also lowering our food miles.  Better still to can what we grow from seeds we start ourselves whenever possible.  Growing your own from seed you save yourself makes you a low carbon footprint rock star.

2.  Switch to re-usable canning lids.  Tattler lids are re-usable indefinitely, and are made from plastic which does not leach BPA - an endocrine disruptor that mimics estrogen.  BPA does no one any favors and is especially bad news for prepubescent children. Re-usable lids will entail a higher upfront cost that may not be feasible for everyone, though I believe it makes good sense both economically and in terms of energy consumption over the long term.  Fossil fuels certainly go into the production of the Tattler re-usable lids and rings, but far more energy goes into the mining of metal for the single-use disposable lids, as well as the BPA-containing plastic lining on those lids.  This is an investment worth working towards incrementally as your budget permits.

3. Prepare large batches so that you max out the capacity of your canner each time you fire it up.  The more food you get out of one run through the canning process, the lower the energy usage per jar.  Check the yields on canning recipes and try to scale up so that you fill your canner each time.  Write margin notes on the recipes you use regarding the accuracy of the stated yields so that you can work more efficiently in the future.  Also, make every effort to ensure that each jar seals successfully.  Each jar that fails to seal and requires reprocessing doubles the energy consumption to preserve that food.

4. Bring the water needed to ambient temperature (or better) before you begin the canning process.  In summer the water that comes out of our tap is roughly 59F/15C.  The canning process takes that water to 212F/100C and beyond.  That's exactly where the bulk of the fossil fuel is consumed - in heating water.  A few hours' worth of foresight can shave off a significant chunk of those fossil fuel calories.  All you need to do is fill the pots you'll need to use in the canning process well ahead of time.  A water bath canner full of 59F water will warm up nicely when placed in the full August sun for several hours.  Even if the pot only sits indoors on a cold stove for a few hours, our kitchen is very rarely less than 73F/23C during the summer months, and often much higher.  If you're more ambitious and better equipped, you could use a camp shower bag to get the water really hot (easily 100F/33C).  It may not seem like these small temperature differentials should make much difference, but heating the water is the major energy cost in the canning process.  Temperature is a measure of energy, and saving energy is the name of the game here.  I know planning ahead isn't the easiest thing in the thick of the summer gardening season, but in this case it's a free and relatively easy way to reduce your energy consumption.

5. As an obvious corollary to the above, use as little hot water as possible when you preserve food.  Leave only the required amount of water in the canner when you're ready to process the filled jars.  Extra water doesn't contribute anything to the process; it only consumes more energy for no purpose.  If you're pressure canning, you can sterilize your jars in the canner with only a few inches of water and preheat the canner in the process.  Just run the pressure canner with the lid on to the point that steam is being produced; you don't need to pressurize it.  Leave the canner closed until you're ready to fill the jars.

6.  If you happen to be blessed with a woodstove to heat your home, and are able to delay some of your canning to the cool months of the year, go for it.  In doing so, you would avoid using any fossil fuel calories at all, and you'd be piggy-backing food preservation on the necessary heating of your home.

Got any other energy-saving tips to do with canning or food preservation?  Please share in the comments!

Thursday, May 5, 2011

First Tincture: Valerian Root


Events around the homestead are running far ahead of posting, as is so often the case in spring.  A lot has been going on what with the installation a new package of Italian honey bees, and the addition of two Cuckoo Marans hens to our tiny backyard flock.  (Yes, I know that Cuckoo Marans sounds like a stripper's name, but it's a breed of chicken, trust me.) Add more transplanted stinging nettles, and ramps, and rootstock, plus potatoes still to be planted, and it's a bit of a whirlwind.  Blog-worthy stuff seems to just be slipping right past me these days, so I decided to seize upon one of them and just get a post out already.

Learning more about herbal medicine made my official list of goals for this year.  Last year I planted a good selection of the more widely available medicinal herbs.  Over the winter I picked up a few titles on the subject and dipped into them from time to time.  And finally today I've made my first effort towards creating a medicinal tincture.  I'm really hoping I just picked one of the more difficult ones, because it was rather a tedious chore: valerian root.  I planted three valerian plants last year, and spring of the second year is the latest time to harvest the roots.  I could only bear to dig one of them up; I'm hoping the other two will set seed and propagate themselves so I can harvest some of those next year.  You see, to make a tincture from the root of the plant is to kill that plant.  That's hard for me.  Beets, carrots, parsnips and turnips are one thing, but perennials are another.


That's one excuse anyway.  An equally good excuse would be that valerian roots are an absolute pain to clean.  Here's a picture of what it looked like after 20 minutes of hosing off outside, before I tackled the rest of the cleaning inside. It's much like being hairdresser to a sheepdog.  A very dirty and tractable sheepdog.  The digging took only a couple minutes.  The cleaning took at least an hour.  Other medicinal tinctures are going to have to be less work if they're going to get made.  Fortunately, once the roots were clean enough to pass muster with me, there was very little else to it.  I simply cut them up with kitchen shears, packed them very tightly into a clean canning jar, and poured over enough 80 proof vodka to cover.  If I'd had 100 proof vodka on hand, I would have used that.

For the next several weeks the tincture will stay in a kitchen cabinet where I'll see it and remember to shake it every other day or so.  After that it'll be strained and stored in the pantry where it will keep forever, or until it's used up. We'll see how diligent I am about making use of all the other medicinal herbs we've got around here.  If it can be justified, eventually it may make sense to stock up on a case or two of 100 proof.  One is inevitably drawn to wonder if it's the herb in the herbal tinctures which lends the efficacy, or is it the alcohol itself?  Valerian is known as a powerful sedative, but for a lightweight like myself, so is vodka.

Valerian root has a pronounced smell which some people apparently find extremely unpleasant.  I sort of like it.  It's strong but not overpowering.  I would describe it as somewhere between mossy forest and licorice.  My cat found the scent of it on my fingers incredibly fascinating just after I finished making the tincture.  I don't think this will be a tincture I've got to hold my nose to take.  At least I hope not.

Oh, and if you're an herbal medicine whiz and feel compelled to tell me I was too late with harvesting my valerian root, please save it.  Tell me in a month or so, if you must.  Today the effort is just too fresh in my mind to learn that it was all wasted.  On the other hand, if you're still an herbal medicine whiz and you have some nifty trick for cleaning valerian root, or any other herbal medicine tips you feel generous about, pipe right up.

Friday, April 1, 2011

Pee in the Garden

My crusty old uncle Jay told me one of his characteristically amusing yarns once while we were puttering around his garden.  He looked kinda like Colonel Sanders, but much leaner, and he spoke with a lovely Louisiana drawl.  (He was an uncle by marriage.) His story was about a writer who composed a lengthy poem dedicated to his beloved, who liked to garden.  He entitled it, She Sits Among the Lettuces and Peas.  His editor liked the theme, but suggested he come up with a more tactful title.  The poet considered this advice and then submitted the revised manuscript under a new name, She Sits Among the Cabbages and Leeks.  I can hear Jay's gasping sort of laughter now. 

Nope.  This is not an April Fool's post.  I decided that this would be the year we start using pee in the garden in some sort of systematic way.  Human urine contains abundant nitrogen, a key nutrient for plants and soil microorganisms.  My husband has used the compost pile for the odd leak now and then with my encouragement, but we've never approached the use of urine with any organized intent.

I'd heard of the value of urine in the garden from various sources.  After all, garden centers sell urea (which is actually fake urine) as fertilizer, and I know that some compost enthusiasts use pee as a compost activator.  Sharon Astyk has written in her inimitable comically informative way about the renewable and cheap nature of human pee.  I attended a session on humanure systems at the PASA conference last year, and was sold on the concept even though we don't have access to a good supply of cover material to make it work.  I read Carol Deppe's The Resilient Gardener, which further extolled the virtues of urine.  And it's not just crackpot greenies talking about this.  Heck, even the Washington Post reported on the concept.  Researchers at the University of Kuopio's Department of Environmental Sciences in Finland...

...concluded that urine produced by one person over a year would be enough to grow 160 cabbages -- that's 64 kilograms (141 pounds) more cabbage than could be grown in a similar plot fertilized with commercial fertilizer. They recommend collecting urine from eco-type toilets, storing it, then scattering it on the soil around the plants rather than directly on them. 

After being bombarded from so many directions, the idea finally worked its way up my priority list.  While we may not be able to employ a full humanure system, we can at least divert the less problematic of human wastes into useful channels.  Several million pounds of nitrogen are flushed "away" in the US every single day.  Homesteading is a process of learning to use what you've got, and learning to find value in what society so often treats as garbage.  This is one more resource available to us that we will no longer squander, one more dependency we can rid ourselves of.

Okay, a few technical details.  Urine should be diluted 1:7 with water if you keep yourself well hydrated, or 1:10 if you don't typically drink enough water.  Too high a concentration of the nitrogen in urine will chemically "burn" plants.  Of course, I like to streamline functions around the homestead, since convenience means my good intentions are more likely to result in good practice.  So I came up with a simple bucket hack.  All that's involved is marking the inside of the bucket to indicate the fill levels that represent the correct proportion of water to pee.  There are two ways to go about this, depending on how quickly you anticipate "contributions" being made.

The first approach is to work out the volume of just the first pee of the day per household.  Carol Deppe wrote that she uses only her first pee of the morning, since that is typically the most concentrated specimen of the day.  I've been doing this off and on for a while now, so I know generally what volume is typical for me.  From there one can multiply by 7 or 10 to get the volume of water, measure that quantity of water into a bucket, and mark the surface line with a permanent marker.  You may need to empty the bucket and dry the inside very well to mark it.  With this method you don't really need a second line indicating the additional volume of urine if your estimate is reasonably accurate.  But if you want to put a second mark as a check, go ahead and add your estimated volume of pee to the water and make a second line above the first.  Check your accuracy over a few days and adjust as needed.

The other approach is to start with how much liquid you want to carry in the bucket, which should take into account the distance you'll need to carry it, how you will be emptying the bucket (lifting?), and your physical strength.  So let's say you're comfortable carrying the bucket half full, or a third full, or whatever.  Put your first mark inside the bucket at that level.  Then fill to that line using a measuring cup to determine how much liquid it takes to fill to that level.  From that measurement, do your calculations - either multiply by 6/7 or 9/10, depending on hydration habits.  That will give you the amount of water needed for correct dilution rates.  Then empty the bucket and measure in the amount of water indicated from your calculations.  Make your second mark at that line inside the bucket, which should be below the first line you marked.  When you're ready to start, fill the bucket to the lower line with water, and when enough pee has been collected to reach the top line, it's time to empty the bucket.  Rinse, fill, collect, empty, repeat.  Free, renewable fertilizer.

There's also the direct method with no need to muck about with dilution or measuring.  Over the winter months I've just been adding my morning collection directly to the compost pile.  A well established and active compost pile should be able to sort out a concentrated dose of nitrogen and "digest" it, so to speak, before it is applied to the garden.  This approach feeds the soil microbes directly, which then later indirectly feed the plants where you apply the compost.  If you want to use this method, it's better to not let the collected pee sit around very long, especially at indoor temperatures.  The nitrogen in pee is such a valuable commodity that airborne bacteria will colonize the pee almost immediately and begin exploiting it.  The faster you get it into a compost pile, the more use it will be to soil microorganisms.

Now for the tedious caveats and common sense warnings, lest I fall foul of the hygiene police and the white knuckled.  Human urine is very nearly sterile when it exits the body, unless you happen to be carrying one of a very few nasty diseases.  Theoretically, hepatitis B, CMV (cytomegalovirus), and HIV (possibly others) are transmissible via direct contact with urine.  There's no data I know of on disease transmission through consuming food from soil fertilized with urine.  I regard healthy soil as a universal cleanser of toxins and pathogens of all stripes anyway.  Further, it's impossible to infect oneself with any disease.  Either you've got it, or you don't.  You don't pick something up from yourself.  If you're using your own urine in your garden, you have nothing to worry about if you're the only one consuming that food.  If you're super cautious, go ahead and test any member of your household for disease who might contribute urine to the cause.  Make sure none of you have any disease that could theoretically be passed on to another.  As indicated above, apply diluted urine around crops, not directly on them.  Finally, you probably want to steer clear of this technique if you sell to the market.  The last thing you need is a frivolous lawsuit.  To be on the safe side, use it on your fruit trees, berry bushes, corn (maize), ornamentals, or your asparagus crop after this year's harvest is finished.

So what are your thoughts?  Is pee in the garden just beyond the pale?  Do you already use urine (human or otherwise) as fertilizer?  If not, would you consider it?

Monday, January 31, 2011

My Thrivalist Binder

This is a topic I've been meaning to post about for some time.  As is the way of things, events have conspired to reveal the good advice I've been meaning to share with all of you as something I should have heeded better myself.  I've been having serious computer trouble lately, and there's the possibility that I may permanently lose a great deal of information and photos saved on my hard drive.  Physician heal thyself.  I've never been too diligent about regular backups.  The last backup performed on my computer was months ago, if not a year ago.  It's a hard lesson to learn, but it brings home what I had intended to write about.  What follows is the post I've been working on incrementally for a few months...

Plenty of peak oil doomers, preppers, and thrivalist types have blogged about their shelf full of reference books for Camp Teotwawki, including me.  But there are an awful lot of loose, unbound, but important bits of information floating around my life that aren't in books.  A great deal of it is on my computer hard drive, here on my own blog, or resides at websites that are as familiar to me as old friends.  From a prepping perspective, this is a bit problematic.  If something suddenly takes out my electrical supply, or the network of datafarms that stores the content of the internet, that information is gone.  And that's probably when I'd most need this information.

This has been nagging me for a while and I finally started printing out important bits of information as they came to my attention.  I put these pages together in a three-ring binder similar to one I keep for recipes I use over and over again.  Each page is placed in a plastic sleeve and then in the binder.  This has always been really handy for the recipes, since the sleeve protects the page from batter, splattering oil, wet hands, etc.  It has saved me having to reprint a given recipe many times over.

So what sorts of things have made it into my thrivalist binder so far?  Here's a sampling:
  • Our yearly harvest records and notes from the garden
  • A planting schedule specific to my hardiness zone, our local first and last frost dates, and the dates when we lose and gain ten hours of daylight
  • Some guidelines on biodynamic beekeeping
  • General principles of curing meat
  • Worksheets for each of my curing batches and a supply of blank curing worksheets 
  • Instructions on making soap the old-fashioned way
  • Where There Is No Doctor - available as a free download
  • Instructions for caring for fig trees grown in containers in my zone
  • Guidelines for disinfecting water through exposure to sunlight
  • Homemade rooting hormone recipe, and a few guidelines on growing plants from cuttings
  • Sharon Astyk's recommendations for 25 plants we should all consider growing
  • Detailed information on growing a few specific medicinal herbs and their various uses
  • Planting instructions for garlic
  • Basic information on seed saving
  • A few working notes on meals cooked in the solar oven
  • A printout of Rocket Mass Heaters
  • All of our soil test results from year to year and bed to bed
  • Guidelines for processing raw wool
  • Guidelines for preparing natural dyes from plants, and a list of which plants produce various shades
Mostly this is information that's either self-generated and therefore not available in any book, or specific pieces of information taken from books that I don't feel the need to own as a whole.  Some of it I may not ever need, but much of it is information I'm already using regularly, if infrequently.  None of it is information I want to trust to memory alone.  There are plenty of things I haven't yet remembered to print out and add to the binder.  But at least having started it there's now a ready repository of information that fits the bill.  I'm more likely to bother to print out the pages since the binder is there and stocked with a supply of empty plastic sleeves. And even if disaster never occurs, having the hard copy means I don't need to use any energy to access the information.

Incidentally, Kathy Harrison not long ago posted about an emergency binder of a different sort.  She has assembled various pieces of critical information and legal documents for her family in case one of the adults is incapacitated, or in case of the need to evacuate her home on very short notice.   This is a binder of a very different sort, but well worth putting in place, in my opinion.  You don't have to be a doomer to benefit from the sorts of preparations Kathy writes about.  After all, we can pretty much count on being incapacitated or dying at some point.  The information she advises assembling would benefit any family trying to deal with the serious illness or death of an adult member of the family.  You don't even have to live in an area prone to natural disaster to use her advice; house fires can happen to anyone at any time. 

So what about you?  Have you printed out information you think is valuable and put it in an easily accessible place?  Care to share what bits of knowledge have made the cut?

Thursday, January 20, 2011

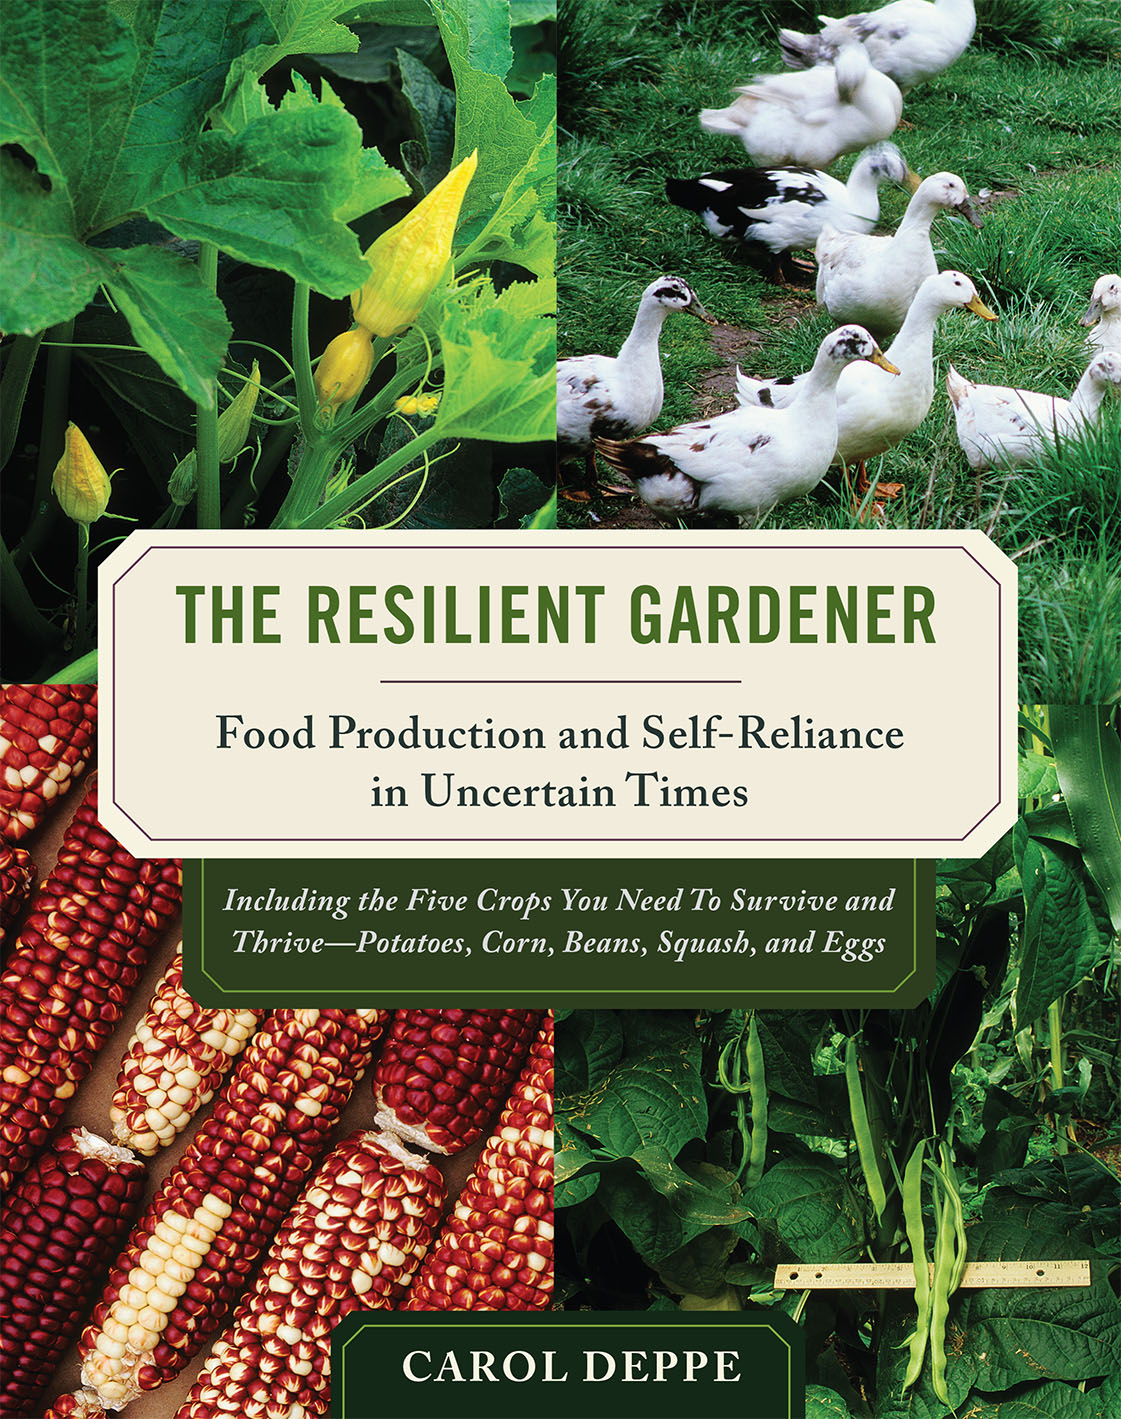
Book Review: The Resilient Gardener


I've just finished reading something excellent and thought I'd share.  It's Carol Deppe's recent book, The Resilient Gardener.  If you think you might one day want to feed yourself without recourse to purchased food, then I cannot recommend it highly enough.  It's one thing to grow a garden for a few years, and even come to rely on it for a significant portion of your calories and nutrition.  It's another thing entirely to really give up purchased foods, especially the cereal crops that make up such a huge portion of our western diet.  And when I say give up, of course I have in mind a time when it may not be a matter of giving up, but of being unable to obtain them, for one reason or another.

Deppe is allergic to wheat, gluten, and dairy.  Yet she feeds herself by concentrating most of her efforts on five crops: corn (maize), potatoes, squash, beans, and eggs.  She chooses these crops for their caloric and nutritional values, storing ability, proven reliability, and resilience in the face of unpredictable weather or even the lack of attention from the gardener.  It seems to me that anyone trying to feed themselves in a very large part of the world (certainly most of the US) would do well to devote much attention to those crops too.  I love my wheaten foods, but there's little chance that I'll ever be able to produce even a fair portion of the wheat I would like to continue to eat.  Corn is not my current starchy staple, but it's the most reliable grain in my region.  We already produce our own eggs with a tiny flock of four laying hens.  The other three crops consistently do well in my region too.  Greens, other vegetables, and fruit are all nice for supplementing, but Deppe has clearly identified one year-round "crop" and four long-storing staples that would do the heavy lifting if we should ever need to provide all our own food.

The Resilient Gardener is not a broad book, but a deep one.  And it's not a basic gardening book, but an advanced one. Deppe assumes her readers have read countless paeans to compost and mulch, and refrains from rehashing these topics.  Instead she caters to those with at least a few years of gardening under their belts.  Her dogged focus on these five crops allows her to recount a wealth of detail that will save many a backyard enthusiast from both errors and unnecessary effort.  And I mean the sorts of errors that even an experienced gardener might make.  Her long-term experimentation with many varieties within her five chosen crops is meticulous and scientifically rigorous.  If you've ever asked yourself a question about one of these foods, chances are that Deppe has provided the answer in her book.  She answered a few handfuls of mine.

I appreciate that Deppe discussed not just how to grow the foods, but how to store them and eat them too.  While I already eat all of the foods she writes about, I don't rely on them to the extent she does.  Since starchy staples tend not to be fungible ingredients when it comes to cooking, it helps to have some guidance with basic recipes.  Changing one's diet is rarely simple.  Even more do I appreciate her frank admission that not everything is worth doing well, or even doing at all.  What she terms selective sloppiness appeals to my sensibilities.  This is a book that will help you find the sweet spot between maximum productivity and minimum labor.  If you want advice on how to make your gardens a beautiful, weed-free show place, this isn't it.

Although she lives and grows these crops in the Pacific northwest, the information she presents is largely relevant to most other areas of the US.  The exception is her chapter on eggs, or the laying flock.  Here Deppe concentrates on ducks rather than chickens.  She explains her choice on logical grounds: ducks make more sense than chickens in her climate, so she has more experience with this species than with chickens.  Moreover, there are numerous books on small-scale chicken keeping; Deppe prefers to cover new ground, and does so with her usual level of gritty detail.  I don't think that backyard ducks are likely to rival backyard chickens in popularity anytime soon, but her contributions on the former nonetheless fill a niche.

Another very minor criticism I have is that Deppe addresses the issue of feeding the poultry flock in hard times largely by sacrificing to them portions of the other crops she grows.  I think there are many other alternative feed options for those with very small flocks, even when pasture is marginal or free-ranging not feasible.  Deppe's suggested feeds will certainly work for those with enough acreage to produce the extra crops.  But they still put livestock in competition with humans for the same foods, as well as turning eggs into re-packaged versions of the other staples in Deppe's dietary paradigm.  This would raise concerns for me about nutritional diversity and completeness. If feeding poultry from resources internal to your homestead is an important issue for you, I strongly recommend you look for Harvey Ussery's forthcoming book The Modern Homestead Poultry Flock.  It'll be published later this year.

Such minor issues aside, The Resilient Gardener is truly an invaluable addition to the bookshelf for those interested in food self-reliance and preparation for a low-energy future.  Due to the necessities of her own dietary restrictions Deppe has done work and research that can benefit anyone looking to produce their own food from a fairly small area and in uncertain times.  I'm thankful that she has chosen to share what she has learned. 

Wednesday, January 5, 2011

Black Soldier Fly Larvae

Photo from Wikimedia Commons

I hope the title of this post doesn't put anyone off.  If you're not fundamentally squeamish about insects, I promise there's nothing terribly icky about what I've got to say today.

Included in my formal list of goals for this year is the project of trying to feed our laying hens more and more with food we produce ourselves.  We've already got well established routines that provide some of the chickens' food, such as kitchen scraps, trimmings from the garden, feeding them Japanese beetles and squash bugs in the proper seasons, and gleaning acorns for them in the fall.  Still, we end up buying a few 80-pound bags of feed for them each year.  This is grown organically, fairly local to me, and milled by the farmer that grows it, so on that score I feel pretty good about it.  But it's a 45-minute drive to buy the feed, and the price (though much cheaper than the nasty pelletized chicken feed from Tractor Supply) has been nudging up steadily ever since I started buying it.  This feed easily accounts for more than half of the hens' caloric intake over the course of the year.

So I've been looking a bit harder at what we might do to close the gaps in our homestead economy and nutrient cycles.  Worms from our vermicompost are an excellent possibility, but I'm going to leave that project for another post.  Right now I'm going to talk about the Black Soldier Fly, which is probably the coolest idea easily adapted for use by very small scale homesteaders I've come across in a long time.  I have this tendency to think that if I've heard of some cool idea, then everyone else already has too.  But I've gotten comments from time to time that ask for more detail on stuff I mention in an off-hand way.  So I'm going to review what I know about this species and how those with small backyard poultry flocks can partner with it to their advantage.

The Black Soldier Fly is well established in many parts of the world, including most of North America in hardiness zone 7 or warmer.  Though it is a fly, it's a world apart from the common housefly in terms of the nuisance factor.  The adult phase of this insect's life, the only time it can fly, is very brief and devoted solely to reproduction.  The adult BSF doesn't even have a working mouth, so it cannot bite or eat and is not attracted by food, except as a resource for the next generation of BSF.  Even so, the mated female BSF does not land on food.  She seeks to lay her eggs nearby - not on - a food source, where the newly hatched larvae will be able to land on the food and begin feeding.  BSF larvae can consume small amounts of meat, but this is not a species that specializes in carrion.  Mostly what she's looking for is decomposing plant matter.  In fact, they may already be resident in your compost heap.  Once her eggs are laid, the adult fly has accomplished her mission in life, and dies shortly after.  The males also die shortly after mating.  The larvae remain on the food source as they pass through several sub-stages of growth, until they are ready to pupate, at which point they seek to burrow into the earth to complete their development into adults.  So you can see that there is little purpose or opportunity for the BSF to interact with humans in any way, unless we deliberately facilitate such an interaction.  Indeed, even if you live in a region with a BSF population, it's entirely feasible that you have never noticed these insects before, since they have little interest in us, and such short life spans in adult form.

The point at which we would want to intervene in the life cycle of this insect is when the larvae are fully grown and ready to pupate. Clever people have designed a clever contraption for harvesting the mature larvae at just this stage.  Or rather, using the BSF's instincts in order to have it harvest itself.  The BioPod is a custom built bucket system that provides an exit route for the larvae leading to a closed container, which makes feeding them to poultry or other livestock trivially easy.

I'm going to post another piece soon about the knockoff BSF composting buckets I'm working on.  What I want to dwell on a little more at this stage is the idea of partnering with this species.  Although in my formal goals for this year I wrote that I'm not committing to adding another species to our homestead, that was an oversight.  In reality, the Black Soldier Fly is another species I very much plan to work with.  It may not look like livestock, just as our red wriggler worms for the vermicompost bin didn't look like livestock.  Perhaps they're not.  But they will be a new species for us, and partnering with them will involve a learning curve.  I see the cultivation of these insects as one more item in the self-sufficiency toolbox; one more thing that reduces our dependence on fossil fuels.  For without fossil fuels it would be very difficult for the farmer to harvest the grains that make up our purchased feed, and very difficult for us to go and buy them multiple times per year.

It may seem grotesque to call my intended relationship with BSF a "partnership."  After all, it looks pretty exploitative from one perspective.  But in reality, I don't see this as ethically any different than keeping other species for food.  I will be establishing an insect where it doesn't currently exist, and responsible not only for feeding each generation, but also maintaining a "wild" population that survives to adulthood in order to reproduce and create the next generation.   After obtaining a starter colony, I'll need to heavily "seed" our garden soils with ready-to-pupate larvae.  This will reduce my usable harvest in the first year.  But with luck, a good population will take root right in the backyard, and continue to take advantage of the shelter and food the composting buckets will provide for them. From what I've read, I will very much need to actively tend the compost buckets.  I expect to derive both animal feed and a small amount of compost tea from this partnership.  In other words, the BSF will become part of the system of this homestead.  I'm always looking for ways to increase the diversity of species, and the connections between them, on our tiny piece of land.

Sooner or later I'll post more on the buckets themselves.  In the meantime, having read this post, would you humor me please, by participating in my poll on Black Soldier Fly composting?  It's on the sidebar of my blog.  I'm curious how many of you have heard of BSF cultivation before, and what your attitudes towards it might be.

Friday, December 3, 2010

Running the Numbers

Recently I've been leafing through Mini Farming: Self-Sufficiency on 1/4 Acre, which I found on the new arrivals shelf at my local library.  I gleaned a few interesting nuggets of information, as I usually do from most gardening books.  But the passage that captured my attention involved using the US Department of Agriculture food pyramid guidelines to project the needed weight in fruits and vegetables for the proverbial average adult's healthy diet.  Now, I have issues aplenty with the USDA and their recommendations.  But still, it seemed an exercise worth considering.

Turns out the average adult should be consuming 456 pounds (201 kg) of vegetables, and 365 pounds (166 kg) of fruit per year to eat a "healthy" diet by the USDA's lights.  Leaving aside the complicating issue of fruit juices and dried fruits, let's just look at those numbers.  That's exactly one pound of fruit, and over a pound of vegetables per person every single day.  I gotta tell you, I don't eat that much fruit and veg.  I know this because I know roughly what we produce ourselves in the backyard, and that we don't buy a whole lot of extra vegetables or fruit.  We don't drink juice other than our own apple cider or grape juice.  I do buy dried fruits - raisins, cherries, apricots, dates, etc.  But these don't make up a major part of our diet.  Other than things like ginger and onions year-round, and some local greens in winter, the odd bag of organic carrots, we just aren't buying that many vegetables either.  Last year, we produced just over 600 pounds of food from our backyard.  Divide that among two adults, and we've got 300 pounds per person last year.  Evidently, we're way below our recommended consumption, even figuring another 100 pounds per person from purchased sources.  Less than half the recommended 821 pounds, total, for each of us.

But Mini Farming then went on to describe how to produce that much yourself, and what sorts of yields could be expected from various perennial plantings.  And this is where the projections began to astound me.  A standard apple tree at maturity can give 300 pounds of apples per year.  Check.  That's roughly what we got this year from our mature apple tree.  A sweet cherry can also deliver 300 pounds per year, and a sour cherry, 150 pounds.  We have one sweet and one sour cherry back there which have only just begun to bear.  Four hundred and fifty pounds of fruit from them in the coming years?  Zoiks!  And then there are the pear trees.  We have one dwarf and possibly one standard.  Since the dwarfs will apparently give 120 pounds of fruit per year at maturity, we're looking at 240 pounds if they're both dwarfs, and 320 pounds if the second one is a standard.  Oh, and we're putting in another apple tree next year.

So just counting on our three varieties of fruit from six trees, we should expect - conservatively speaking - 1230 pounds (558 kg) of fruit per year, eventually.  That doesn't even touch the blueberries, raspberries, black currants, elderberries, potted figs, or our citrus trees, let alone any nuts we might get from our hazels.  Oh, and next year we'll begin a long term project to replace our wooden fence with a hedgerow stocked with edibles.  More than half a ton of fruit from the backyard.  Yes, the numbers are beginning to freak me out a little bit.  Am I going to be able to handle this much food without letting it go to waste?  I'm thinking three things.  One, we can always turn fruit juice into hooch.  (Alcohol is good.)  Two, we need to get a good system of bins together for the root cellar before such harvests start coming in.  And three, we may well be able need to help feed other people from such bounty.

We've got all these trees and plants on 2/3 of an acre, plus raised beds for asparagus, with 2800 square feet of garden space for annuals besides.  That's with at least half the property being essentially useless due to driveway, house, huge detached garage, and massive shade trees around the house.  So really, we're talking all that production on about 1/3 of an acre, more than half of which is off-limits because of the annual garden area.  So maybe really only 1/6 acre available for perrenials.  Turns out, the stocking density we've got is nothing to write home about.

In perusing the website of a local orchard we occasionally buy from, I noted that their most recently planted orchard has a stocking density of more than 300 dwarf apple trees per acre.  A little poking around turned up the claim by Gennaro Fazio, director of  an apple rootstock breeding project in Geneva, NY, that an acre of good land can support as many as 485 dwarf apple trees.  That's a mind boggling number of fruit trees.  What does that scale down to?  A tenth-acre backyard with as many as 48 dwarf apple trees.  Say that with a one-third acre working space, like us you're only willing or able to devote half of that to fruit trees.  You could, according to this theory, squeeze 80 dwarf trees into that parcel.  Back garden of only 20 square meters?  That still gives you ample room for two trees.  Fazio also claims that yield and fruit size are the same with standard and dwarf apples, so you're not sacrificing production by choosing a smaller tree.  I find this hard to believe, but even if dwarfs yield half the crop of standard trees, that 20 square meter back garden could give you almost all the fruit one adult needs per year.  That's nothing to sneeze at.

This is good.  It gives me hope for the future.  Not just for myself, but for my immediate environs.  I live in a low density development area, and all the mcmansions sit on what was formerly prime farmland.  The good earth is still there, though now in the custody of folks most often doing nothing better than dousing their grass monocultures with pesticides that kill honey bees, and herbicides that run off into our waterways.  Most of them have a lot more than my 1/6 acre to work with, should they ever wish to do so.

Bottom line is this: any little bit of yard ("garden" for you Brits) you've got can produce more food than you probably suspect.  We need more fruit and nut trees planted on residential lots.  Even on a tenth of an acre, and under far from ideal conditions, you could probably put in two dwarf fruit trees, at a minimum, and still have room for a decent patch of annual vegetables.

As Rob so eloquently said, we can do this.

Saturday, October 23, 2010

Counting Lemons Before They're Hatched


The Meyer lemon tree I ordered early this year is blooming.  Actually, it first bloomed during the summer, and while I noticed it, there was a ton of other garden stuff occupying my mind.  So much so that I forgot that lemons need to be hand pollinated in my part of the world, since whatever insect normally performs the service for lemons doesn't live where I do.  When I remembered that I was supposed to be a proxy in plant sex, it was too late, and I was sad to see that no fruit had been set.

So I was pretty psyched to notice little buds all over the tree when it was time to pull it inside for the winter.  The tree was giving it another go!  Now I'm servicing the blooms once a day with a tiny paintbrush.  They are amazingly fragrant and sweet-smelling.  Being a novice at sex surrogacy for lemon trees, I'm not too sure of my technique.  Do lemon blossoms like it rough or delicate?  Are they chaste (prefer pollen from the same blossom), or lascivious (pollen from as many blossoms as possible, thank you)?  I'm hoping that what I lack in finesse and experience I can make up in diligence.  Also, I'm pampering the tree with good nutrition by regular feedings with worm tea from our worm bin.

It's pretty thrilling to look at all the buds on the tree and imagine that even half of them may turn into lemons.  Which reminds me of the old adage about unhatched chickens.  Still, it's hard not to be a bit giddy about the prospect of homegrown Meyer lemons.  It also makes me think about seasonality.  I think lemons normally ripen in late winter.  So strange to think of a fruit, especially the lemon, ripening at that time of year.  I associate lemons so much with lemonade and summer drinks.  Just goes to show you how out of touch we are with the food we eat.  Lemons in winter?  Guess that'll mean lemon curd. 

I'll definitely let you know if we get any fruit from the tree.  In the meantime, if any of you have lemon trees I'd love to hear any tips you have for keeping them happy and productive, and what time of year you get a harvest.

Monday, October 4, 2010

Acorns as Chicken Feed, Revisited


Last fall I gathered acorns from a single oak that straddles our property line and used them as a feed supplement for my hens over the winter months.  This year I made it a formal goal to be a bit more ambitious about gleaning acorns.  So far this year I've collected over 65 pounds of them, and they're still coming down in my area.  I do think of them as booster fuel for hens during the coldest and harshest months of the year, so most of what I've gathered has been put up in buckets where they will, I hope, escape the notice of rodents who would love to help themselves to this caloric feast.  But I've also been feeding the less prime acorns to the hens as they come in, so I thought it would be a good time to post about some points that have come up for me as I've been gathering them and using them for feed.

First off, I've become rather selective about which acorns I pick up and bring home.  I gleaned a little factoid from the coverage of the recent recall of factory farmed eggs.  Namely that salmonella is carried by rodents, which can introduce the disease to previously healthy poultry flocks.  Squirrels are rodents, are abundant in my region, and show a famous interest in acorns.  Many of the nuts I find bear evidence of nibbling by squirrels.  I do not gather these acorns.  Some acorns have broken shells that may or may not be due to squirrel nibbling.  They may have taken the damage when they fell on a hard surface.  I err on the safe side and don't risk collecting such acorns.

Another type of damage common to acorns is a shell that has split along its grain.  This is clearly not caused by rodents, but it still presents a problem.  Acorn nutmeats are very high in fat, and they will turn rancid fairly quickly once exposed to air.  So acorns with split shells are not candidates for storage.  I do bring home a number of acorns with reasonably small splits in the shell and feed them to the hens very quickly.  It's a way of using up what I can, even if they can't be kept for storage.

The last type of damage that causes me to reject an acorn at collection is a small hole that indicates a weevil has penetrated the shell and is currently feasting on the nutmeat.  If you see two holes (rare when the nuts have just fallen) the weevil has been and gone.  Now these nuts too could be collected for the hens if I were willing to segregate the ones with such holes.  Laying hens, after all, will just as happily eat weevils as they will acorns.  But if the infested acorns are stored with the pristine ones, the weevils will eat their way from one acorn to the next, and there is a net caloric loss with each step up the food chain.  So it's either segregate, or don't collect.  Mostly I opt not to collect those acorns.


Last year I used a small burlap bag to crush the acorns.  Each day I placed a couple handfuls in the bag and crushed them on a flat rock by using a 5-pound hand sledge.  The problem with that setup was that the burlap didn't hold up.  Fairly quickly I found that a glancing blow from the hand sledge could propel an acorn straight through the fabric.  This year I've upgraded to a denim bag crafted from a tattered pair of my father's jeans.  I just cut one of the legs off and sewed up the cut edge with some sturdy hand stitching.  So far it looks as though the denim is going to answer nicely.


A note on oak trees - Quercus is a big family, or more properly speaking, a genus.  (Isn't Quercus just about the best word, ever?)  I'm not going to tell you than I can tell any of the 600+ oak species apart by name, because I can't.  What I can say is that the size, shape, quality, and drop time of acorns varies considerably from one species of oak to another.  Acorns started falling here in August, and there are still oaks dropping their bounty now in October.  It pays to look around and keep looking.  If you don't find acorns of good quality from one particular type of oak, you may well find them from another type a few weeks on.

Storage was a problem last year.  Mice are quite happy to help themselves to any sort of seed or nut kept in our garage over the winter months.  I've taken steps to prevent this this year and recommend you think about how to keep any acorns you collect away from rodents, particularly in light of the risk they might transmit salmonella to your poultry.

I did a little poking around to find out what the value of my acorn gleaning might be in terms of feed for the hens. I have no clue what they do or don't contribute in terms of nutrients.  But the average laying hen needs - at an absolute maximum - 350 calories per day to maintain optimum laying rate.  Presumably this is for hens who live in Siberia and lay jumbo sized eggs.  Even so, let's say my hens need that many calories in winter.  After all, they don't get any supplemental heat, only shelter from the wind.  The other factoid I turned up is that acorns have 1700 calories per pound.  Now I don't know if that figure is just for the extracted nutmeats, or what.  Clearly the acorn cap and shell contribute nothing to the hens' diet.  So let's say that of the 65 pounds of acorns I've gathered so far, we have to eliminate a whopping 25% of that weight to account for the unusable portion. That leaves about 49 pounds worth of acorn nutmeats, which have an astonishing 82,875 calories.  Divide that by the maximum caloric needs of my four-hen flock (1400 calories per day for all four of them) and speaking very conservatively we're looking at a two-month supply of feed from gleaned acorns.


Now, as mentioned, it's not at all clear that acorns alone would give the hens what they need in terms of vitamins and minerals.  But I did lay in a supply of comfrey, dried from our own production earlier in the year, and I know that's a highly nutritious feed for poultry.  Between these two "free" feeds, plus our kitchen scraps, some recycled eggshell for calcium, and whatever mystical stuff chickens find in deep litter bedding, I would bet they're pretty well on their way to a complete laying hen diet.  I plan to use the acorns only as supplemental feed in combination with the locally grown and milled organic grains they normally get.  But it's clear to me that if it were absolutely necessary, we could probably get the hens through the winter with aggressive acorn gleaning (provided of course that the oak trees didn't take another gap year as they did in 2008).  If that were the case, we almost certainly wouldn't light the hens to maintain their winter laying quota, so their caloric needs would go down, which would make the acorns stretch even further.  And that's without even touching on hickory nut gleaning.

Aside from musing about strategies for maintaining my mini-flock in a worst case scenario, I see this as a social justice issue.  We in the industrialized countries "go to the table" ahead of citizens in the developing world.  We eat first, because we can afford to.  Not only can we pay more for the most basic foodstuffs, such as grains, but we choose to eat animal products which are produced at the cost of a huge amount of grain - further driving up global market prices for these commodities. And after we've eaten our fill of grain-intensive meat or dairy or eggs, we then feed our pets with meat produced in an identical fashion.  Thus we consume first, and consume more than the poor.  My flock and my pets are no exception to this reality.  Though they are pastured on our lawn, and we supplement what feed we buy with all sorts of food that would otherwise be wasted, our hens nonetheless eat grain that could have gone to the world market and contributed to lower prices for grain.  My hens compete with impoverished families and hungry children, and they win by virtue of the money I have at my disposal.

So whatever I can do to come up with free food  for my hens not only saves me money and makes my homestead less dependent on a fragile distribution system, it also brings a little more balance to the relationship between rich and poor countries.  That's a real motivation.  Gleaning acorns is fun for a while.  But when it gets a little boring, or my back starts to ache, I push on just a little longer with the acorn hunt.  Because I believe that actions - even small, imperfect, insufficient actions - have consequences.  Even if I never see the results, I know that gleaning this food is the right thing to do.

Tuesday, August 3, 2010

Tomato Canning Begins

A friend is coming over in a few hours to can roasted tomato sauce with me.  I don't bother with canning whole or chopped tomatoes.  The roasted sauce serves equally well for pizza or pasta; we don't seem to miss store-bought canned tomatoes, so I don't see the need.  If you'd like to see how the roasted tomato sauce is made, check out my post on it from last year.  For the record, I pressure can this sauce at ten pounds of pressure for 25 minutes in quart jars.  But please consult a reliable canning guide rather than taking any anecdotal canning recommendations you find in the blogosphere.

My canning goal for this year with regards to tomatoes is to get enough sauce into jars to see us through two years.  I'm still traumatized by last year's late blight which left us with hardly any tomato crop to speak of.  I canned only three quarts of sauce, which we soon ran through.  I resolved to make a big effort this year if we had a good crop.  If blight rears its ugly head again next year, I'll be able to coast through with what I put up now.  If next year is a good tomato year, I can put up just one year's supply and still have a year's supply in reserve.  So far it looks like June and July's blistering heat and little rain have protected us from blight and set us up for a good tomato harvest.  My estimate for a two-year supply of tomato sauce is somewhere between 30 and 40 quarts.  I'm going to try my best to put that much up in the next three to four weeks as the tomatoes come in.  Extra quarts are always good to have for gifting.  If our own supply of tomatoes is insufficient, I may resort to buying locally grown.  But first I'm going to see how we fare on our own production.

Much of our cherry tomato crop is going to be smoked in our homemade trash can smoker.  We're still slowly working our way through the apple wood chips we made ourselves from the first pruning of our apple tree after we move in three years ago.  These are excellent material for smoking, and homegrown too.  After smoking, I dehydrate the cherry tomatoes until they are shelf-stable.  We then keep them on hand for adding to winter stews, pasta dishes, and polenta.  Super-sweet cherry tomatoes smoked over our own apple wood give a marvelous flavor boost to winter meals. 

Speaking of growing tomatoes, I have to gush a bit about the Speckled Roman tomato.  My last few posts have included pictures of this beauty if you want to see what it looks like.  I'm more and more impressed with it as time goes on.  This variety is a stabilized hybrid of Banana Legs and Antique Roman tomatoes.  "Stabilized hybrid" means that someone worked on the cross of the two parent varieties until they had a genetic line that breeds true.  In other words, it's now open pollinated.  In other other words, it's possible to save seeds from Speckled Roman tomatoes and reliably get Speckled Roman tomatoes from those seeds.  I like the fact that it's open pollinated.  I love their unusual and beautiful appearance.  I like both the texture and flavor - meaty and solid enough to make a good slicing tomato, but full of well balanced tang and sweetness.  I love the fact that they very rarely split; this characteristic redeems the only moderate production from each plant, since I can count on harvesting just about every fruit that forms.  And I really appreciate the Speckled Roman's ability to resist late blight, which I saw first hand last year.  This is only my second year growing this variety, but I'm definitely sold on it over other paste tomato varieties.  In fact, I'm strongly considering making it my primary tomato in future years and planting only a couple of beefsteaks and cherries. 

Tuesday, April 13, 2010

Self-Sufficiency: How Far Have We Come?

It's been a few years since I started down the road to self-sufficiency, and started checking out of the pervasive corporate-culture that dominates the average US lifestyle.  It's a road I never expect to reach the end of, because I know that complete self-sufficiency is not really possible.  I don't see this as a negative thing.  There are endless shades and degrees of self-sufficiency, and building real community is the other side of the self-sufficiency coin.  Today I want to talk about a few key areas where we have - seemingly - achieved self-sufficiency, and explore the reality in those cases.

Garlic - This is one product in which we come very, very close to genuine self-sufficiency.  I bought garlic seed stock in 2007 and have not paid for any more since then.  Garlic grows well in our area, and I managed to salvage a decent crop, including viable seed stock even during our incredibly wet year of 2009.  Potentially, I could go on indefinitely saving seed from each year's harvest, with no need to purchase garlic ever again.  The fly in the ointment has been that so far I have not really managed to keep us in fresh garlic 12 months out of the year.  I'm working on bridging the garlic gap with green garlic, garlic chives, and garlic scapes.  And we can use the garlic I dehydrate when the last of the harvest begins to go off, though that requires electricity we don't generate ourselves.  It's fair to say that garlic is a core product in our lives.  We eat a lot of it; I don't really know how to cook without it; and we deeply resent having to pay for it.  So self-sufficiency in this food would mean a lot to us.  I'd say that we're 70-80% of the way there, and there's a good chance that we can narrow that gap further.

Eggs - On the face of it, we're self-sufficient in eggs.  With a backyard flock of just four layers, we have more than all the eggs we can eat.  But the devil is in the details.  We buy most of the feed for the girls.  True, it's milled locally, so potentially we could continue to obtain that input even if TSHTF.  It's a long drive though.  And the thornier issue is that we don't keep a rooster.  Even if we did, our girls are production birds, with all the broodiness selected out of their ancestors.  Laying hens are very productive for a good two to three years, but then their output tapers off.  With no chicks from our flock, we'll need to buy more birds.  I've taken several steps to supply more of the girls' feed from our own resources, and it's my plan to increase these efforts this year and next.  Less-than-prime garden produce, our kitchen scraps, weeds, Japanese beetles, and acorns are all part of the girls' diet, free for the taking from our own 2/3 acre homestead.  But if I'm honest I have to say these all add up to less than half of what the girls need to lay productively.  And without the ability to produce a new generation of hens, we'll never be truly self-sufficient in eggs.  I'd say that we're only about 40% self-sufficient in eggs, despite the fact that we never buy them.

Potatoes - We now grow all the potatoes that we eat.  When we don't have potatoes from our own harvest, we eat other things.  Although it's potentially possible to save seed from one harvest to begin the next year's planting, there are significant limitations to that practice.  The major obstacles are late blight and, to a lesser extent, viruses that can carry over from one year into the next in the seed potato.  Late blight can destroy a crop of potatoes outright, while the viruses can damage a lineage of potatoes progressively over time, so that yields slowly dwindle year by year.  It's certainly possible to save a few potatoes for seed from one year to the next. I've done that.  But since we had late blight last year, none of our potatoes can be used for seed this year, and any potato plants that crop up in the garden will need to be destroyed.  Late blight makes the whole prospect of self-sufficiency in potatoes kinda dodgy.  We could go for years without another outbreak.  We could decide to grow only blight resistant varieties, and take our chances with saving seed even in years we know the blight was prevalent.  So far, we haven't done that.  I've bought seed potatoes every year.  Even if blight were taken out of the picture, there are the less obvious viruses that simply reduce yield over time.  Given these challenges to genuine self-sufficiency with this crop, I'd say we're only 50% self-sufficient in potatoes.  Our prospects for achieving real self-sufficiency over the long term seem low here.

Bread - I can't say that I never, ever buy bread.  There's a special loaf made by a local baker who turns up at my farming friend's monthly on-farm markets over the winter months.  I buy some of her bread from time to time.  But that's about it.  All the other bread we eat is made by me, and my baking skills are good enough that we would turn our noses up at the sort of bread supermarkets in our area sell.  However, we don't grow wheat, nor even grind our own flour.  It's all bought in bulk.  Even if I wanted to grow our own wheat, the high-protein "hard" wheat needed for producing good bread does not grow in my region; it requires an entirely different climate.  And even if that weren't an issue, we don't have near enough space to grow the amount of wheat we go through in a year.  It's true I bake some breads that do not require hard wheat, and potentially those could be made from wheat grown nearby.  In other words, we're a long, long way from self-sufficiency with bread.  The little bread we buy is hardly an issue.  We could give that up without any hardship at all.  I also know how to begin and keep a sourdough starter, and have done so in the past.  So if I couldn't buy yeast, it wouldn't be the end of bread for us.  We even have a rarely used manual grain mill, meaning we could grind our own flour if we had the grain. But we will likely always be dependent on purchased flour or at least purchased grain.  And then there's the whole issue of how the bread gets baked.  Right now we use an electric oven tied to the grid.  We generate no electricity of our own, and even if we did, running an electric oven is extremely costly in terms of energy consumed.  Potentially we could build a wood-fired outdoor oven, and that's certainly feasible for the long term.  Right now I'd say we're only 25% self-sufficient in bread, despite the fact that I bake virtually all we eat.  Having that outdoor oven might add 10-20% efficiency, and a sourdough starter maybe another 5-10%, in my estimation.

Fruits and Other Vegetables - It's hard to be precise about this, but I think it's fair to say that we grow more than 50% of all the fruits and vegetables we eat.  There's room for improvement, certainly, and we're working on that.  Some of the perennial plants we put in over the last few years are nowhere near their maximum productivity.  In fact some have yet to produce at all.  We don't need to do much else but prune and tend them for those plants to displace purchased food in future years.  So at this point we can "coast" to a greater degree of self-sufficiency in fresh fruit and veg over the next few years.  A good portion of the fresh produce we still do buy comes from local producers, especially fruit in season and greenhouse salad greens over the winter.  But I still buy a lot of onions, herbs during winter time, and the occasional citrus fruit or avocado at the grocery store.  We now have both a lemon and lime tree, though neither has produced a crop yet.  We have mostly weaned ourselves off fruits and vegetables that just don't grow in our area.  Bananas were dropped without fanfare some time ago, and avocados are treated like the treats they are.  At this point I think we've done most of the work we can do, both on our mental/dietary habits and the infrastructure needed to be really self-sufficient in produce.  There are two concerns over the long-term. Seeds and rootstock.  I need to learn more about saving seed and then put it into practice.  And learning to graft scion wood onto rootstock would mean more real self-sufficiency over the long haul.  The second concern is that right now we have the luxury of supplementing what we grow with lots of purchased carbohydrates, meat, and dairy.  In the future our diet might have to rely more heavily on the fruits and vegetables we can grow here.  What counts for 30% of our diet right now might have to be 50% or more of our diet in the future. I'll give us 50% self-sufficiency in fresh produce, with an additional 20-30% already in the pipeline.  The remaining 20-30% could be covered by a combination of buying from local growers, a few more of our own cold frames, and more skill development on my part.

Heat/energy - We are in the (agonizingly slow) process of having a passive solar thermal heating system installed for our home.  This will make us independent of oil so far as heating goes, and it may at some point give us hot water out of the tap.  We don't live in the harshest area of the US so far as winters go, but getting through a Pennsylvania winter without heat would be no joke at all.  Our zone 6b means the average low wintertime temperature is -5 F, or -21C.  We heat our house intermittently from as early as mid-October through mid-December, steadily from at least mid-December through mid-March, and again intermittently from mid-March through at least late April and possibly into May.  And our thermostat is never set above 64 F/18 C.  So really, there are only about five or six months out of the year when lack of heating would be no big deal for us.  Despite the fact that our heat will now be generated "for free," (and the cost of the passive solar system is nothing to sneeze at) we're still completely dependent on the electrical grid.  If we lost power, we'd also lose our heat when the pumps no longer moved warm water through our radiant floors.  Can we remedy this?  Possibly.  We're weighing the decision to install PV panels that would supply enough power to run the systems we consider really critical to our lives.  Having enough electricity from a grid-independent system to keep the chest freezer and a few pumps running would make me feel pretty secure.  Enough homegrown power to run some lights and our computers would be gravy.  This is entirely possible - in theory - but the expense would be significant.  Right now I'd say we'll be 40% self-sufficient with heating.  We've already done plenty of work to improve the energy efficiency of our home.  So most of the remaining 60% could only be achieved if we were to shell out for a PV system.  Then of course, in the long-term there's the thorny issue of replacing components of either the passive solar or PV systems in a low-energy world.

I could probably carry on further with this sort of evaluation of my life, but I'm sure you get it, and it's probably already gotten a bit tedious.  My intention was to explore the real issues of a self-sufficient lifestyle, and to encourage you, dear reader, to think about what challenges you might face on the road to self-sufficiency.  So what about you?  I know the challenges and resources differ enormously among the readership here.  I think it would add a lot to the discussion if you posted about this topic on your own blog, or if you add a comment to this post.  I'd be especially interested to see anyone report on other areas they've tackled, such as health care, education, transportation, dairy, etc.  Let me know if you do post something along these lines on your blog, and I'll be happy to add a link here.  Some general issues you might want to wrestle with:
  • How much does our own skill/labor "count" for in terms of self-sufficiency if we must purchase inputs?
  • How do you factor in dependence on a locally produced good versus dependence on something produced very far from where you live?  Are we more self-sufficient if we can get something from our neighbor, or make a bicycle trip to obtain something locally produced?  Why, or why not?
  • If you depend upon "infrastructure" (e.g. fruit trees, livestock, PV panels, etc.) that you own, but that will eventually die or wear out, how do you gauge your level of self-sufficiency?

Friday, April 9, 2010

Food Production in Small Spaces: Fig Trees in Zone 6


I know the posts on my backyard food production challenge have been rather thin on the ground.  But I hope to make up for that somewhat with this post and a few others I have up my sleeve.  The technique outlined here pushes the edge of the envelope not only in terms of food production in limited spaces, but also in terms of cultivating plants outside of their normal hardiness zone tolerances. 

The hardiest figs are generally considered to do well in zone 7 or higher.  I'm in zone 6b.  Early last spring a hardcore gardener in my area showed me his Brown Turkey fig trees that he had planted in large tubs and pulled into his garage over the winter months. Though fig trees can reach 6 meters in height, these were only 2 meters, at most, above the level of the soil in their containers.  I was impressed and fascinated, enough so that this concept made it on my official list of goals for 2010.  Having taken up the challenge of feeding ourselves as much as possible from our own production, while also making a conscious effort to reduce our food miles and eat locally, some of our favorite items of produce have become rather scarce in our diet. We've lamented the fact that we could not grow avocados, mangos, or figs. Until we saw this method for keeping fig trees, that is.

I'm going to walk through this technique as logically as I can, though I'm not sure the pictures I have are going to make it flow very well.  Bear with me, and click on any of the pictures for bigger scale.  The basic idea is a large planting container with a water reservoir at the bottom which is kept filled as constantly as feasible.  The soil and the roots of the plant are held up above this reservoir with the use of wire mesh and burlap.  The burlap also serves to wick moisture up to the soil as the level of water in the reservoir falls away from direct contact with the soil.

The gardener who showed me his fig trees explained that one key issue was to make sure that the container the trees were planted in was UV resistant, otherwise the sun would make the plastic brittle enough to crack and break easily after very little time.  Having handles on the containers is also a really good idea, since they will need to be moved twice a year and will get quite heavy indeed as the plant grows.  He was using slices of large diameter PVC pipe to create the water reservoir at the bottom of the container. But this site (which includes designs for a different but similar self-watering container) argues against the use of PVC in container gardening, because it leaches harmful chemicals, including endocrine disruptors. Good to know, but who knows what's in the plastic planter itself.

I broke down and bought feeding buckets for large livestock at Tractor Supply to use as the containers.  Rather than using PVC for the water reservoir, I asked friends to save a bunch of dog food cans for me. Any tall can would do just as well, but it's important that all the cans in a given container be of identical or nearly identical height.  To allow water to move freely within the reservoir, I drilled a hole towards one end of each can on the side and another on the bottom, and arranged them all upright in the barrel. A few cans were made such that a can opener could be used to remove the bottom of the can as easily as the top.  Where I could, I did so.  The cans also have the virtue of not costing me any extra money.


Over the layer of cans goes a piece of hardware cloth, to help support the soil in a tidy layer. The hardware cloth was cut using a cardboard template traced from the bottom of the container.  After tracing and cutting the cardboard, check to make sure it's a good fit within the container over the top of the cans before cutting the wire to fit.  Over and around the wire netting goes a piece of burlap. The burlap must be sized to overhang the wire netting by enough to reach the bottom of the container. Burlap also has the virtue of turning up as packaging for various items. If you buy basmati rice in those 10-pound bags, there's a source of burlap that you won't pay extra for. If you can't find any for free, burlap is one of the cheapest fabrics you can buy. 

An overspill hole is needed at just the level of the hardware cloth netting.  This is to keep the roots from getting waterlogged.  I first drilled a normal hole and then used that hole as a guide for a mandrel drill bit which significantly enlarged the hole.  I wanted something that would allow me to easily check the water level with my finger and accommodate a garden hose.  Since I'll be sticking my finger in there fairly often, and since the hardware cloth is right at the level of the overspill hole, I took the precaution of crimping back the sharp ends of the wire so my fingers aren't at risk.

A watering tube is an option for filling the reservoir if you don't want to fill through the overspill hole.  This is a tube that sticks up above the soil in the container and empties into the water reservoir.  You could use bamboo if you have access to an aggressive stand that needs thinning. You'll just need to punch through the interior segments to make it work as a pipe. The bamboo will rot fairly quickly in damp soil, but it is non-toxic and cheap enough to replace each year if need be.  To make sure that the water flows easily into the reservoir, the bottom of the bamboo pole should be cut at an angle.  Angling the top in the same way also makes filling a bit easier.  However, I'm opting to forgo a watering tube entirely.  Instead, I'll be adding the water via the hole I use to monitor the reservoir levels.  Given that I'll have only a few containers to monitor for water reserves, I think this is fine.  If I had dozens of such plantings, I'd probably opt for the watering tubes.  I was told that a fig tree grown to full size for such a container will empty a such a reservoir in two or three days of hot weather.

I was also told that the roots of the potted fig trees will need to be pruned back severely about every three years, as the plant grows out and fills the container.  The guy who sold me the fig trees said this could even be done with a chain saw!  I suppose this root trimming works along the same lines as bonsai cultivation does. Pulling out a fig tree whose root ball has managed to fill a twenty-odd gallon container is going to require two people, no doubt, even with the container laid on its side. But it will also be an opportunity to check that the burlap is still intact, and to add some worm castings to the container to feed the tree.

So last Friday I came home from Flemington, New Jersey with three one-year-old fig trees: one each of the Neri II, Sicilian, and Verte varieties.  Fig trees like an alkaline soil in the 7.5-8.0 range, so I added finely crushed eggshell (a homegrown product) to the garden soil and compost mixture that I made for the fig tree containers. This study shows that pound for pound eggshells are nearly as effective as garden lime at lowering the pH of soils. Eggshells affect soil pH a little more slowly, but the effect is longer-lasting.  I was told to expect a small crop of fruits this year. The trees have shown really dramatic leaf production in the few days I've had them in their large containers.  We'll see how it goes as far as a harvest is concerned.

Aside from the fact that I'll be able to pull my fig trees into our garage for protection from winter weather, planting them in containers means that they can be placed on a driveway, porch, or any other space not otherwise useful for food production.  When we try to maximize what we produce in limited residential spaces, we need to use all available space, whether it looks suitable for cultivation or not.  Container gardening is one of the most versatile means of doing so.  Theoretically, these trees in large containers could be moved if we were to relocate. I don't expect we will anytime soon. But if you aspire to food production in a rented space or if you anticipate moving in the near future, this self-watering container for fruit trees is one you might consider. Just be aware that containers of the size I show here will weigh a couple hundred pounds when full of soil and a tree grown to the limits of that container.

I'm posting this technique at just the moment I'm trying it out for myself, because I've seen first hand that it works for this particular tree in my immediate area.  There may be a few tweaks and modifications I will recommend in a year's time.  But I wanted to get this idea out there for those of you thinking about what can be done in small spaces or in a cold hardiness zone.  Also, for what it's worth, it's apparently not too hard to grow new fig trees from cuttings.  So if you "invest" in a fig tree or two now, you could in theory have figs for the rest of your life, or share the wealth by passing on new trees to your community.  That's my kind of investment.