Monday, January 31, 2011

My Thrivalist Binder

This is a topic I've been meaning to post about for some time.  As is the way of things, events have conspired to reveal the good advice I've been meaning to share with all of you as something I should have heeded better myself.  I've been having serious computer trouble lately, and there's the possibility that I may permanently lose a great deal of information and photos saved on my hard drive.  Physician heal thyself.  I've never been too diligent about regular backups.  The last backup performed on my computer was months ago, if not a year ago.  It's a hard lesson to learn, but it brings home what I had intended to write about.  What follows is the post I've been working on incrementally for a few months...

Plenty of peak oil doomers, preppers, and thrivalist types have blogged about their shelf full of reference books for Camp Teotwawki, including me.  But there are an awful lot of loose, unbound, but important bits of information floating around my life that aren't in books.  A great deal of it is on my computer hard drive, here on my own blog, or resides at websites that are as familiar to me as old friends.  From a prepping perspective, this is a bit problematic.  If something suddenly takes out my electrical supply, or the network of datafarms that stores the content of the internet, that information is gone.  And that's probably when I'd most need this information.

This has been nagging me for a while and I finally started printing out important bits of information as they came to my attention.  I put these pages together in a three-ring binder similar to one I keep for recipes I use over and over again.  Each page is placed in a plastic sleeve and then in the binder.  This has always been really handy for the recipes, since the sleeve protects the page from batter, splattering oil, wet hands, etc.  It has saved me having to reprint a given recipe many times over.

So what sorts of things have made it into my thrivalist binder so far?  Here's a sampling:
  • Our yearly harvest records and notes from the garden
  • A planting schedule specific to my hardiness zone, our local first and last frost dates, and the dates when we lose and gain ten hours of daylight
  • Some guidelines on biodynamic beekeeping
  • General principles of curing meat
  • Worksheets for each of my curing batches and a supply of blank curing worksheets 
  • Instructions on making soap the old-fashioned way
  • Where There Is No Doctor - available as a free download
  • Instructions for caring for fig trees grown in containers in my zone
  • Guidelines for disinfecting water through exposure to sunlight
  • Homemade rooting hormone recipe, and a few guidelines on growing plants from cuttings
  • Sharon Astyk's recommendations for 25 plants we should all consider growing
  • Detailed information on growing a few specific medicinal herbs and their various uses
  • Planting instructions for garlic
  • Basic information on seed saving
  • A few working notes on meals cooked in the solar oven
  • A printout of Rocket Mass Heaters
  • All of our soil test results from year to year and bed to bed
  • Guidelines for processing raw wool
  • Guidelines for preparing natural dyes from plants, and a list of which plants produce various shades
Mostly this is information that's either self-generated and therefore not available in any book, or specific pieces of information taken from books that I don't feel the need to own as a whole.  Some of it I may not ever need, but much of it is information I'm already using regularly, if infrequently.  None of it is information I want to trust to memory alone.  There are plenty of things I haven't yet remembered to print out and add to the binder.  But at least having started it there's now a ready repository of information that fits the bill.  I'm more likely to bother to print out the pages since the binder is there and stocked with a supply of empty plastic sleeves. And even if disaster never occurs, having the hard copy means I don't need to use any energy to access the information.

Incidentally, Kathy Harrison not long ago posted about an emergency binder of a different sort.  She has assembled various pieces of critical information and legal documents for her family in case one of the adults is incapacitated, or in case of the need to evacuate her home on very short notice.   This is a binder of a very different sort, but well worth putting in place, in my opinion.  You don't have to be a doomer to benefit from the sorts of preparations Kathy writes about.  After all, we can pretty much count on being incapacitated or dying at some point.  The information she advises assembling would benefit any family trying to deal with the serious illness or death of an adult member of the family.  You don't even have to live in an area prone to natural disaster to use her advice; house fires can happen to anyone at any time. 

So what about you?  Have you printed out information you think is valuable and put it in an easily accessible place?  Care to share what bits of knowledge have made the cut?

Wednesday, January 26, 2011

The Virtues of Winter

This is one of the hardest periods of the year for me.  I've had my winter break from gardening duties, and it was very welcome.  Now I'm a bit antsy and definitely missing all the summer vegetables.  There is still a week or two to go before the earliest seed starting can begin, though I'm pushing that boundary with some experimental cold frame plantings.  I've done a few germination tests to make sure that the seeds I put into our personal seed vault came through the year in viable condition.  All looks well there, so my seed orders this year will be fairly limited.  We have snow on the ground still from two separate storms, and six-ten inches of mixed sleet and snow predicted for the next 24 hours.  As I write, fat flakes are coming down at a decent clip.  I'm trying to see the upside in winter.  Here's what I've come up with.

I used our recent -1 F (-18 C) temperature to go around the windows of our home feeling for air leaks.  At that temperature you don't need any fancy instruments to find them.  Bare fingers will do the trick, trust me.  I'd brought in a tube of silicone caulking from the garage to warm up in the house.  Then I went over all the leaks I could find, sealing them up.  It made a noticeable (but not huge) improvement in our downstairs bathroom, which has two exterior walls, both of which are only passably insulated.  Upgrading the insulation in these walls is on the list, but the expense will not be insignificant, so the project is not near the top of that list.  But hey, a reduction of those thin drafts of icy cold is all to the good.

I've also got a tiny tip today.  I call it iceboxing - turning our refrigerator into an icebox.  It's easy to do at this time of year, provided there's a little extra room on the top shelf.  I use empty plastic juice and soda containers, given to me by relatives.  The large squarish ones with the rectangular handles are really nice for this purpose. Just fill them with tap water, put them outside and let them freeze solid overnight.  In the morning, I put them in the fridge and put two more filled bottles outside so as to have swaps available when the first two thaw out.  Two large chunks of ice keep the refrigerator's compressor from running much at all.  I don't unplug the machine because I still want the light in there, but it certainly cuts down on our electrical usage.  Easy, free, saves money.  Seems like an obvious win to me.

Winter is also the time of year I most like to knit, and cold hands certainly provide motivation.  I've made myself two more pairs of fingerless gloves.  I finally have some that fit snugly around my wrists, like the ones I made for my husband a few years back.  A pair of these gloves is a quick project that suits my short knitting attention span.  They can be made fast enough to give me a quick sense of accomplishment, and that helps keep me going on other fronts. 

The cold season is a tough sell, but I wouldn't give it up for anything.  I've lived in places without a real winter and always felt slightly cheated.  I grew up with four seasons, so snow and sub-freezing temperatures feel right to me.  Winter has its austere beauty too.  As a gardener, I know the value of the frost heave that loosens up our heavy soils, making them spongy and easier to work.  The glory of spring in this area is part and parcel with the severity of our winter.  Where I live spring explodes out of frozen winter: dramatic, lavish, electrifying.  Other places have springs that sort of saunter onto the scene, a nearly seamless transition from tepid winter, or maybe even just a rainy season.  Not our springs.  So as I look out the window at a world drained of color, it's well to remember this.  I know that in a few short months we'll feast on asparagus and enjoy the succession of breathtaking tree blossoms. Meanwhile I muse on hoop house designs and hope that this time next year will see us harvesting abundant greens as the snows come down.

Have you been making good on winter weather lately?  Do tell.

Thursday, January 20, 2011

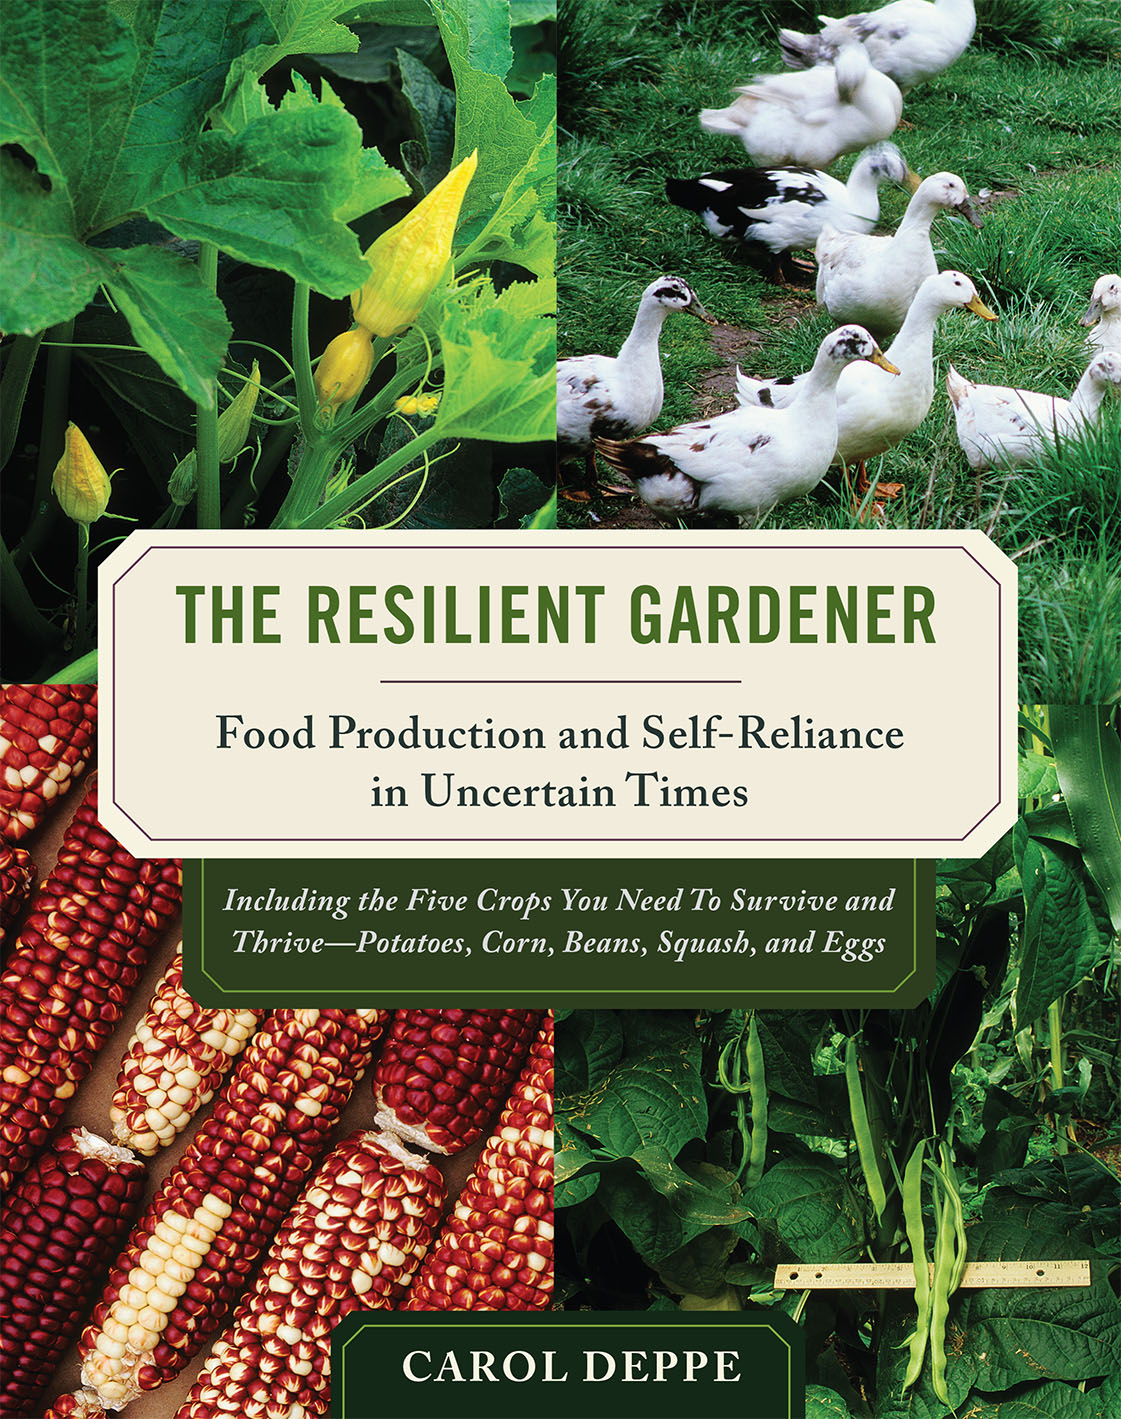
Book Review: The Resilient Gardener


I've just finished reading something excellent and thought I'd share.  It's Carol Deppe's recent book, The Resilient Gardener.  If you think you might one day want to feed yourself without recourse to purchased food, then I cannot recommend it highly enough.  It's one thing to grow a garden for a few years, and even come to rely on it for a significant portion of your calories and nutrition.  It's another thing entirely to really give up purchased foods, especially the cereal crops that make up such a huge portion of our western diet.  And when I say give up, of course I have in mind a time when it may not be a matter of giving up, but of being unable to obtain them, for one reason or another.

Deppe is allergic to wheat, gluten, and dairy.  Yet she feeds herself by concentrating most of her efforts on five crops: corn (maize), potatoes, squash, beans, and eggs.  She chooses these crops for their caloric and nutritional values, storing ability, proven reliability, and resilience in the face of unpredictable weather or even the lack of attention from the gardener.  It seems to me that anyone trying to feed themselves in a very large part of the world (certainly most of the US) would do well to devote much attention to those crops too.  I love my wheaten foods, but there's little chance that I'll ever be able to produce even a fair portion of the wheat I would like to continue to eat.  Corn is not my current starchy staple, but it's the most reliable grain in my region.  We already produce our own eggs with a tiny flock of four laying hens.  The other three crops consistently do well in my region too.  Greens, other vegetables, and fruit are all nice for supplementing, but Deppe has clearly identified one year-round "crop" and four long-storing staples that would do the heavy lifting if we should ever need to provide all our own food.

The Resilient Gardener is not a broad book, but a deep one.  And it's not a basic gardening book, but an advanced one. Deppe assumes her readers have read countless paeans to compost and mulch, and refrains from rehashing these topics.  Instead she caters to those with at least a few years of gardening under their belts.  Her dogged focus on these five crops allows her to recount a wealth of detail that will save many a backyard enthusiast from both errors and unnecessary effort.  And I mean the sorts of errors that even an experienced gardener might make.  Her long-term experimentation with many varieties within her five chosen crops is meticulous and scientifically rigorous.  If you've ever asked yourself a question about one of these foods, chances are that Deppe has provided the answer in her book.  She answered a few handfuls of mine.

I appreciate that Deppe discussed not just how to grow the foods, but how to store them and eat them too.  While I already eat all of the foods she writes about, I don't rely on them to the extent she does.  Since starchy staples tend not to be fungible ingredients when it comes to cooking, it helps to have some guidance with basic recipes.  Changing one's diet is rarely simple.  Even more do I appreciate her frank admission that not everything is worth doing well, or even doing at all.  What she terms selective sloppiness appeals to my sensibilities.  This is a book that will help you find the sweet spot between maximum productivity and minimum labor.  If you want advice on how to make your gardens a beautiful, weed-free show place, this isn't it.

Although she lives and grows these crops in the Pacific northwest, the information she presents is largely relevant to most other areas of the US.  The exception is her chapter on eggs, or the laying flock.  Here Deppe concentrates on ducks rather than chickens.  She explains her choice on logical grounds: ducks make more sense than chickens in her climate, so she has more experience with this species than with chickens.  Moreover, there are numerous books on small-scale chicken keeping; Deppe prefers to cover new ground, and does so with her usual level of gritty detail.  I don't think that backyard ducks are likely to rival backyard chickens in popularity anytime soon, but her contributions on the former nonetheless fill a niche.

Another very minor criticism I have is that Deppe addresses the issue of feeding the poultry flock in hard times largely by sacrificing to them portions of the other crops she grows.  I think there are many other alternative feed options for those with very small flocks, even when pasture is marginal or free-ranging not feasible.  Deppe's suggested feeds will certainly work for those with enough acreage to produce the extra crops.  But they still put livestock in competition with humans for the same foods, as well as turning eggs into re-packaged versions of the other staples in Deppe's dietary paradigm.  This would raise concerns for me about nutritional diversity and completeness. If feeding poultry from resources internal to your homestead is an important issue for you, I strongly recommend you look for Harvey Ussery's forthcoming book The Modern Homestead Poultry Flock.  It'll be published later this year.

Such minor issues aside, The Resilient Gardener is truly an invaluable addition to the bookshelf for those interested in food self-reliance and preparation for a low-energy future.  Due to the necessities of her own dietary restrictions Deppe has done work and research that can benefit anyone looking to produce their own food from a fairly small area and in uncertain times.  I'm thankful that she has chosen to share what she has learned. 

Wednesday, January 5, 2011

Black Soldier Fly Larvae

Photo from Wikimedia Commons

I hope the title of this post doesn't put anyone off.  If you're not fundamentally squeamish about insects, I promise there's nothing terribly icky about what I've got to say today.

Included in my formal list of goals for this year is the project of trying to feed our laying hens more and more with food we produce ourselves.  We've already got well established routines that provide some of the chickens' food, such as kitchen scraps, trimmings from the garden, feeding them Japanese beetles and squash bugs in the proper seasons, and gleaning acorns for them in the fall.  Still, we end up buying a few 80-pound bags of feed for them each year.  This is grown organically, fairly local to me, and milled by the farmer that grows it, so on that score I feel pretty good about it.  But it's a 45-minute drive to buy the feed, and the price (though much cheaper than the nasty pelletized chicken feed from Tractor Supply) has been nudging up steadily ever since I started buying it.  This feed easily accounts for more than half of the hens' caloric intake over the course of the year.

So I've been looking a bit harder at what we might do to close the gaps in our homestead economy and nutrient cycles.  Worms from our vermicompost are an excellent possibility, but I'm going to leave that project for another post.  Right now I'm going to talk about the Black Soldier Fly, which is probably the coolest idea easily adapted for use by very small scale homesteaders I've come across in a long time.  I have this tendency to think that if I've heard of some cool idea, then everyone else already has too.  But I've gotten comments from time to time that ask for more detail on stuff I mention in an off-hand way.  So I'm going to review what I know about this species and how those with small backyard poultry flocks can partner with it to their advantage.

The Black Soldier Fly is well established in many parts of the world, including most of North America in hardiness zone 7 or warmer.  Though it is a fly, it's a world apart from the common housefly in terms of the nuisance factor.  The adult phase of this insect's life, the only time it can fly, is very brief and devoted solely to reproduction.  The adult BSF doesn't even have a working mouth, so it cannot bite or eat and is not attracted by food, except as a resource for the next generation of BSF.  Even so, the mated female BSF does not land on food.  She seeks to lay her eggs nearby - not on - a food source, where the newly hatched larvae will be able to land on the food and begin feeding.  BSF larvae can consume small amounts of meat, but this is not a species that specializes in carrion.  Mostly what she's looking for is decomposing plant matter.  In fact, they may already be resident in your compost heap.  Once her eggs are laid, the adult fly has accomplished her mission in life, and dies shortly after.  The males also die shortly after mating.  The larvae remain on the food source as they pass through several sub-stages of growth, until they are ready to pupate, at which point they seek to burrow into the earth to complete their development into adults.  So you can see that there is little purpose or opportunity for the BSF to interact with humans in any way, unless we deliberately facilitate such an interaction.  Indeed, even if you live in a region with a BSF population, it's entirely feasible that you have never noticed these insects before, since they have little interest in us, and such short life spans in adult form.

The point at which we would want to intervene in the life cycle of this insect is when the larvae are fully grown and ready to pupate. Clever people have designed a clever contraption for harvesting the mature larvae at just this stage.  Or rather, using the BSF's instincts in order to have it harvest itself.  The BioPod is a custom built bucket system that provides an exit route for the larvae leading to a closed container, which makes feeding them to poultry or other livestock trivially easy.

I'm going to post another piece soon about the knockoff BSF composting buckets I'm working on.  What I want to dwell on a little more at this stage is the idea of partnering with this species.  Although in my formal goals for this year I wrote that I'm not committing to adding another species to our homestead, that was an oversight.  In reality, the Black Soldier Fly is another species I very much plan to work with.  It may not look like livestock, just as our red wriggler worms for the vermicompost bin didn't look like livestock.  Perhaps they're not.  But they will be a new species for us, and partnering with them will involve a learning curve.  I see the cultivation of these insects as one more item in the self-sufficiency toolbox; one more thing that reduces our dependence on fossil fuels.  For without fossil fuels it would be very difficult for the farmer to harvest the grains that make up our purchased feed, and very difficult for us to go and buy them multiple times per year.

It may seem grotesque to call my intended relationship with BSF a "partnership."  After all, it looks pretty exploitative from one perspective.  But in reality, I don't see this as ethically any different than keeping other species for food.  I will be establishing an insect where it doesn't currently exist, and responsible not only for feeding each generation, but also maintaining a "wild" population that survives to adulthood in order to reproduce and create the next generation.   After obtaining a starter colony, I'll need to heavily "seed" our garden soils with ready-to-pupate larvae.  This will reduce my usable harvest in the first year.  But with luck, a good population will take root right in the backyard, and continue to take advantage of the shelter and food the composting buckets will provide for them. From what I've read, I will very much need to actively tend the compost buckets.  I expect to derive both animal feed and a small amount of compost tea from this partnership.  In other words, the BSF will become part of the system of this homestead.  I'm always looking for ways to increase the diversity of species, and the connections between them, on our tiny piece of land.

Sooner or later I'll post more on the buckets themselves.  In the meantime, having read this post, would you humor me please, by participating in my poll on Black Soldier Fly composting?  It's on the sidebar of my blog.  I'm curious how many of you have heard of BSF cultivation before, and what your attitudes towards it might be.

Friday, December 31, 2010

2010: A Year in Review

It's that time again when I look back and assess progress made over the past year. Before getting in to any details, I'm happy to report that this year things seemed different somehow.  At this time last year, I really felt that despite all the work we'd done, it didn't amount to much.  It felt like I couldn't get much traction on the sorts of progress I was trying to make.  Not this year.  I feel good about where we're at, and where we're going.  I can't really explain this, since I didn't work any harder or smarter, or get more done this year as compared with last year.  It might come down to the work of past years beginning to literally bear fruit in 2010.

While I had my official list of goals for the year, and dutifully tackled some of them, there were a whole slew of other projects that were never on the list, but were completed nonetheless.  Like laying out permanent beds and pathways in our garden, and amending the beds with copious amounts of compost from our township, and building a mobile poultry pen to fit precisely over those new beds.  That project was a lot of work, and it will make a significant difference for our garden and our ability to use it more efficiently in future years.  Seems like I should be able to cross that off the list with pride.  Except that it wasn't on the list in the first place.  I won't detail the goals unmet this year.  If you're curious, a quick look at the sidebar shows (at least for the next few days) what didn't get done.  Nothing left undone was absolutely critical, and only a couple of those goals are going to be priorities for the coming year.

Anyway, on to what did get done this year.

Overall:  We decreased our dependence on the industrial food system by producing more of our own food, and also by buying more of our food from local sources, including fruits I turned into jam.  Our passive solar thermal heating system substantially reduced our dependence on fossil fuels.  This was also the year we began harnessing volunteer muscle to help with the work load, which has turned out to be a huge help in many different ways. My husband remained employed this year, and is even reasonably assured of continued employment for another year, for which we are very grateful, given the continued state of recession (whatever the talking heads may say about that).  We saw the first modest harvests from several of the perennial food plants we established in previous years.  Asparagus, pears, cherries, grapes, elderflowers and elderberries!  It's unutterably gratifying to see what we hope are just hints of the harvests to come from these crops.

Harvest tally - This year we brought 757.2 pounds (343.5 kg) of food in from our backyard, including about 11 pounds of home-harvested meat.  This figure doesn't include any of the produce we picked and ate outside, nor any sub-par stuff sent directly to the chickens.  Also, we haven't yet gotten around to shucking this year's popcorn, so that hasn't been included in the tally.  Our four hens gave us about 1143 eggs this year.


Mortgage reduction - I'm not going to give an exact figure, but we made substantial progress towards our goal of paying off our mortgage.  We're currently 16 years ahead of schedule in repaying our principal.  If we do as well in the coming year, we'll be extremely close to paying it off entirely.


January - Finished the root cellar. Researched honeybees and methods of keeping them. Placed orders for two packages of honeybees. Placed seed and rootstock orders. Began second introductory beekeeping class. Reseeded the coldframe with arugula.

February - Attended the PASA conference, a one-day seminar for beginning beekeepers, a one-day seminar on alternative agricultural strategies, and a three-day class on agricultural soils. Got our personal seed vault squared away. Two cats joined our household. Seed starting commenced.

March - Got the fruit trees pruned. Work began on our passive solar heating system. I improved my knowledge of curing meats by working with a few local grass-based farmers during their big curing day. Prepped the beekeeping equipment. Prepped large self-watering containers for fig trees and hazelbert bushes.

April - Planted 3 fig trees and 2 hazelbert bushes in large self-watering containers. Bees arrived and we installed them in their hives, beginning the drama. Started experiment #2 with potatoes grown in buckets.  Began creation of a permaculture-style guild around our old apple tree, using the deep litter that the hens had been on through the winter months, as well as saved corrugated cardboard and paper bags from bulk purchases for lasagna mulching. Picked up truck loads of cheap compost and mulch from the township four weekends out of four.  Dug wild elderberries and stinging nettle from a friend's property; transplanted them around our home along with ramps given to me by a relative. Renovated the chicken coop and pen. Put the hens back into rotational grazing on the lawn. Seed starting continued. Tilled and laid out permanent beds in the garden.

May - Started experimenting with lacto-fermentation.  Picked up more loads of cheap compost and mulch from the township four weekends out of four. Hosted a work weekend which allowed me to get ahead of the weeds in the garden.  Planted the bulk of the annual crops, including our first three sisters planting. Made my first ever successful batch of jam.  Killed our first garden rabbit and ate it with satisfaction.

June - Hit a huge, community-wide yard sale and snagged a lot of canning jars, plus a stovetop wok for use with the rocket stove, on the cheap.  Built a colorful mailbox hand tool depot in the garden, and a plastic bag drip-dry station in the kitchen, which together constituted my birthday gift projects.  Took in a disabled heritage turkey poult, intended for Thanksgiving.  Built pea trellises.  Arranged to host a WWOOFer for a week, informally.  Cleaned out the wreck room to make a place for the WWOOF volunteer. Made raspberry jam from local organic fruit I picked myself, and elderflower cordial from the first blooms of the elders we planted in 2009.

July  - The month started out well when I managed to keep most of the garden alive through a crazy heat wave that started in June.  With help from our WWOOFer, we built a very lightweight and mobile poultry pen sized to fit our garden beds, used it as temporary housing for the growing turkey poult, and caught up on a lot weeding and lasagna mulching.  Then I got hit with the double whammy of a massive infection in my foot and the sudden death of a relative.  Together these things kept me from the garden for more than ten days, leading to a squash crop failure.

August - A big month.  Mustered the will to get back out in the garden to keep battling the weeds, salvage some parched plants, and to succession plant for fall crops.  Canned tomatoes like nobody's business, finishing the month with 28 quarts of roasted tomato sauce.  Cured seven more pork jowls and smoked them, turning out 12 pounds of finished guanciale.  Dealt with first harvests of elderberries and our wine varietal grapes.  Experimented with summer-sowing parsnip seeds as they mature.  (Results on that to come in the spring.) Took delivery of custom ordered ceramic weights for improvised lacto-fermentation crocks, and started experimenting with garden produce.  Welcomed our first official WWOOF volunteer, who helped with a great deal of lasagna mulching and canning.  Got one cold frame built.  Finally figured out a good method for making smoked chili powder from homegrown chilies and wood chips from our own apple tree.

September - Planted both new and old cold frames with varieties of cold-tolerant crops (spinach, carrots, lettuce, scallions) that tested well last winter.  Painted our living/dining room, making it bit less stark and a bit nicer for having company over.  Harvested the potato buckets to disappointing results.  Harvested and dried first crop of hops.  Welcomed a third WWOOF volunteer.  Did a bit of refurbishment on the mobile chicken pen and used all the leftover paint samples to make it all piebald.

October -   Hosted another WWOOF volunteer.  Built a crate from scavenged wooden pallets to hold bottles of ice in the root cellar.  Used the poultry schooner to let the chickens do much of my garden cleanup and prep for winter.  Cut down the hemlock tree in the back yard to make room for another apple tree to be planted next year.  Copied Tamar and Kevin's ingenious instant greenhouse for the in-ground rosemary plant out in the garden.

November - Winterized the beehive in hopes of keeping our struggling colony alive until spring.  Started loading up the root cellar. Reconstructed winter quarters for the girls and got them back onto deep litter bedding.  Lasagna mulched large swaths of garden beds, and two spots on the lawn in preparation for transplanting our hazelnut bushes in early 2012.  Got on the waiting list for two nucs from Champlain Valley Bees.  Pressed our apple cider and turned some of it into hard cider.  Hosted Thanksgiving for the extended family without having a nervous breakdown.  Bought a shotgun and got a gun club membership so we'll have a place to practice shooting once we've completed our gun safety classes.

December -  Made my first batch of duck confit from locally farmed ducks, and started another batch of guanciale with free/workshare jowls from farming friend's pastured hogs.  Attended a workshop on leasing farmland in an attempt to figure out what to do with our parcel of agriculturally conserved land.  Based on advice from one of our WWOOF volunteers with EMT experience, assembled first aid kits for the house and both vehicles.  Slaughtered our turkey fosterling, and plan to eat it for New Year's Eve dinner.  Started early on the construction of a Biopod knockoff, officially a goal for 2011.

It feels fantastic to end the year with a sense of satisfaction for things accomplished, instead of my customary nonsensical feeling that we got nowhere.  Primarily because it allows me the freedom to be fairly slothful for a while during the winter.  I expect next year to be just as busy, and that the busy-ness will start up again quite soon.  I can only hope we make as much progress in the new year, and that I feel as good about it in twelve months' time.

What accomplishments made you proud this year?

Wednesday, December 29, 2010

Working Guanciale Recipe and Methodology

 I've got a batch of guanciale in progress, so it seems a good time to present my working recipe and methodology for this delicacy.  I say "working" because, while I've had some experience in taking raw jowls and turning them into cured and smoked guanciale, I'm still tweaking the seasonings, timing, and methodology as I go along.  With this post I'm going to venture into a topic that carries some risk.  My methods almost certainly will not meet USDA guidelines for food safety or sanitation.  Although my husband and I have eaten several jowls' worth of this guanciale and lived to tell the tale, you are hereby warned that the procedures outlined here may result in food-born illness.  So follow them at your own risk.

When beginning to experiment with home curing meat, it's important to start with meat you can trust in the first place.  Clean meat.  If you wish to try a batch of guanciale, sourcing the jowls will probably be the most difficult thing for many of you.  I'm lucky to have one friend who raises hogs, and an established acquaintance with another hog farmer, both of whom keep their animals on pasture and eschew hormones and unnecessary antibiotics.  These people raise hogs the way I would raise them if I had the acreage, and the chain from farm to butcher to customer is short, well known, and transparent. So I'm very comfortable with using their meat, and confident that this is clean food.   Your best bet will likely be a small scale local farmer who sells pork by the whole or half animal.  Quite often the jowls are not wanted by the customers, so the butcher often salvages this cut for head cheese, scrapple, or sausage.  If you order a half or whole animal, by all means request the jowls.  Once you've established a working relationship with the farmer, you may be able to acquire the jowls other customers don't want either very cheaply or entirely free.

Despite my caveats at the beginning of this post, which you should consider seriously, I want to reassure you somewhat.  When curing pork jowls, you are starting with a solid piece of meat, as opposed to ground or even cubed meat.  This means you are inherently starting from a safer position.  Meat with no cuts into it presents few opportunities for contamination.  When you can thoroughly cover all exposed surfaces with a curing mix, the risk of any pathogen establishing itself is vanishingly small.  Furthermore, I'm going to recommend that all beginners work with small enough batches that the initial stages of curing can be done in the refrigerator.  Practice exemplary sanitation when working with meats you will be curing.  Make sure your hands, knives, cutting board and food containers - anything the meat comes into contact with - are spotlessly clean.  When you add to good sanitation the precaution of starting with clean meat in the first place, and the protection of refrigeration, you can be confident that your curing process is going to produce something safe to eat.  When I started home curing I even began the air drying process in the refrigerator.  I now do it in our root cellar or even the garage when the temperatures are appropriate.

For additional insurance against spoilage, I tend to smoke the meats I cure at home.  Wood smoke is a natural means of preservation and it happens to add a wonderful flavor.  If you have a smoker, plan to use it for your first few runs through the curing process.  By building in these multiple layers of safety, you will enjoy your finished cured meats without misgivings and learn how easy it really is.  Leave sausage preparation for later, after you've taken a few batches of solid cuts through the entire process.

So.  On to the details of guanciale.  You will need: a metric scale capable of handling fractions of grams, and a scale capable of weighing the jowls you will work with.  You can weigh in imperial and convert pounds to metric if need be.  Also, a cutting board, a sharp fillet or butcher's knife, salt, sugar, spices, a spice grinder, a container large enough to hold the jowls, metal skewers or racks, newspaper, and optionally, a smoker.

I'm indicating a large salivary gland, but there are many others below my finger as well

Trimming the jowls
Ideally, you will do the trimming of the jowls yourself, and with a sharp knife of course, so that as little fat is removed as possible.  Some butchers remove almost all the fat, assuming that customers want as lean a cut as possible.  Fat protects lean tissue from excessive drying during the curing process, so it's worthwhile to do the job yourself if you can.  You will need to remove the salivary glands from the jowls.  These usually have a characteristic, light brownish coloration to them, in contrast to the reddish muscle tissue.  But I have on at least one occasion seen salivary glands almost identical in color to the muscle.  Fortunately, they are further distinguished by shape, which tends to be round, sort of like a bubble surrounded by fat.  And the fatty tissue around these glands is also grainy or bubbly, for want of a better word.  This fat should also be removed, since it can conceal small salivary glands.  The fat you want to leave on the jowl has a smooth, solid texture.  Also remove any skin that adheres to the jowls, and wash off any stray bristles or other material.  The trimmings can be given to other livestock or pets, either cooked or raw as you prefer.

Two detail images of salivary glands and the different colors they can be.  (Click to biggify.)


Weigh the jowls and prepare the curing mix - sample calculations in blue
Once your jowls are cleaned, trimmed, and patted dry, weigh them and convert the weight into grams.  A conversion calculator can be found here, or simply multiply the weight in pounds (in decimal form, such as 8.475 lbs) by 453.6.  This gives you the weight in grams (8.475 x 453.6 = 3844.26).  Using the number you derive, make the following calculations:

[Meat in grams]  x  0.025  =  kosher salt in grams  (3844.3 g x 0.025 = 96.1 g of salt)
[Meat in grams]  x  0.015  =  cane sugar in grams  (3844.3 g x 0.015 = 57.7 g of sugar)

-This is a basic curing mix, the active ingredients that will extract moisture and do most of the preservation.  The remaining ingredients will contribute extra flavor, and their weights are derived not directly from the weight of the meat, but from the weight of the salt.

[Salt in grams] ÷ 14 = dried juniper berries in grams (96.1 ÷ 14 = 6.9 g juniper)
[Salt in grams] ÷ 7 = fresh thyme in grams (96.1 ÷ 7 = 13.7 g fresh thyme)
[Salt in grams] ÷ 16 = white peppercorns in grams (96.1 ÷ 16 = 6 g white pepper)
[Salt in grams] ÷ 50 = black peppercorns in grams (96.1 ÷ 50 = 1.9 g black pepper)
[Salt in grams] ÷ 200 = dried bay leaves in grams (96.1 ÷ 200 = 0.5 g bay leaf)

Be sure to make the first two calculations based on the weight of the meat, and all subsequent calculations based on the weight of the salt.  This is done simply in order to work with fewer digits.  If you need to make substitutions for any of these seasonings, keep in mind that dried herbs are much more concentrated in flavor than fresh herbs.  So, for instance, if you use dried thyme in place of fresh, reduce the weight by at least 2/3.  If substituting fresh juniper or bay leaves for the dried, multiply the weight by 3 to 5.  Other flavorings that I have tried in the past and may continue to experiment with include fresh rosemary, allspice, fennel, and star anise. 

Combine the salt and sugar in a bowl. Finely chop the fresh thyme and mix it into the salt mixture.  Grind the remaining spices until very fine.  Mix these into the salt mixture until the curing mix is homogeneous.

Curing
Into the bottom of a non-reactive container large enough to hold all the jowls, scatter a heaping tablespoon of the curing mix.  Holding each jowl over the container, coat all surfaces of each jowl thoroughly with the curing mixture, working it into any folds in the meat.  When laying one jowl on top of another, sprinkle extra curing mix between them.  Scatter any leftover mix over the top layer of jowls.  Cover the container tightly with a lid or plastic wrap, and place it in the refrigerator or a root cellar at refrigerator temperature.

Curing mix, freshly applied

Let the jowls cure in the refrigerator for ten days, marking the start and end dates on your calendar when you begin. Check the jowls at least every other day.  Turn them over and bring the ones on the bottom to the top. The meat and curing mix will naturally form a brine.  You may pour this off after the fifth day if it is excessive, but this is not necessary if you keep rotating the meat.  Cover the jowls well after each rotation.  By the end of this initial curing stage, the meat should have become noticeably stiffer, but remain somewhat flexible.

Air-drying
On the tenth day, pour off all liquid from the jowls and pat them dry.  Either hang them from skewers suspended in the refrigerator, or spread them out on racks to air dry in the refrigerator for another seven days.  (If the outdoor air temperature at this time is below 50 F/10 C, you can allow the jowls to dry in a dark, sheltered spot with good air flow.) Mark the beginning and end dates of this period on your calendar when you begin.  They will release moisture during this stage, so you may want something to catch the drips.  After drying for one week in a cool area, brush off any excess dried curing mix that remains on the meat.  If necessary, you can rinse the jowls off under running water.  Pat them dry as soon as the curing mix is removed.

Guanciale on skewers in the fridge

Smoking and additional air drying
You may now smoke the jowls if you wish.  I like a medium smoking temperature for about 4 hours, using apple wood chips, but maple, oak, hickory and other woods could be used.  According to strict tradition, guanciale is not a smoked meat.  But guanciale affumicata is not unknown in Italy, and I strongly prefer the addition of real smoke flavor.  I also prefer the advantage of an additional preservative to the salt and sugar.

Skewers are handy for the smoking process too.
Additional air curing after smoking.  Good air circulation is important.

After the initial air drying and optional smoking, the guanciale can be eaten, or it can continue to air dry for an additional 2-4 weeks, depending on air temperature and humidity.  Good temperatures for air curing range from 40-55 F (4-13 C).  Humidity should be no higher than 75% and no less than 50%.  The jowls will continue to lose moisture in this stage, and it will likely be enough to drip slowly from the meat.  You may wish to lay down newspaper under the jowls to save cleanup.  When the guanciale is fully air cured, it will no longer release enough liquid to drip.  It will have lost more flexibility and become noticeably stiff.  In theory, you can dry the meat as much as you like.  I find that I prefer guanciale that is still a little flexible and moist.  Over drying makes the muscle tissue tougher and causes both the lean and fatty tissue to burn more quickly when cooking.  Leaving some moisture in the jowls makes them slower to burn.  You will likely want to experiment with the length of the final air curing stage to see what you prefer.

At no time during the curing process should any off odors be present.  If you have smoked your guanciale, the smoke should be the only prominent scent.  Unsmoked guanciale should have very little odor at all.  If you detect an odor of spoilage, trust your nose and discard the meat.  If this should happen, it will probably be accompanied by visible signs of contamination.

If you wish to experiment with different flavorings or techniques from one batch to another, it is invaluable to keep a notebook with a record of how you prepared each batch, with tasting notes on the final product, and your ideas for modifications in future batches.

Although the finished guanciale may be eaten raw, I tend to cook it and use it sparingly as a flavoring ingredient.  I like it sliced as thinly as possible, laid on top of a pizza just as it goes into the oven.  I like to cut it into lardons and render the fat to cook my onions in when preparing a pasta sauce or risotto.  Of course it's incomparable in spaghetti alla carbonara, which is its best known use.  It can serve as a substitute for bacon in most recipes.

Hope you've enjoyed this overview of my approach to guanciale, and that it encourages you to try some home curing yourself.